Build a balloon popper
Build a balloon popper using clothespins, rubber bands, cardboard, and tape to safely burst balloons and explore how design affects popping distance.


Step-by-step guide to build a balloon popper
Step 1
Gather all the materials on a clear table so everything is easy to reach.
Step 2
Cut a rectangle of cardboard about 15 cm long and 10 cm wide to make the base.
Step 3
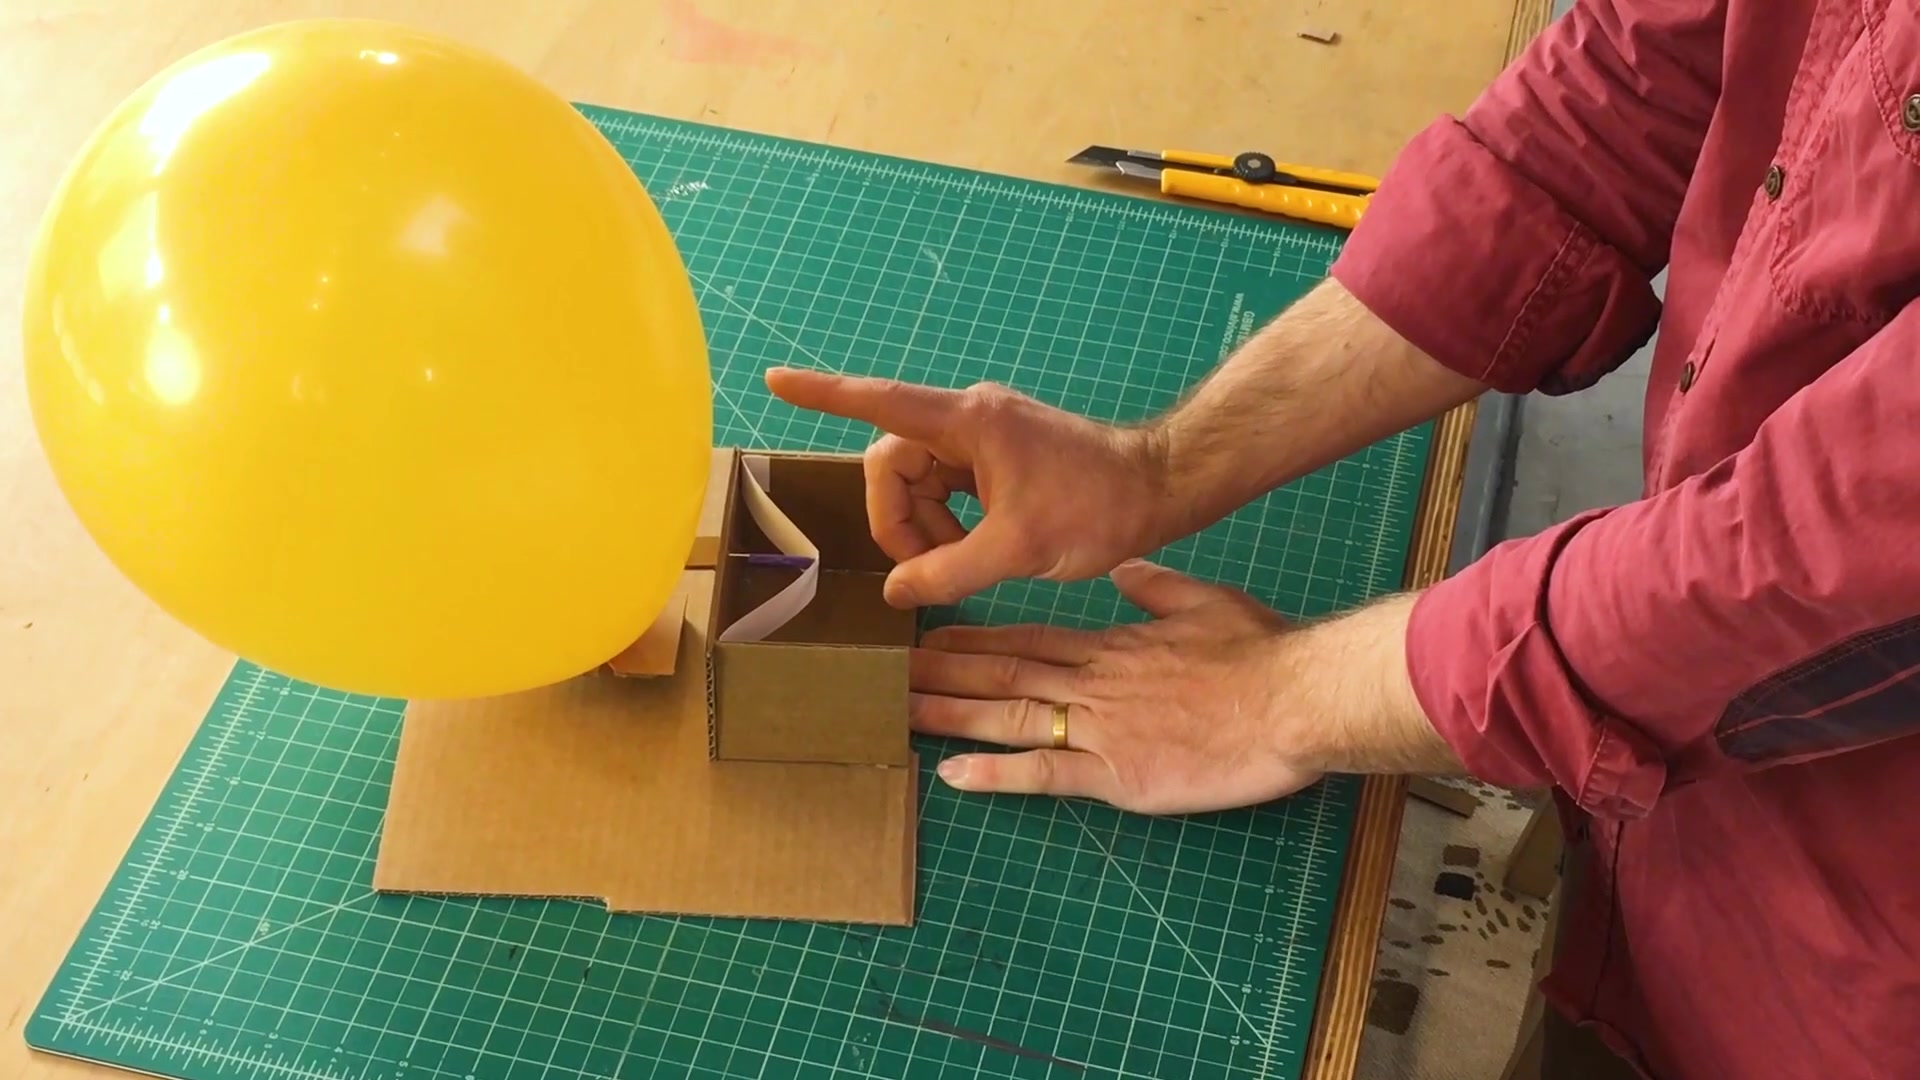
Cut a long narrow cardboard strip about 20 cm long to use as the launching arm.
Step 4
Tape one end of the cardboard arm to the center of the base so it can lift up and act like a hinge.
Step 5
Tape a clothespin upright on the base a few centimeters from the hinge so its jaws can hold the arm tip.
Step 6
Attach one end of a rubber band to the front edge of the base with tape and stretch it toward the arm.
Step 7
Loop the other end of the rubber band around the tip of the arm and secure it with tape so the band will pull the arm forward.
Step 8
Tape a pushpin to the tip of the arm pointing forward and flat against the cardboard (adult help required for safety).
Step 9
Pull the arm back and slip the arm tip under the clothespin jaws to cock the popper.
Step 10
Inflate a balloon to a medium size and tie it closed.
Step 11
Use the ruler to measure 30 cm from the front of the base and mark that spot on the floor or wall.
Step 12
Place the balloon at the 30 cm mark and tape it lightly so it stays in place.
Step 13
Release the clothespin latch to fire the arm and try to pop the balloon.
Step 14
Move the balloon 10 cm farther away, repeat cocking and firing, and then change one design element (for example use a thicker rubber band or shorten the arm) and test again to see how the popping distance changes.
Step 15
Take a photo or write what you learned and share your finished balloon popper and results on DIY.org.
Help!?
What can I use if I don't have a clothespin or pushpin?
If you don't have a clothespin or pushpin, an adult can clamp a small binder clip upright on the base to hold the arm and tape a straightened paperclip or small nail flat to the arm tip as the popping point.
Why won't the arm snap forward or pop the balloon?
If the arm doesn't snap forward or pop the balloon, re-tape the rubber band to the front edge so it won't slip, shorten or double the rubber band for more tension, and make sure the hinge tape at the base allows the arm to pivot freely.
How can I adapt this activity for different ages?
For younger kids, skip the pushpin and tape a foam pad or coin to the arm tip so they can practice cocking and firing safely while an adult handles the sharp parts and inflation, and older kids can follow step 14 to vary arm length or rubber-band thickness and record how popping distance changes.
How can we make the balloon popper more powerful or personalized?
To improve or personalize the popper, decorate the cardboard base, add a second rubber band or use a thicker rubber band as in step 14 for more power, and mount the hinge on a sturdier board to get more consistent popping distances to photograph for DIY.org.
Watch videos on how to build a balloon popper
Create a Balloon Popper Mini-Game in 30 MINUTES - Unity Tutorial
4 Videos
Create a Balloon Popper Mini-Game in 30 MINUTES - Unity Tutorial
How to create a balloon popping game in scratch!
Scratch Tutorial #28 | Making Balloon Pop Game
Make a Balloon Pop Game (No Code!) | MIT App Investor Step-by-Step Tutorial for Beginners Part 2
Facts about elastic potential energy and basic physics
🟢 Stretching a rubber band stores elastic potential energy — the more you stretch it, the more 'zing' it can release!
🎈 When a balloon pops the latex snaps back so quickly it makes a loud, sudden sound — that quick release is what we hear as a 'pop'!
📐 Like a tiny catapult, changing the pull (tension) and the release angle on your popper changes how far bits fly.
🪵 Clothespins act as simple clamps that can hold and then quickly let go of a balloon without needing sharp parts.
📦 Cardboard is lightweight, easy to cut and tape, and great for building and iterating safe popper frames.
How do I build a balloon popper with clothespins and rubber bands?
What materials do I need to build a balloon popper?
What ages is a clothespin balloon popper activity suitable for?
What safety precautions should I follow when making a balloon popper?
