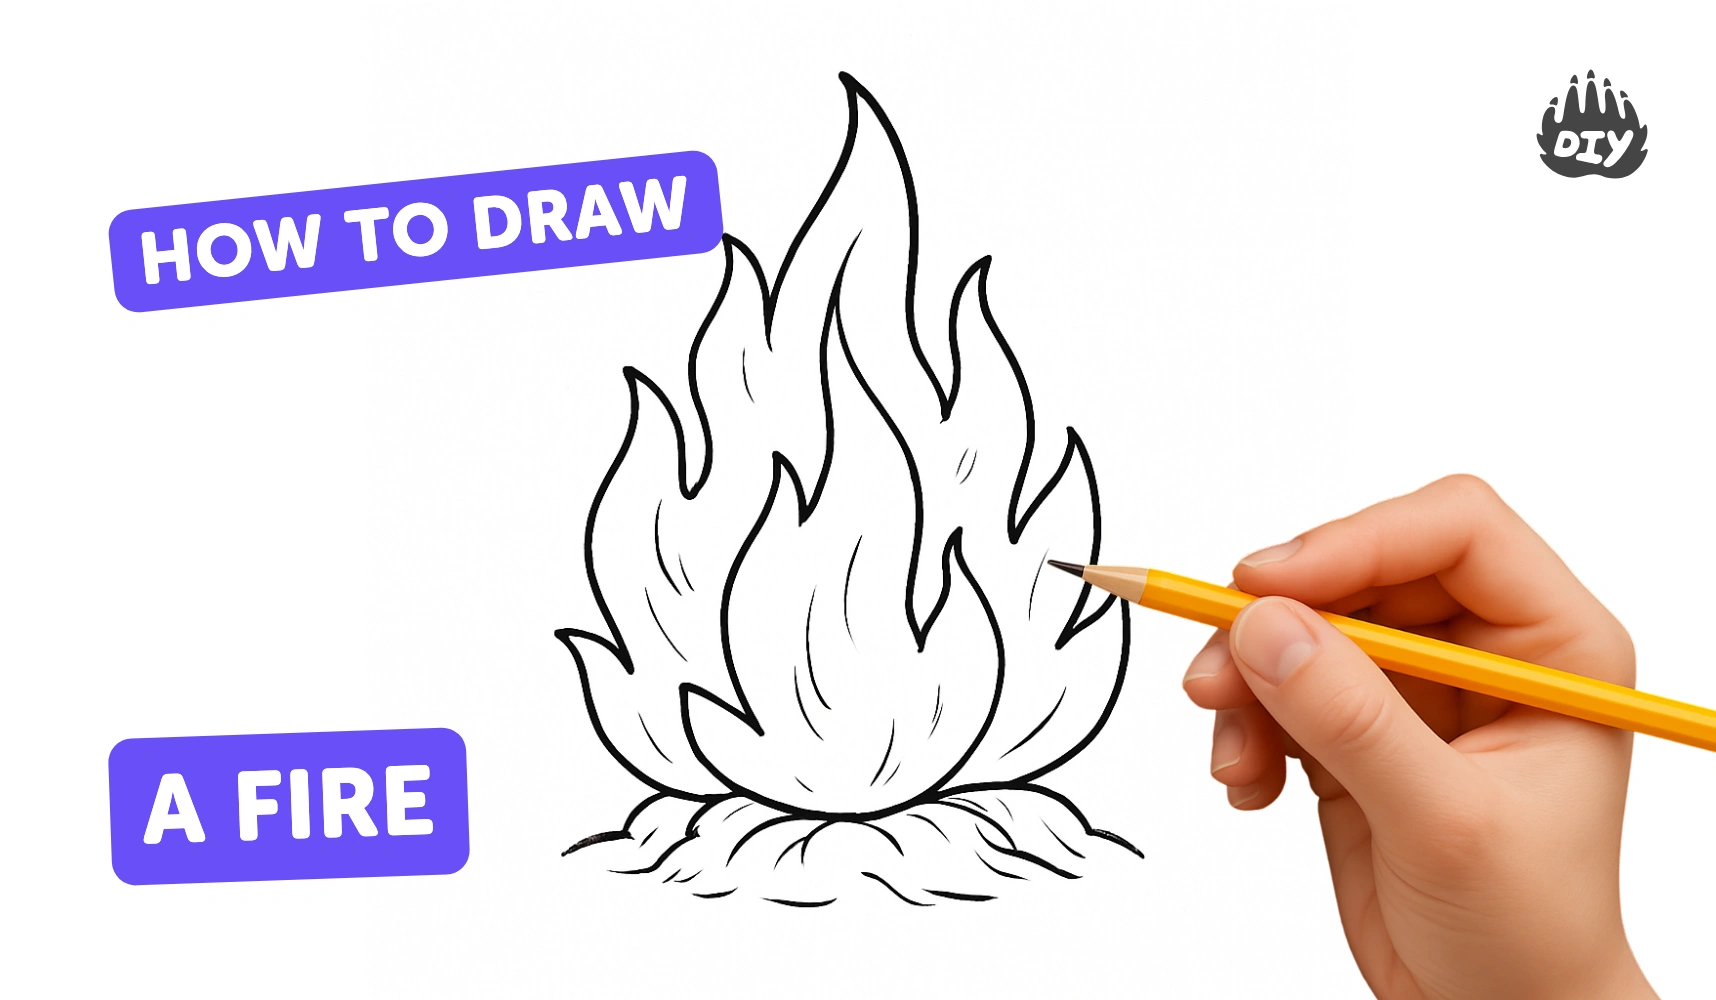
How to draw a fire - a free fire drawing guide
Draw a realistic flame step-by-step using simple shapes, linework, shading, and color blending to create a dynamic fire illustration on paper with pencils and markers.

Drawing Apps
Get inspired with these


Instructions
How To Draw A Campfire
Step 1
Arrange your workspace by placing your paper flat and keeping your pencil eraser sharpener and colored pencils within reach.
Step 2
Lightly draw a horizontal ground line near the bottom of the page with your pencil.
Step 3
Sketch simple log shapes on the ground using ovals and long rectangles for each log.
Step 4
Draw overlapping flame outlines above the logs using teardrop and curved shapes that point upward.
Step 5
Add small round shapes and short lines near the base of the logs to show glowing coals and sparks.
Step 6
Shade the logs with pencil using short strokes along the wood grain to make them look textured.
Step 7
Color the inner parts of each flame with light yellow using small circular strokes.
Step 8
Add orange around the yellow to build the mid tones of the flames.
Step 9
Apply red to the outer edges and gaps between flame tongues to create depth.
Step 10
Gently blend the yellow orange and red with a tissue or light pencil strokes to soften the color transitions.
Step 11
Lightly color the ground and the parts of the logs closest to the flames with orange and yellow to show reflected glow.
Step 12
Use an eraser or a white colored pencil to add bright highlights inside the flames and on the edges of the logs.
Step 13
Sign your name on the drawing.
Step 14
Share your finished campfire drawing on DIY.org
Help!?
What can we use if we don’t have colored pencils, a tissue, or a white colored pencil?
Use crayons or markers instead of colored pencils, a folded paper towel, cotton swab, or blending stump in place of a tissue to soften the yellow/orange/red transitions, and a white gel pen or white crayon to add the bright highlights inside the flames and on the edges of the logs.
My flames look muddy when I blend—what should I do?
Follow the steps by applying yellow, then orange, then red with small circular strokes and blend very gently using the edge of a tissue or light pencil strokes so you preserve each layer instead of rubbing hard and creating muddy color.
How can I adapt this activity for younger or older kids?
For younger children simplify by drawing big teardrop flames and using crayons or finger-painting for the color layers, while older kids can add detailed pencil shading on the logs, subtle reflected glow on the ground, and fine highlights with a white colored pencil as described.
How can we make the campfire drawing more unique or advanced?
Extend the drawing by adding a night sky or campsite background with dark blue colored pencil, sketching a roasting stick and marshmallow, using a blending stump or cotton swab for smoother flame transitions, and finishing with glitter gel or a white gel pen for extra sparks before signing and sharing on DIY.org.
Related videos
How To Draw A Firework
4 Videos
How To Draw A Firework
How To Draw A Funny Campfire And Marshmallow
How to Make Fire
How To Draw A Firefly - Preschool
Fun Facts
🔥 Real campfires can reach very high temperatures — the hottest parts can glow bluish and exceed 1,000°C, and you can hint that in drawings with bright white-yellow highlights.
✏️ Graphite pencils come in H (hard, light) and B (soft, dark) grades — use B pencils for deep shadows and H for light textures.
🎨 Colored pencils blend best by layering light strokes — small circles and gradual color build-up give smooth transitions without waxy buildup.
🌈 Placing cool colors (blues/purples) near warm flame colors (yellows/oranges) makes the fire look brighter and more vibrant.
✨ Adding a single sharp highlight and soft reflected light on nearby logs makes a campfire drawing feel glowing and three-dimensional.
How do you draw a realistic campfire scene with pencil and colored pencils?
What materials do I need to draw a realistic campfire?
What ages is drawing a realistic campfire suitable for?
What are the benefits, safety tips, and variations for drawing a campfire scene?
