Use scratch to remix a program
Use Scratch to remix a program by changing sprites, sounds, and scripts to create your own interactive story or game and test it.


Step-by-step guide to remix a Scratch project into your own interactive story or game
How to use Scratch for Kids! | Coding for Kids | STEM MC
Step 1
Open scratch.mit.edu and log in to your Scratch account.
Step 2
Search or browse the Explore page to find a project you like to remix.
Step 3
Open the project's page by clicking on its thumbnail.
Step 4
Press the Remix button to make your own editable copy of the project.
Step 5
Remove any sprite you don't want by selecting it and clicking the delete option.
Step 6
Add a new sprite by choosing one from the library or by painting or uploading your own.
Step 7
Select a sprite and pick a costume to change how it looks.
Step 8
Click the Sounds tab for a sprite and add or record a new sound.
Step 9
Replace a play sound block in a script so the sprite uses your new sound.
Step 10
Click the Code tab and change one block in a script to alter a sprite's behavior.
Step 11
Add an event block such as when green flag clicked or when this sprite clicked.
Step 12
Attach action blocks to that event so the sprite moves talks or responds.
Step 13
Click the green flag and play your project to test how it works.
Step 14
Edit scripts costumes or sounds to fix any problems you found while testing.
Step 15
Share your finished creation on DIY.org.
Help!?
What can I use instead of a microphone or if I can't log into a Scratch account?
If you don't have a microphone, choose a sound from the Sounds library or upload a sound file in the Sounds tab, and if you can't log in use Scratch Desktop or click Create to work locally (you won't be able to press Remix or share online).
My Remix button is grayed out or the new sound doesn't play when I test—what should I check?
Make sure you're logged into Scratch and pressed Remix to make an editable copy, then in the sprite's script replace the 'play sound' block with the exact name of your new sound from the Sounds tab and add a 'when green flag clicked' event so the script actually runs when testing.
How can I adapt this remix activity for different age groups?
For younger kids (5–7) focus on deleting/adding a sprite and changing a costume or sound and then clicking the green flag, for elementary (8–10) add one simple code change or an event block, and for older kids (11+) have them record custom sounds, create multiple costumes for animation, and add variables or extra scripts before sharing.
What are easy ways to extend or personalize the remix beyond the basic steps?
Personalize by painting or uploading a custom sprite and backdrop, record several new sounds in the Sounds tab and attach them to different 'play sound' blocks, add a score variable or extra event blocks to change behavior, and then include a project description before sharing on DIY.org.
Watch videos on how to remix a Scratch project into an interactive story or game
Scratch Basics - A Beginners Guide to Scratch
4 Videos
Scratch Basics - A Beginners Guide to Scratch
Remix and Re-imagine Scratch Sprites | Tutorial
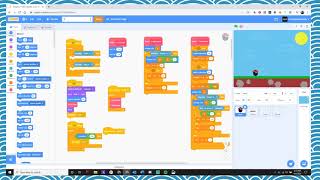
How to Remix a Scratch Project

Scratch 3.0 Programming for kids
Facts about block-based coding for kids
🐱 The default Scratch sprite is a friendly orange cat that appears in every new project.
🧩 Scratch uses block-based visual programming — blocks snap together like puzzle pieces to form scripts.
🌍 Scratch was created by the MIT Media Lab's Lifelong Kindergarten group to help kids learn coding and creativity.
🎵 You can record, upload, and edit sounds in Scratch to make custom music and voice effects for your games.
🔁 Remixing is built into the Scratch community: projects often show remix history so creators can learn from each other.
How do I remix a Scratch project to make my own interactive story or game?
What materials and tools do I need to remix a Scratch program?
What ages is remixing Scratch projects suitable for?
What are the benefits of remixing Scratch projects for kids?
