Style your hair with an accessory
Make a simple hair accessory (fabric bow, ribbon, or decorated clip) and use it to style your hair while practicing folding, attaching, and creative design.


Step-by-step guide to style your hair with an accessory
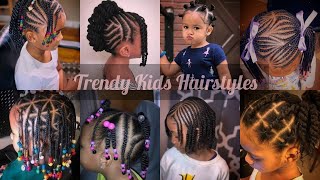
How to: Simple Braid style for kids with extension|Detailed|Step By Step
Step 1
Gather all your materials and put them on a clean flat workspace.
Step 2
Decide whether you will make a fabric bow ribbon or a decorated clip.
Step 3
Cut a piece of ribbon or fabric about 20 to 30 centimeters long.
Step 4
Fold the cut ribbon into two loops to form a bow shape.
Step 5
Pinch the middle of the folded ribbon tightly to hold the bow shape.
Step 6
Secure the pinched middle by tying a short piece of narrow ribbon or wrapping and knotting thread around it.
Step 7
Trim the ribbon tails into angled or V-shaped ends with the scissors.
Step 8
Pick a decoration you like and place it on the bow center to test the look.
Step 9
Attach the decoration to the bow center by gluing or sewing it on.
Step 10
Fasten the bow onto your hair clip or elastic by gluing or sewing it securely.
Step 11
Wait until any glue has dried completely before moving the accessory.
Step 12
Put the accessory into your hair where you like and make small adjustments so it feels comfy.
Step 13
Share your finished creation on DIY.org
Help!?
What can I use if I don't have ribbon, a hair clip, or hot glue on hand?
Use a 20–30 cm strip cut from an old cotton t-shirt or scrap fabric instead of ribbon, swap a hair elastic or bobby pin for a clip in step 9, and replace hot glue with craft glue or sew the bow on in steps 8–9.
My bow keeps falling apart after I pinch it—what should I do?
If the folded bow in steps 4–5 comes undone, wrap and knot extra narrow ribbon or thread tightly around the pinched middle in step 6 and add a small dot of glue at the wrap in step 8 to secure it.
How can I adapt this activity for a 4-year-old or a 10-year-old?
For a 4-year-old, have an adult pre-cut the 20–30 cm ribbon and supervise gluing in steps 3–9 while letting them press decorations onto the center in step 7, whereas a 10-year-old can cut, trim the tails in step 7, and sew the decoration and clip in steps 8–9 to practice fine motor skills.
What are some ways to make my bow accessory more unique or long-lasting?
Layer two different ribbons before folding in step 4, stitch on a button or charm as the center decoration in step 8, and attach the finished bow to both a clip and an elastic in step 9 so it can be worn multiple ways and shared on DIY.org as a set.
Watch videos on how to style your hair with an accessory
Fun & Easy Hairstyles for Kids That Anyone Can Do
4 Videos
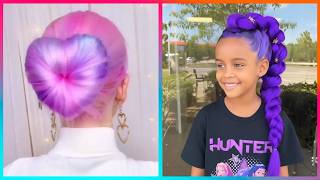
Fun & Easy Hairstyles for Kids That Anyone Can Do
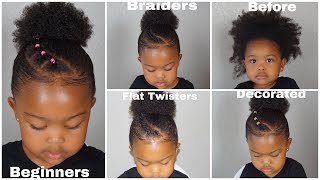
Quick & Easy Toddler Natural Hairstyles | Beginner Friendly to Advanced!
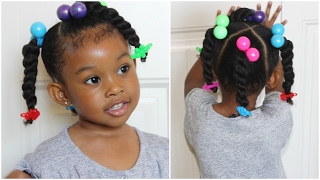
Ponytails & Twists | Cute Hairstyles for Kids
72 Kids Hairstyles For Girls | Cute & Trendy DIY Hairstyles Compilation 2022 - Easy To Do Hairstyles
Facts about hair accessories and basic crafting
🎀 Ribbons have decorated hair for centuries — from ancient headbands to modern bows.
✂️ A simple running stitch or a dab of hot glue can attach a fabric bow to a clip in just minutes.
🧷 Barrettes and metal hair clips became widely popular in the early 20th century with mass production.
♻️ Small fabric scraps, old T-shirts, or leftover ribbon are perfect for upcycling into new hair accessories.
🧠 Folding, pinching, and attaching tiny pieces helps kids build fine motor skills and boost creativity.
How do I make a simple hair accessory and use it to style my child's hair?
What materials do I need to make a fabric bow, ribbon, or decorated clip for kids?
What ages is this hair accessory activity suitable for?
What are the benefits and safety tips for kids making and wearing hair accessories?
