Practice angles in Calligraphy
Practice calligraphy pen angles by making basic strokes, lowercase letters, and a decorative name plate while learning steady hand techniques and stroke consistency.


Step-by-step guide to practice angles in calligraphy
Step 1
Tape one sheet of plain paper to the table so it won’t move while you write.
Step 2
Use the pencil and ruler to draw three evenly spaced horizontal guide lines across the paper about one finger width apart.
Step 3
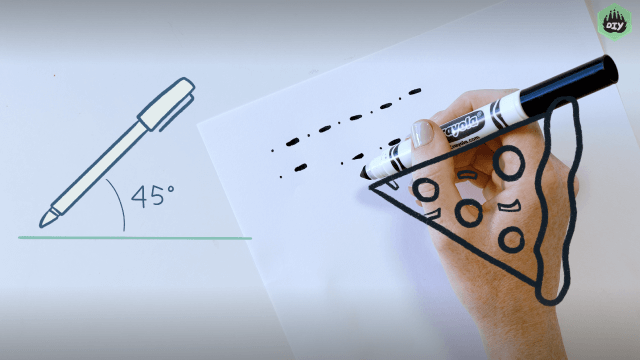
Hold the pen so the chisel nib is at a 45° angle to the paper and rest your hand lightly for a steady grip.
Step 4
On a spare corner of the paper make ten slow straight downstrokes using firm pressure to make thick lines.
Step 5
On the same spare area make ten slow gentle upstrokes using light pressure to make thin lines.
Step 6
Practice basic shapes by drawing five ovals and five loops inside the guides focusing on thick downstrokes and thin upstrokes.
Step 7
Choose a short name and lightly draw a rectangular name plate with the ruler and pencil on the main paper.
Step 8
Sketch your chosen name inside the rectangle in pencil using the same thick and thin stroke ideas from your practice.
Step 9
Trace over your penciled letters with the calligraphy pen while keeping the 45° angle and steady pressure for consistent strokes.
Step 10
Erase any pencil guide lines gently and add simple decorations or color around your name plate with your coloring materials.
Step 11
Share your finished decorative name plate on DIY.org
Help!?
What can I use if I can't find a calligraphy pen with a chisel nib?
If a calligraphy pen with a chisel nib isn't available, use a broad-tip marker or felt-tip pen held at a 45° angle to mimic thick downstrokes and thin upstrokes while following the guide lines you drew with the pencil and ruler.
My strokes are uneven or shaky—what should I try to fix them?
If strokes look uneven, re-tape the sheet to the table, rest your hand lightly as instructed, and repeat the ten practice downstrokes and upstrokes on the spare corner until your pressure and 45° pen angle produce consistent thick and thin lines.
How can I adapt this activity for younger or older children?
For younger kids, simplify by using a broad marker, fewer or pre-drawn guide lines and a pre-drawn rectangular name plate to trace, while older kids can use the chisel nib calligraphy pen at 45° and add more letters, flourishes, and detailed coloring around their finished name plate.
What are some ways to extend or personalize the finished name plate?
To personalize and extend the activity, experiment with different nib angles and pen pressures to create varied lettering styles, erase pencil guide lines and add a watercolor wash or metallic accents with your coloring materials, and make several decorated name plates to choose one to share on DIY.org.
Watch videos on how to practice angles in calligraphy
5 Things to Keep in Mind while Learning Calligraphy as a Beginner
4 Videos
5 Things to Keep in Mind while Learning Calligraphy as a Beginner
How to write CALLIGRAPHY with ANY PEN ✍️ | Step by Step Tutorial
8 Basic Calligraphy Strokes (+ Free Basic Strokes Practice Sheet!) #basicstrokes #calligraphy
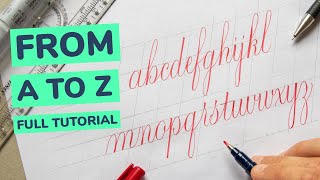
Calligraphy Alphabet For Beginners - a to z With Brush Pen (Tutorial)
Facts about calligraphy and hand lettering
✒️ Broad-edged nibs are usually held at a 30°–45° angle to make the bold and thin stroke contrasts that define many scripts.
🖋️ Pointed-pen styles like Copperplate create hairline upstrokes and thicker downstrokes by changing pressure, not angle.
📏 Calligraphers use guidelines (x-height, ascender/descender and slant lines) to keep letter size and angles consistent.
🧠 Repeating basic strokes builds muscle memory—steady hand control often comes from daily short practice drills.
🎨 Decorative nameplates usually start as pencil sketches, then get inked and embellished with flourishes or color.
How do I practice calligraphy pen angles with a child?
What materials do I need to practice calligraphy angles with kids?
What ages is practicing calligraphy pen angles suitable for?
What are the benefits, safety tips, and variations for practicing calligraphy angles?
