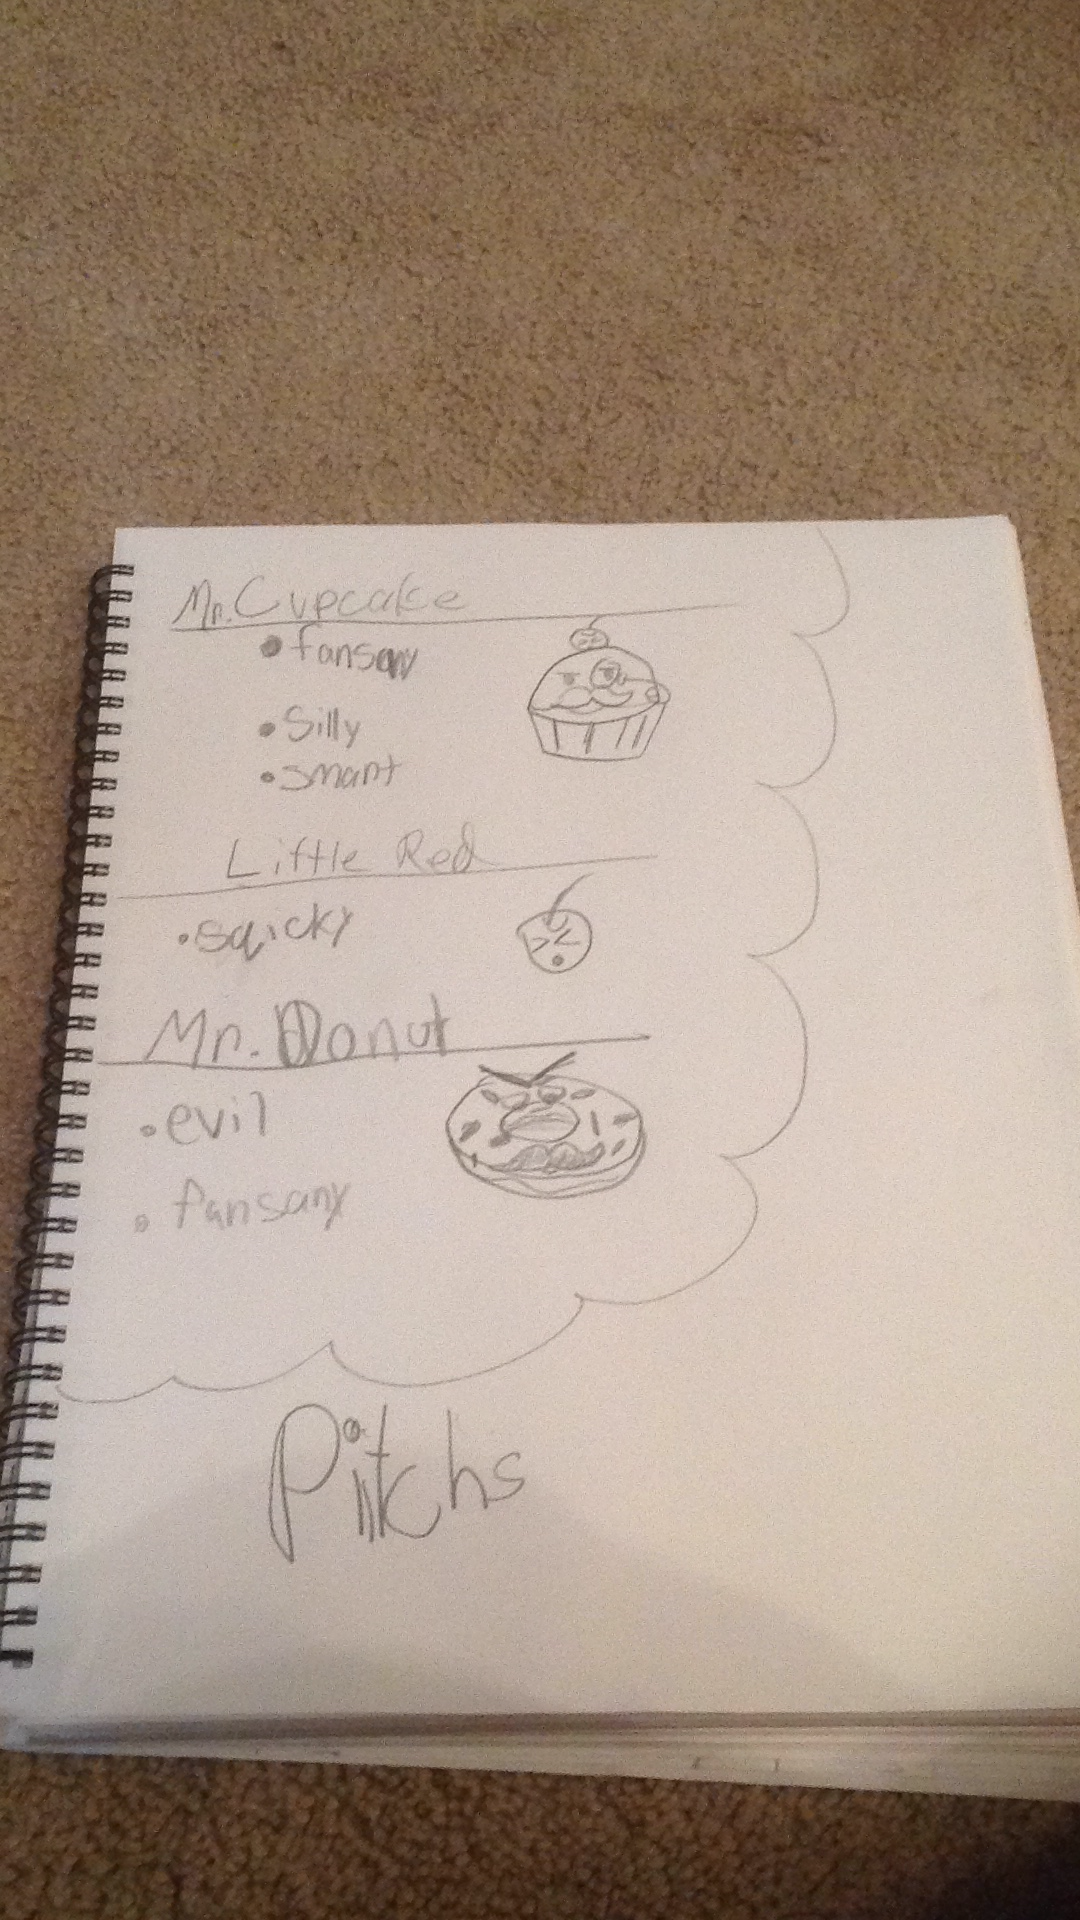
Pitch an animation
Create a short stop-motion animation using clay or paper, a smartphone, and simple storyboard frames; plan, photograph, edit, and share your three-scene movie.


Step-by-step guide to create a three-scene stop-motion animation with clay or paper
Step 1
Choose whether you will use clay or paper cutouts for your characters.
Step 2
Think of a very short story with a beginning middle and an end and give it a fun name.
Step 3
Draw three storyboard boxes on a sheet of paper and write one sentence under each box to say what happens in Scene 1 Scene 2 and Scene 3.
Step 4
Make your characters and small props from clay or cut and colour paper pieces.
Step 5
Set up a plain background on a table and tape or smooth it so it stays flat.
Step 6
Arrange your characters and props for Scene 1 on the background exactly where you want them to start.
Step 7
Ask an adult to steady the smartphone on the stack of books so it will not move.
Step 8
Look at the smartphone screen and adjust the books or phone so Scene 1 is fully in the frame.
Step 9
Take 10 to 20 photos for Scene 1 moving your characters a tiny amount between each photo to make motion.
Step 10
Move your characters to the Scene 2 positions shown on your storyboard.
Step 11
Take 10 to 20 photos for Scene 2 moving your characters a tiny amount between each photo.
Step 12
Move your characters to the Scene 3 positions shown on your storyboard.
Step 13
Take 10 to 20 photos for Scene 3 moving your characters a tiny amount between each photo.
Step 14
Import your photos into a simple editing app and assemble the three sets into one short movie then add titles trim clips or add music with an adult if needed.
Step 15
Share your finished three-scene stop-motion movie on DIY.org
Help!?
What can we use if we don't have clay or colored paper for the characters?
Use play-doh, modelling clay, plasticine, felt, foam sheets, or cut cardboard and tape to make the characters and small props mentioned in the 'Make your characters and small props from clay or cut and colour paper pieces' step.
What should we do if the smartphone moves or photos look shaky while taking the 10–20 photos per scene?
Follow the 'Ask an adult to steady the smartphone on the stack of books' step and secure the phone with tape or a small tripod and keep the table and books still so each set of photos stays aligned.
How can we adapt the activity for younger or older kids?
For younger kids, simplify the storyboard to one clear sentence per box and take fewer photos per scene, while older kids can add more frames, extra scenes, finer props, and use the editing step to add titles, trim clips, or music.
How can we make the final stop-motion movie more creative or personalized before sharing on DIY.org?
Enhance the 'Import your photos into a simple editing app' step by recording voice narration, adding homemade sound effects, experimenting with different backgrounds or lighting, and creating custom titles and credits.
Watch videos on how to create a three-scene stop-motion animation using clay or paper and a smartphone
Animation For Beginners | Kids Learn How To Animate | Animation Basics
4 Videos
Animation For Beginners | Kids Learn How To Animate | Animation Basics

How to Make Kids 3D - Animated Stories Video | Fast, Easy and Free
Easy Animation Method: Create Stunning Animations in Minutes! | Beginner-Friendly Tutorial
How to Create Animated Kids' Story Videos with AI! | Step-by-Step Tutorial
Facts about stop-motion animation for kids
🎬 Stop-motion animation dates back to the 1890s; one of the earliest examples is The Humpty Dumpty Circus (1898).
🧱 Clay animation (claymation) was popularized by studios like Aardman, the creators of Wallace and Gromit.
✏️ Storyboards were formalized at Walt Disney Studios in the 1930s to plan scenes before filming.
📱 Modern smartphones can shoot high-quality video (even 4K), letting kids make movies with just a phone.
⏱️ Many stop-motion films use about 12 frames per second to save time and create a charming, slightly jerky motion instead of the smooth 24 fps.
How do I create a three-scene stop-motion animation with my child?
What materials do I need to make a stop-motion animation?
What ages is this stop-motion activity suitable for?
What are the benefits of making stop-motion animation with kids?
