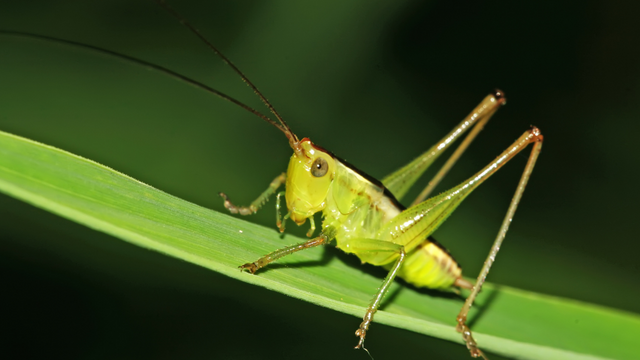
Photograph an Insect
Use a smartphone or camera to safely photograph an insect outdoors, observing its features, habitat, and behavior while practicing patience and close-up composition.


Step-by-step guide to photograph an insect
Step 1
Ask an adult to come outside with you.
Step 2
Take your smartphone or camera notebook and pencil outside with the adult.
Step 3
Walk to a flower plant or grassy area where insects are likely to be.
Step 4
Stand still and quiet for up to two minutes so insects feel safe.
Step 5
Look slowly for an insect and stop moving as soon as you see one.
Step 6
Watch the insect for thirty seconds and write what it looks like and what it is doing in your notebook.
Step 7
Move one slow small step closer to the insect without touching it.
Step 8
Crouch or lower your camera so you are at the insect’s eye level.
Step 9
Hold the camera steady and tap the screen or half-press the shutter to focus on the insect.
Step 10
Take three to five photos from different angles and distances.
Step 11
Review your photos and delete any that are blurry.
Step 12
Use the magnifying glass to look at tiny features and add one more note in your notebook.
Step 13
Step back slowly and leave the insect where you found it so it stays safe.
Step 14
Share your best photo and what you learned about the insect on DIY.org.
Help!?
What can I use instead of a smartphone, magnifying glass, or notebook if I don't have them?
Use a tablet or a simple point-and-shoot camera in place of a smartphone, use your phone camera's zoom or a cheap reading magnifier instead of the magnifying glass, and use plain paper or a printed checklist instead of the notebook and pencil.
Why do insects keep flying away or my photos come out blurry, and how can I fix that?
If insects fly away, remember to 'stand still and quiet for up to two minutes' and then 'move one slow small step closer,' and if photos are blurry, 'hold the camera steady,' 'tap the screen or half-press the shutter,' and take 'three to five photos' so you can 'review your photos and delete any that are blurry.'
How can I adapt the steps for different ages like a 4-year-old, 8-year-old, or 12-year-old?
For a 4-year-old have the adult hold the smartphone or camera and magnifying glass while the child points and makes simple drawings in the notebook, for an 8-year-old let them crouch to eye level, tap the screen to focus, and write a short note after 'watch the insect for thirty seconds,' and for a 12-year-old encourage taking 'three to five photos' from different angles, using the magnifying glass for tiny features, and sharing the best photo on DIY.org.
What are some fun ways to extend or personalize the Photograph an Insect activity?
Add a ruler or coin in a photo for scale, try a clip-on macro lens for your smartphone, keep an insect journal with your notebook sketches and magnifying-glass notes, and write a short caption about the insect's behavior before you 'share your best photo and what you learned about the insect on DIY.org.'
Watch videos on how to photograph an insect
How to Photograph Insects Tutorial: Hand-held with a Canon EF 100mm f/2.8 Lens
4 Videos
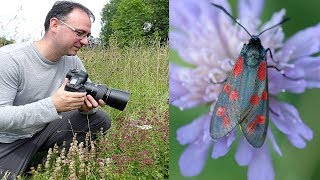
How to Photograph Insects Tutorial: Hand-held with a Canon EF 100mm f/2.8 Lens
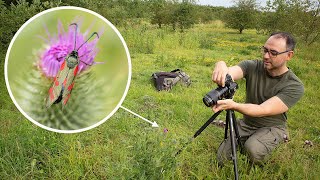
How to Photograph Insects in the Field (EF 100mm F/2.8 Macro Lens & Canon R6)
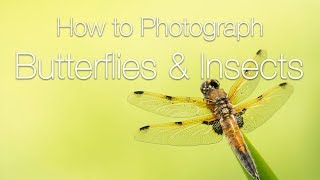
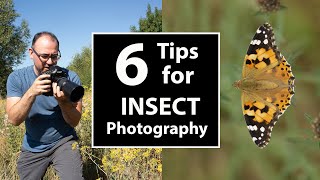
How to Photograph Butterflies and Insects | Macro Photography Tips
Maximise Sharpness & Enhance Backgrounds in Your Insect Photography
Facts about nature photography for kids
🔍 Many smartphones can take close-up shots just a few centimeters away when you use macro mode or a clip-on lens.
🐞 Scientists have described over 1 million insect species — insects are the most diverse group of animals on Earth.
📸 Macro photos reveal tiny details like hairs, wing veins, and the dozens of facets in a compound eye.
🌿 Including the insect's habitat in your photo helps experts identify its species and behavior.
⏳ Patience pays off: sitting quietly for a few minutes often catches natural behaviors like feeding, mating, or cleaning.
How do you photograph an insect?
What materials do I need to photograph an insect?
What ages is insect photography suitable for?
What are safety tips, benefits, and fun variations?
