Paint a swimming turtle with @samaro4ka
Paint a colorful swimming turtle with artist @samaro4ka, learn basic brush techniques, color mixing, and simple water effects on paper.

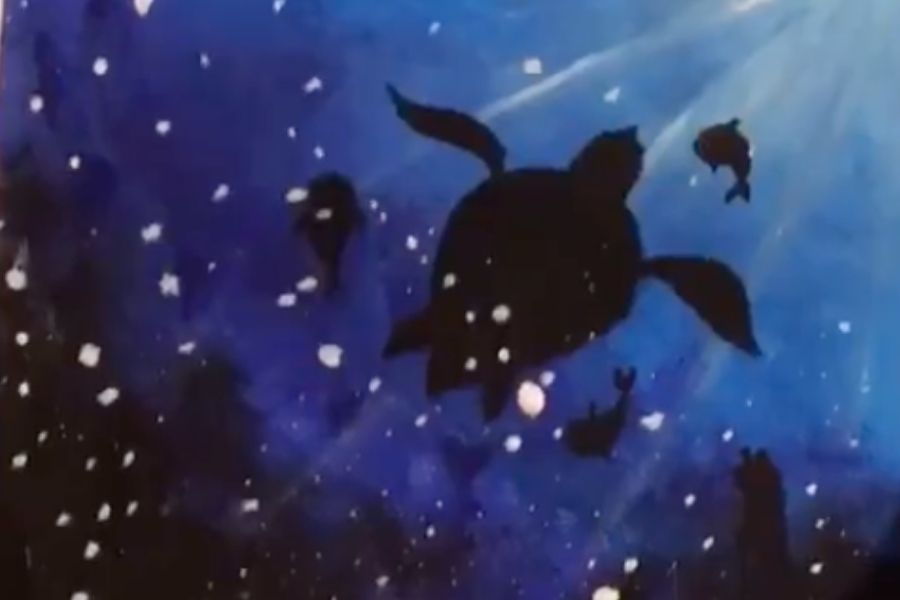

Step-by-step guide to paint a swimming turtle with @samaro4ka
Step 1
Put your watercolor paper flat on the table so it won’t move while you paint.
Step 2
Lightly sketch a happy swimming turtle with a round shell a head four flippers and a little tail.
Step 3
Choose three to four bright paint colors and put small amounts on your mixing tray.
Step 4
Prepare a light wash on your medium flat brush by picking up a little water and some paint on your brush.
Step 5
Paint the turtle’s body with broad smooth strokes using the light wash.
Step 6
Mix two colors on the tray to make a new shade for the shell.
Step 7
Use the small round brush to paint shell patterns and add color to the flippers and head.
Step 8
Fill a cup with clean water to make soft water effects and to rinse your brush.
Step 9
Dip a clean brush into the cup so the brush is wet and ready for water effects.
Step 10
Lightly wet the paper around the turtle where you want the water to look soft and blended.
Step 11
Drop diluted blue or green paint into the wet area and watch the color spread for a watery look.
Step 12
Gently blot the wet paint with a paper towel to lift color and create light ripples.
Step 13
Let your painting dry completely so the colors set.
Step 14
Add dark outlines with a black marker for definition and tiny white highlights with a gel pen for sparkle.
Step 15
Share your finished swimming turtle with artist @samaro4ka on DIY.org.
Help!?
What can I use if I don't have watercolor paper, the medium flat brush, or a mixing tray?
If you don't have watercolor paper use heavyweight mixed-media or cold-pressed drawing paper and keep washes light, swap the medium flat brush for a wide synthetic or flat foam brush, and use a clean ceramic plate or plastic lid as a mixing tray.
My colors are pooling or getting muddy when I try the wet water effects—what should I do?
If paint pools or muddies during the wet water steps, gently blot with a paper towel, rinse and dry your brush in the cup of clean water, lift excess color with a dry brush or towel, and let the paper dry completely before adding outlines or more layers.
How can I adapt the painting steps for different ages or skill levels?
For younger children pre-sketch the turtle and give them a large flat brush and washable paints for broad smooth strokes, while older kids can follow steps 6–12 to mix colors on the tray, refine shell patterns with the small round brush, and practice wet-on-wet water effects for more detail.
What are simple ways to personalize or make the turtle painting more advanced?
To enhance the project, sprinkle table salt on the wet blue/green water area (step 11) for textured ripples, add painted seaweed or bubbles around the turtle before drying, and finish with black marker outlines and gel-pen highlights for sparkle as in the final step.
Watch videos on how to paint a swimming turtle with @samaro4ka
How To Draw A Turtle - Preschool
4 Videos
How To Draw A Turtle - Preschool
How To Draw A Cartoon Turtle
How To Draw A Realistic Sea Turtle

How To Draw A Cartoon Sea Turtle
Facts about painting techniques for kids
🐢 Sea turtles have been around for more than 100 million years — they shared the seas with dinosaurs!
🎨 Watercolor paint uses water to spread pigment, so tiny drops can create big, soft effects.
🖌️ Round brushes are great for both fine lines and filling shapes because they hold lots of water and pigment.
🌊 The wet-on-wet watercolor technique makes colors flow into each other, perfect for painting water and movement.
🌈 Mixing two bright colors (like blue + yellow) makes a new color (green) — color mixing is like magic you can control!
How do you paint a colorful swimming turtle with @samaro4ka?
What materials do I need to paint a swimming turtle with @samaro4ka?
What ages is the swimming turtle painting activity suitable for?
What are the benefits of painting a swimming turtle with @samaro4ka?
