Origami Pigeons
Fold paper to make origami pigeons with movable wings; decorate them, learn about symmetry and following step-by-step instructions to practice fine motor skills.


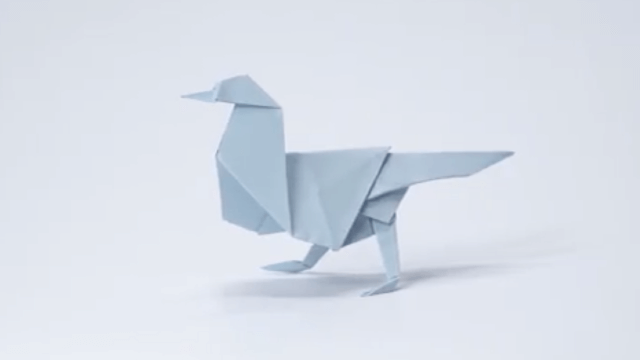

Step-by-step guide to make Origami Pigeons
Step 1
Place your square paper colored side down on a flat table.
Step 2
Fold the paper in half from left to right and press the fold to make a center crease then open it so the crease shows. This center line will help you make both sides the same and learn about symmetry.
Step 3
Fold the left edge to meet the center crease and press the fold to make a sharp edge.
Step 4
Fold the right edge to meet the center crease and press the fold so both sides match. Nice—this is symmetry in action!
Step 5
Fold the top point down about one third of the paper’s height to form the pigeon’s head and press the crease.
Step 6
Fold the bottom point up behind the model about one third to form the pigeon’s body base and press the fold.
Step 7
Take a scrap paper and fold it in half so you can cut two matching wings.
Step 8
Draw a simple wing shape along the folded edge of the scrap paper with your colouring materials.
Step 9
Cut along the drawn wing shape through both layers to make two matching wings. Ask an adult to help with cutting if you need it.
Step 10
Decorate the pigeon body and the two wings with your colouring materials using matching patterns on both sides to practise symmetry and fine motor control.
Step 11
Attach each wing to the pigeon’s body at the top of the wing with a small piece of clear tape so the tape acts like a hinge and lets the wings move.
Step 12
Gently bend each wing a little so they can flap and adjust them until your pigeon looks ready to fly.
Step 13
Share your finished pigeon on DIY.org.
Help!?
What can we use if we don't have square colored paper or clear tape?
If you don't have square colored paper, fold a rectangle corner-to-corner and trim off the excess to make a square then place the colored side down as instructed, and if you lack clear tape use a small piece of washi tape or a folded paper hinge so the wings can still move.
My folds look uneven and the wings won't flap properly — what should I check or redo?
Re-open and carefully realign each side to the center crease before pressing sharp folds so the left and right edges match, cut your wings from a folded scrap so they are identical, and attach only a tiny bit of tape at the top as a hinge so the wings can flap.
How can I adapt this activity for different ages or skill levels?
For younger children, pre-fold the center crease and pre-cut the wings so they can focus on decorating and taping, while older kids can do precise symmetry folds, create detailed wing cutouts on the scrap paper, or add extra body folds for realism.
What are some ways to enhance or personalize our origami pigeon once it's finished?
Try patterned origami paper for the body, add googly eyes or drawn details to the head, experiment with different wing shapes on the scrap paper to change the flap, or attach a string to hang several pigeons as a mobile and share them on DIY.org.
Watch videos on how to make Origami Pigeons
How to Make a Paper Pigeon - Origami Pigeon instructions
4 Videos
How to Make a Paper Pigeon - Origami Pigeon instructions
How to Make an Origami Pigeon - DIY Paper Pigeon Instructions
origami for beginners【Bird/Pigeon】
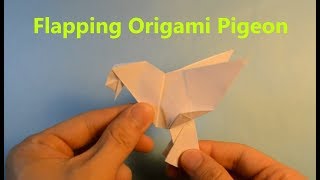
How to make an Origami Pigeon
Facts about origami and paper folding for kids
🕊️ Homing pigeons were used as messenger birds for centuries because they can find their way home from long distances.
🇯🇵 Origami became widely practiced in Japan during the Edo period and started as ceremonial and decorative paper folding.
📐 Many origami designs use mirror symmetry—folding paper in half helps make matching wings and bodies for birds like pigeons.
✂️ Origami builds complex shapes from a few basic folds, especially mountain and valley folds, so small steps add up to big results.
✋ Folding origami strengthens fine motor skills and hand-eye coordination in kids, boosting precision and patience.
How do I fold an origami pigeon with movable wings?
What materials do I need to make origami pigeons?
What ages is origami pigeon folding suitable for?
What are the benefits of folding origami pigeons?
