Mill a log
Mill a small log into smooth slices and simple planks using measuring, marking, and safe hand tools with adult supervision.


Step-by-step guide to mill a log
Cutting Your Own Lumber for Beginners | Getting Started with a Portable Sawmill
Step 1
Find a sturdy work surface like a sawhorse or a strong table.
Step 2
Clear the area around the work surface so you have plenty of room to work safely.
Step 3
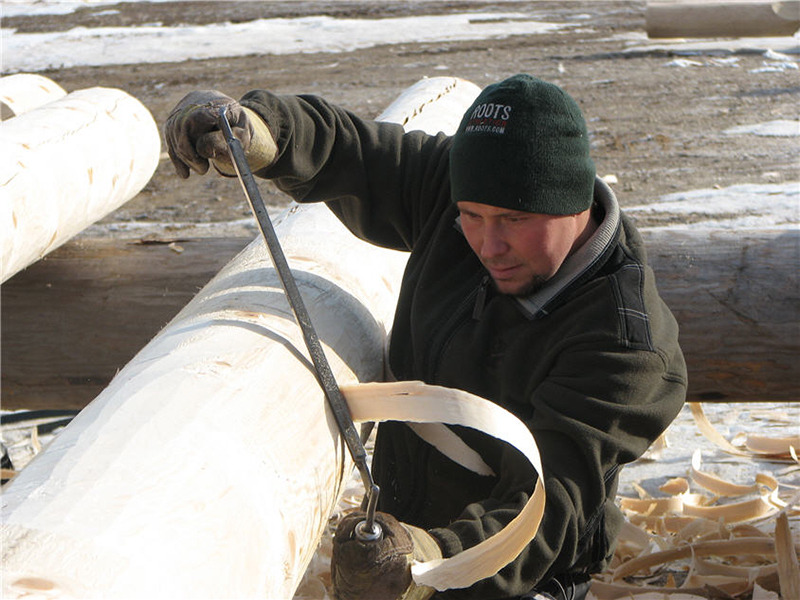
Put on your safety gear goggles gloves and dust mask.
Step 4
Place the small log on the work surface so it sits flat and steady.
Step 5
Clamp the log or ask an adult to hold it firmly so it will not move while you cut.
Step 6
Use the measuring tape and pencil to mark how thick you want each slice or how wide you want a plank.
Step 7
Use the carpenter's square to draw straight cut lines around or along the log on each mark.
Step 8
With an adult's help place the hand saw on your first mark and cut slowly with steady strokes until the piece separates.
Step 9
Repeat cutting each marked line to make all your slices or planks.
Step 10
Sand the cut faces and edges with the sanding block or sandpaper until they feel smooth and splinter-free.
Step 11
Share your finished creation on DIY.org.
Help!?
What can we use if we don't have a clamp or a hand saw listed in the instructions?
If you don't have a clamp, use heavy-duty ratchet straps, wedges, or have an adult firmly hold the log in step 5, and if you lack a hand saw use a small pruning saw or bow saw with adult help following step 7's slow, steady strokes.
What should we do if the log keeps slipping or the saw keeps binding while cutting?
If the log slips or the saw binds, stop, re-secure the log per step 5 (re-clamp or reposition wedges), re-check your straight lines from step 6, and resume cutting with slow, steady strokes as described in step 7 before sanding in step 10.
How can we adapt this milling activity for younger children or older kids?
For younger children let them help with step 6 measuring and marking, and step 9 sanding while an adult handles clamping and sawing in steps 5–8, and for older kids (10+) you can teach controlled hand-saw technique in step 7 or introduce supervised power tools with training.
How can we extend or personalize the finished slices or planks after sanding?
After sanding in step 10, personalize your finished creation from step 11 by staining or painting faces, drilling holes to make ornaments, woodburning initials with adult supervision, or routing edges before sharing on DIY.org.
Watch videos on how to mill a log
Milling Your Own Lumber - Part 2: Plain Sawing a Log
4 Videos
Milling Your Own Lumber - Part 2: Plain Sawing a Log

Sawmill School | How to Mill Your First Log
How to Saw your first log, for beginners. (Norwood Portable Sawmill)
Sawmill 101 for beginners. How to cut your first logs.
Facts about woodworking for kids
🪵 A tree's growth rings usually show its age—each ring typically equals one year and creates the unique grain in planks.
🪚 Water-powered sawmills existed in ancient Rome; modern industrial sawmills can cut hundreds of logs an hour, while hand-milling is slow and careful.
📏 'Measure twice, cut once' is a carpenter's favorite rule—accurate measuring and marking save wood and time.
🔪 Sharp hand tools are safer than dull ones because they require less force and are less likely to slip, so keep blades well-sharpened.
🧤 Safety gear (glasses, gloves) and using clamps or a helper to hold the log dramatically reduce accidents during milling with adult supervision.
How do you mill a small log into slices and planks with a child?
What materials and tools do I need to mill a log safely with a child?
What ages is this log-milling activity suitable for?
What are the key safety tips for milling a log with a child?
