Make sediment jars
Make sediment jars by layering sand, soil, clay, gravel, and water in clear containers to observe settling, layers, and basic erosion processes over time.


Step-by-step guide to make sediment jars
Make your own Sediment Jar!
Step 1
Gather all your materials and bring them to your workspace.
Step 2
Put the tray on a flat table to keep spills safe.
Step 3
Make sure your clear container is clean and dry.
Step 4
Label the jar with your name and the date using masking tape and the marker.
Step 5
Spoon a 1 to 2 centimeter layer of gravel into the bottom of the jar.
Step 6
Add a thin layer of crumbled clay on top of the gravel using the spoon.
Step 7
Add a layer of garden soil on top of the clay using the spoon.
Step 8
Add a layer of coarse sand on top of the soil using the spoon.
Step 9
Gently tap the side of the jar so the layers settle and sit snugly.
Step 10
Slowly pour water into the jar using the funnel or folded paper until the water is near the top but not overflowing.
Step 11
Put the lid on the jar to stop spills.
Step 12
Place the jar on the tray so you can watch it safely.
Step 13
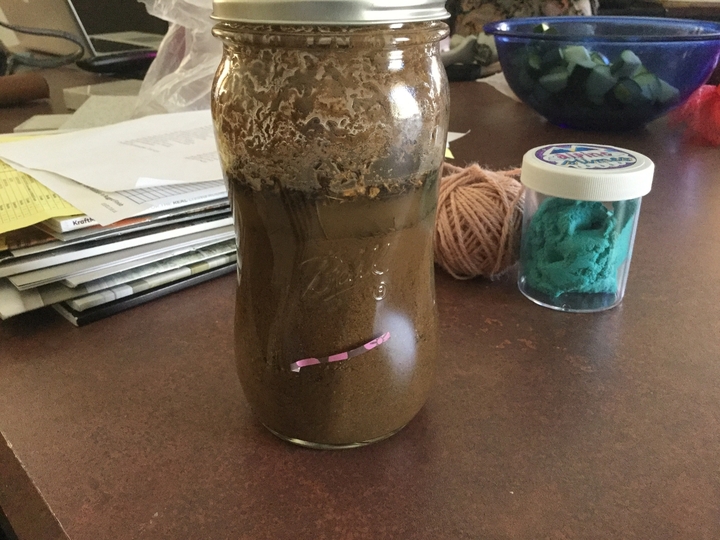
Watch the jar for 5 to 10 minutes to see how the layers settle and the water clears.
Step 14
Carefully tilt the jar away from you and then back a few times to simulate erosion and watch how the layers move.
Step 15
Share a photo or description of your finished sediment jar and what you learned on DIY.org.
Help!?
What can we use instead of gravel, crumbled clay, or a funnel if we can't find them?
Use aquarium gravel or clean pebbles for the gravel, broken-up air-dry or modeling clay for the crumbled clay, sandbox/play sand for coarse sand, and roll a piece of paper into a funnel or use a plastic cup with a corner cut for pouring into a recycled clear jar with a tight lid and masking tape or a sticky note and marker for labeling.
Why do my layers keep mixing or the water stay cloudy, and how can I fix it?
If layers mix or the water stays cloudy, spoon each layer slowly down the side of the clean, dry clear container, gently tap the jar after each layer to let them settle (step 7), pour the water very slowly with the funnel or folded paper, and wait longer than 10 minutes before tilting.
How can I adapt this sediment jar activity for younger or older kids?
For preschoolers have an adult spoon in pre-measured layers and supervise the tapping and pouring steps, while older kids can measure 1–2 cm layers precisely, time the 5–10 minute settling, record observations, and compare results across multiple jars.
How can we extend or personalize the sediment jar after finishing the basic steps?
Decorate the jar with masking tape labels, make several jars to test extra materials like silt or crushed charcoal, add a drop of food coloring to the water to track movement, or gently add a little oil and observe separation over days to study pollution effects.
Watch videos on how to make sediment jars
Fun Science Fridays episode 9: Sediment jars
4 Videos
Fun Science Fridays episode 9: Sediment jars

How To Turn Old Glass Jars Into Stained Glass Masterpieces!

How To Make Ocean Layers In A Jar (STEM education activity)

3 Weather in a Jar Science Experiments For Kids
Facts about sediment layers and erosion
🏖️ Gravel settles fastest, then sand, then silt — clay particles can stay floating the longest!
🕰️ Sediment layers are like Earth’s history book: deeper layers are usually older.
🌊 Fast-moving water can carry big rocks, while gentle water drops the tiniest particles.
🦴 Many fossils are found in sediment layers because buried plants and animals get preserved.
🔬 Tiny differences in grain size and shape change how quickly layers form — you can watch it in a jar!
How do you make a sediment jar to observe layering and erosion?
What materials do I need to make sediment jars?
What ages is a sediment jar activity suitable for?
What are the benefits, safety tips, and variations for sediment jars?
