Make Christmas Ornaments with DIY Star MrsWoof
Make star shaped Christmas ornaments with MrsWoof using paper, paint, glitter, and ribbon; decorate, personalize, and practice cutting, folding, and gluing.


Step-by-step guide to make star-shaped Christmas ornaments with MrsWoof
Step 1
Gather all your materials and set them on a clean table.
Step 2
Fold one sheet of paper in half neatly so the edges line up.
Step 3
Use your pencil to draw half of a star shape along the folded edge.
Step 4
Cut along the pencil line through the folded paper using scissors.
Step 5
Unfold the cut paper to reveal your full star shape.
Step 6
Paint the star with the paintbrush using any colors you like.
Step 7
Sprinkle glitter over the wet paint to add sparkle.
Step 8
Let the paint and glitter dry completely before touching the star.
Step 9
Fold the dry star in half to make a gentle center crease for dimension.
Step 10
Put a small dot of glue on the top center back of the star.
Step 11
Press one end of the ribbon into the glue and hold it until it sticks to make a hanging loop.
Step 12
Use colouring materials to write your name or draw designs to personalize your ornament.
Step 13
Share a photo of your finished ornament on DIY.org
Help!?
What can I use if I don't have ribbon, glitter, or paint?
Use string or yarn instead of ribbon when you press it into the glue for the hanging loop, swap stickers, sequins, or colored pencil shading for the glitter step, and use markers or crayons in place of paint for the 'paint the star' step.
The star tore or the glitter won't stick—how do I fix common problems?
If the paper tears while cutting, refold so the edges line up and cut slowly with sharp scissors along your pencil line, and if glitter won't stick make sure you sprinkle it over wet paint and then let the paint and glitter dry completely before touching the star.
How can I adapt this craft for different ages?
For toddlers have an adult pre-fold and pre-cut the star and let them paint and add stickers during the 'paint the star' and 'sprinkle glitter' steps, for school-age kids let them draw their own half-star and personalize with detailed coloring, and for teens use heavier cardstock and seal the painted star with a clear glue or varnish before adding the ribbon.
How can we make the ornament more special or advanced?
Glue two decorated stars back-to-back with the ribbon sandwiched into the top-center glue dot so both sides show, add layered sequins or small battery LED stickers before the paint dries, and write or draw a name using the coloring materials to personalize it as instructed.
Watch videos on how to make star-shaped Christmas ornaments with MrsWoof
Easy Star | How to make a Paper Star | Star Origami | Christmas Ornaments
4 Videos

Easy Star | How to make a Paper Star | Star Origami | Christmas Ornaments

Easy Star Craft With Popsicle Sticks - Christmas Crafts for Kids - Popsicle Stick Star Ornaments
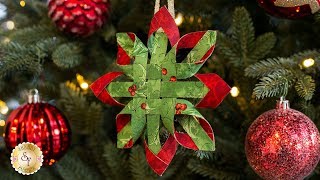
How to Make a No-Sew Scandinavian Star Ornament | Shabby Fabrics Tutorial
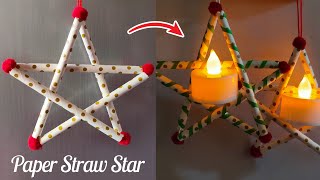
Easy Star Using Drinking Paper Straw ⭐ DIY Christmas Ornaments
Facts about holiday crafts for kids
🎄 The star placed atop many Christmas trees represents the Star of Bethlehem and is one of the oldest holiday symbols.
✂️ Cutting, folding, and gluing paper helps kids build fine motor skills and hand-eye coordination—perfect for practicing with ornaments.
✨ Modern glitter sparkles because tiny reflective pieces (often plastic or metal) bounce light back to our eyes.
🧵 Ribbons have been used for centuries to decorate gifts and trees and come in fabrics like satin, grosgrain, and organza.
🎨 Making ornaments at home can be eco-friendlier—using recycled paper and leftover craft supplies reduces waste and adds a personal touch.
How do you make star-shaped Christmas ornaments with DIY Star MrsWoof?
What materials do I need for making star-shaped Christmas ornaments with MrsWoof?
What ages is this star ornament activity suitable for?
What are the benefits of making star-shaped ornaments with MrsWoof?
