Make an origami puppy
Fold paper to make an origami puppy, learning step-by-step creasing, folding, and shaping techniques while decorating it with crayons or markers.

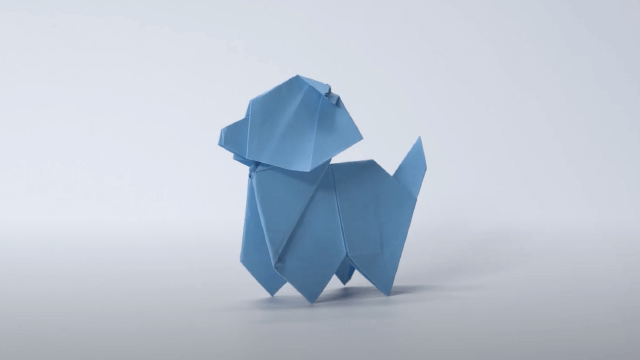

Step-by-step guide to make an origami puppy
Step 1
Place one square sheet of paper color side down on a flat workspace.
Step 2
Fold the paper in half diagonally so two opposite corners meet to make a triangle and press the crease firmly.
Step 3
With the triangle point facing up fold the top point down about one-third of the way to form the puppy’s nose and crease it.
Step 4
Flip the triangle over to the other side.
Step 5
Fold the left corner up toward the top point to make the left ear and press the crease.
Step 6
Fold the right corner up toward the top point to make the right ear and press the crease.
Step 7
Fold the tip of the left ear down a little to round the ear and crease it.
Step 8
Fold the tip of the right ear down a little to round the ear and crease it.
Step 9
Gently bend the nose flap forward a tiny bit to shape the snout.
Step 10
Turn your puppy to the front and use colouring materials to draw eyes a nose a mouth and any decorations you like.
Step 11
Share your finished origami puppy on DIY.org.
Help!?
What can I use if I don't have a square sheet of paper or origami paper?
You can make a square from regular printer or A4 paper by folding one corner to the opposite edge and trimming the excess, then place the resulting square color side down as the instructions say.
My diagonal fold in step 2 doesn't line up and the ears look uneven—how do I fix it?
Unfold, realign the two opposite corners precisely before pressing the diagonal crease firmly, then refold the left and right ear folds (steps 4–5) and sharpen creases with a fingernail or ruler so the ears match.
How can I adapt this origami puppy activity for different ages?
For younger kids, use a larger pre-cut square and guide hand-over-hand through the diagonal and ear folds, while older kids can try smaller paper, refine the tiny nose flap shaping (step 8), and add more detailed colouring with markers or colored pencils.
How can we personalize or extend the puppy after finishing the folds and colouring?
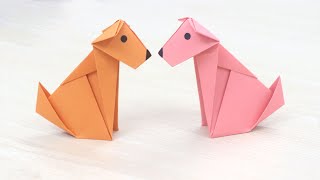
After drawing the eyes and nose (step 9), personalize it by gluing on googly eyes or a ribbon collar, make a puppy family using different patterned paper, and then share your creations on DIY.org.
Watch videos on how to make an origami puppy
"How to Make an Origami Dog: Step-by-Step Guid/ Fun and Simple Origami Dog Craft for Beginners"
4 Videos

"How to Make an Origami Dog: Step-by-Step Guid/ Fun and Simple Origami Dog Craft for Beginners"
How to fold Origami Dog - Easy Paper Dog Tutorial
Origami Dog Tutorial - So easy that anyone can make it, you'll be amazed!
Easy Origami Dog Tutorial 🐶 | Simple Paper Dog Step by Step
Facts about origami and paper crafts
🗺️ Origami is most famously associated with Japan, but paper-folding traditions have been practiced in China and Europe for centuries too.
🧾 A sheet of paper folded by hand is often hard to fold more than 7 times — that’s why careful creases matter in origami!
🐶 Dogs were one of the first animals domesticated by humans and have been companions for thousands of years — great inspiration for puppy crafts!
🖍️ Crayola introduced its first box of crayons in 1903, making colorful decorating easy and safe for kids.
✂️ Traditional origami uses a single sheet of paper with no cuts or glue — just folding, creasing, and shaping.
How do I make an origami puppy?
What materials do I need to make an origami puppy?
What ages is making an origami puppy suitable for?
What are the benefits of making an origami puppy?
