Make An Origami Chameleon
Fold and decorate an origami chameleon using square paper, learning folding techniques, color patterns, and practicing patience while creating movable legs and tail.


Step-by-step guide to make an origami chameleon
Simple Chameleon Origami Tutorial: Easy Steps for All Ages
Step 1
Gather your materials and spread them on a clean flat surface so everything is easy to reach.
Step 2
Place the square paper color-side down so the white or plain side faces up.
Step 3
Fold all four corners of the square into the center point to make a smaller square (this is called a blintz fold).
Step 4
Press the creases firmly so the small square stays flat.
Step 5
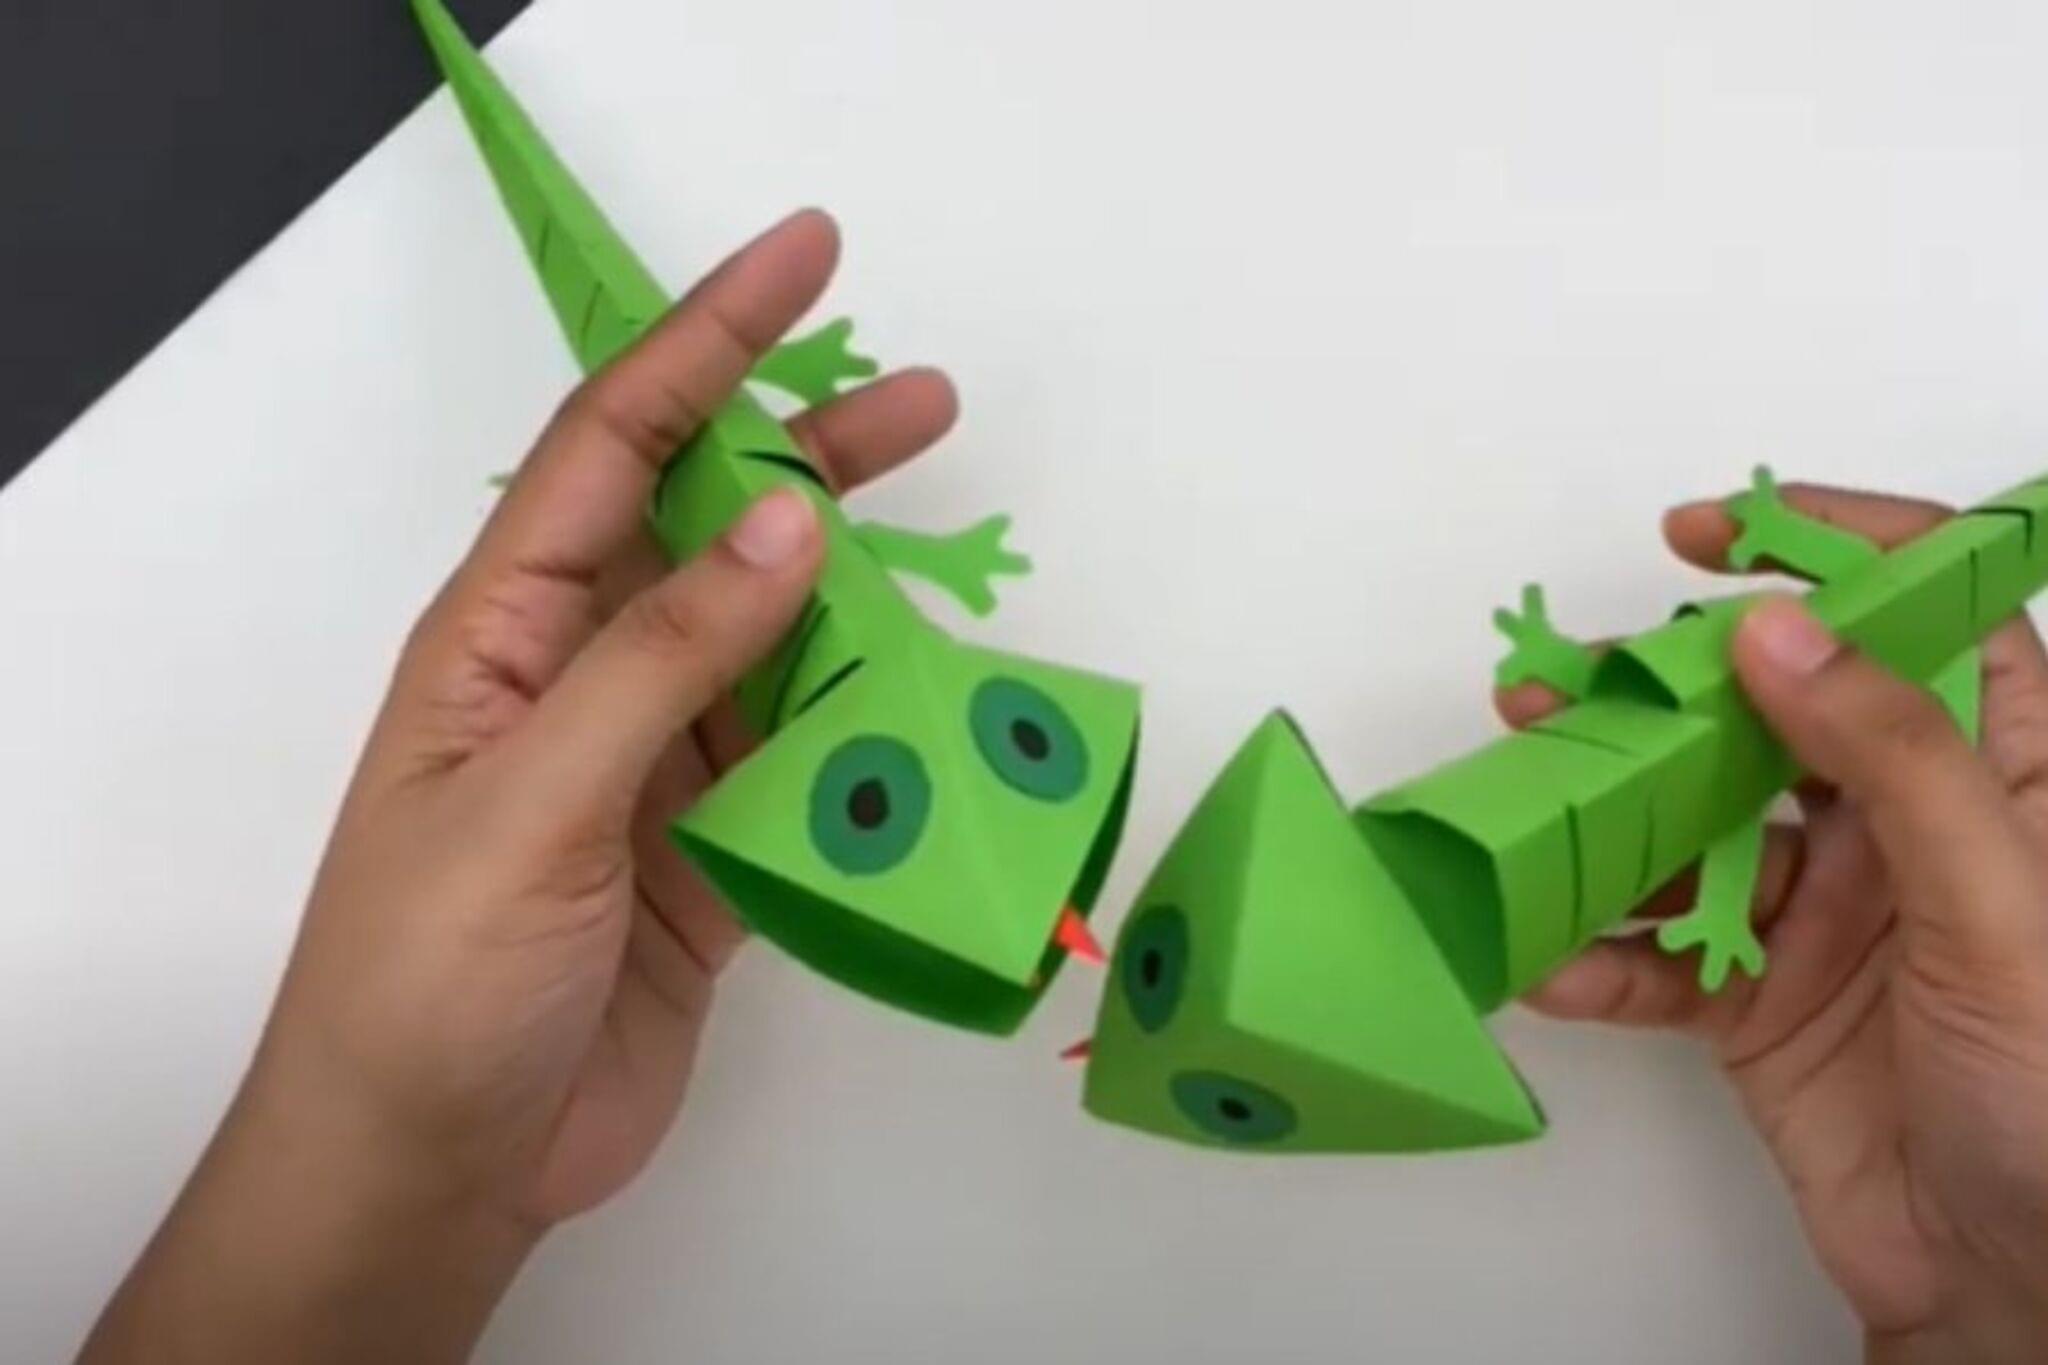
Fold the top corner of the small square down about one-third of the way to make the chameleon’s head.
Step 6
Turn the paper over so the folded head is face-down on the table.
Step 7
Fold the bottom corner up about one-third to form the base of the tail.
Step 8
Make the front left leg by folding a small triangle flap out from the left middle edge and crease it.
Step 9
Make the front right leg by folding a small triangle flap out from the right middle edge and crease it.
Step 10
Make the back left leg by folding a small triangle flap out from the left side near the tail and crease it.
Step 11
Make the back right leg by folding a small triangle flap out from the right side near the tail and crease it.
Step 12
Curl the tail tip by gently rolling the tail around a pencil to make a spiral tail.
Step 13
Decorate your chameleon with colorful patterns and spots using your coloring materials and take your time to make it unique.
Step 14
Share a photo of your finished origami chameleon on DIY.org so others can see your colorful creation.
Help!?
What can I use if I don't have square origami paper or a pencil to curl the tail?
If you don't have origami paper, cut a regular sheet into a square and place it color-side down as instructed, and if you lack a pencil for curling the tail, use a thin marker, skewer, or dowel to roll the tail tip.
My corners won't line up for the blintz fold — how do I fix it?
If the corners don't meet when making the blintz fold, realign opposite edges, refold each corner carefully into the center point, and press the creases firmly with your fingernail or a ruler so the small square stays flat before folding the head and tail.
How can I adapt this origami chameleon for younger or older kids?
For younger children use a larger square of construction paper and pre-crease the blintz fold and the head/tail folds to simplify steps, while older kids can work with smaller origami paper and add extra details like a rolled paper tongue after curling the tail.
How can we make the chameleon more realistic or display it after decorating?
Enhance your chameleon by attaching googly eyes or patterned paper spots when you decorate with your coloring materials, making a little habitat diorama, and then share a photo on DIY.org to showcase your unique creation.
Watch videos on how to make an origami chameleon
🦎✨ How to Make an Origami Chameleon | Easy Step-by-Step Tutorial
3 Videos

🦎✨ How to Make an Origami Chameleon | Easy Step-by-Step Tutorial
Easy Origami Chameleon Tutorial 🦎 Step-by-Step Instructions
Fold a Stunning Origami Chameleon in Easy Steps
Facts about origami and paper crafts for kids
🦎 Chameleons can move their eyes independently, so they can look in two different directions at the same time.
📄 Traditional origami starts with a single square sheet of paper and usually uses no cuts, glue, or tape.
🧑🎨 Akira Yoshizawa is often called the grandmaster of origami for popularizing modern folding techniques and notation.
🔁 Action origami creates movable parts—perfect inspiration for making bendable legs and a wiggly tail on your chameleon.
⏳ Complex folds help build patience and fine motor skills—some origami models require dozens of precise folds!
How do I fold and decorate an origami chameleon?
What materials do I need to make an origami chameleon?
What ages is making an origami chameleon suitable for?
What are the benefits, safety tips, and fun variations for an origami chameleon?
