Make an Envelope With Wings
Fold and decorate a paper envelope with attached paper wings using scissors, glue, and markers; learn symmetry, measuring, and creative design while crafting.


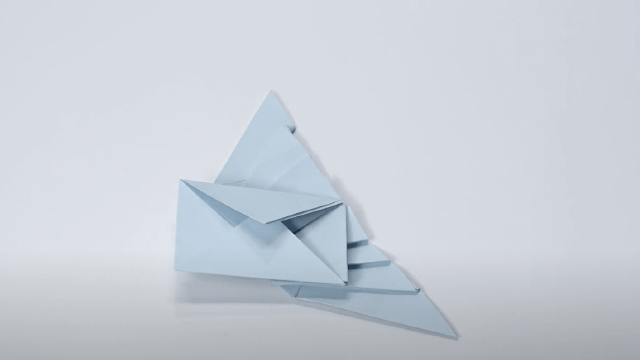

Step-by-step guide to make an envelope with wings
Step 1
Gather all your materials and find a clean flat workspace.
Step 2
Draw a rectangle 18 cm by 12 cm on your paper using the ruler and pencil.
Step 3
Mark a light horizontal line 8 cm from the bottom edge of the rectangle.
Step 4
Cut out the rectangle along your pencil lines with scissors.
Step 5
Fold the bottom edge up along the 8 cm mark to make the envelope pocket.
Step 6
Fold the top edge down about 4 cm to form the envelope flap.
Step 7
On leftover paper draw two matching wing shapes each about 8 cm wide.
Step 8
Cut out both wing shapes carefully.
Step 9
Fold a 1 cm strip along the inner straight edge of each wing to make a glue tab.
Step 10
Mark matching spots on the left and right sides of the pocket where the wings will attach.
Step 11
Attach both wing tabs to the marked spots on the pocket using the glue stick so the wings sit evenly.
Step 12
Draw a fun pattern on one wing using your coloring materials.
Step 13
Copy the same pattern onto the other wing to make the wings symmetrical.
Step 14
Let the glue and colors dry completely so everything stays stuck.
Step 15
Share your finished envelope with wings on DIY.org
Help!?
What can I use if I don't have a glue stick, ruler, or ordinary paper?
Use double-sided tape or glue dots to attach the wing tabs instead of the glue stick, a straight-edged book or cardboard strip to draw the 18 cm by 12 cm rectangle, and cardstock, cereal-box cardboard, or printer paper scraps in place of the original paper.
My wings are uneven or fall off—what should I check and fix?
Make sure you folded a precise 1 cm strip along each wing's inner straight edge, marked matching spots on the pocket before attaching the tabs, press each tab firmly when using the glue stick, and let the glue dry completely as instructed so the wings sit evenly.
How can I change the activity for younger or older kids?
For younger children, pre-draw and pre-cut the 18×12 cm rectangle and the wing shapes and let them glue and color, while older kids can measure and cut their own wings, use thicker cardstock, and practice copying more detailed symmetrical patterns on both wings.
How can we personalize or expand the finished envelope with wings?
After copying the pattern onto both wings, personalize the project by using patterned scrapbook paper for the rectangle, adding googly eyes or sequins to the wings, writing a secret note inside the 8 cm pocket, or punching the wing tabs and inserting brads so the wings can flap.
Watch videos on how to make an envelope with wings
5 Easy DIY Paper Envelopes | Simple Origami Craft Tutorial"
4 Videos

5 Easy DIY Paper Envelopes | Simple Origami Craft Tutorial"
✂️ Easy Butterfly Craft for Kids - Flapping Wings! 🦋
How to Make a Mini Origami Envelope Super Easy
How to Make a Beautiful Green Origami Envelope - Easy Paper Craft for Kids
Facts about paper crafts for kids
✉️ Ancient people folded clay, papyrus and paper to carry messages long before modern envelopes became common in the 1800s.
🦋 Folding paper in half is the fastest way to create perfect bilateral symmetry for matching wings and decorations.
✂️ Cutting a shape while the paper is folded makes two identical wings in one snip — great for twin designs!
🎨 Decorations change a craft's balance: heavier ink, stickers, or glue on one side can make a winged envelope tilt when it flies.
📏 Simple fractions like halves and quarters are the same measuring tricks engineers use to make wings balanced and steady.
How do you make an envelope with wings?
What materials do I need for an envelope with wings?
What ages is this envelope with wings craft suitable for?
What are the benefits of making an envelope with wings?
