Make a USB Pen Drive Case
Make a protective USB pen drive case using cardboard, fabric, or recycled materials, measuring, cutting, gluing with adult help, and decorating to fit the drive.
About this activity
Make a protective USB pen drive case using cardboard, fabric, or recycled materials, measuring, cutting, gluing with adult help, and decorating to fit the drive.
What you need
Step by step
- 1
Step 1
Gather all materials and set up a clean flat workspace.
- 2
Step 2
Measure the length and width of your USB pen drive with the ruler and write down the numbers.
- 3
Step 3
Draw a case template on the cardboard that includes one rectangle 1 cm larger than the drive a 1 cm glue flap along one long edge and a second matching rectangle next to the first with a small 5 mm gap.
- 4
Step 4
Cut out the cardboard template shape along the outer lines using scissors.
- 5
Step 5
Fold the cardboard along the rectangle edges and along the small gap to begin forming the sleeve.
- 6
Step 6
Run the ruler along each fold to make the creases sharp and neat.
- 7
Step 7
Apply glue evenly to the narrow glue flap.
- 8
Step 8
Press the glued flap to the inside edge of the sleeve and hold until the glue sets.
- 9
Step 9
Cut a piece of fabric or colourful paper slightly larger than one face of the sleeve.
- 10
Step 10
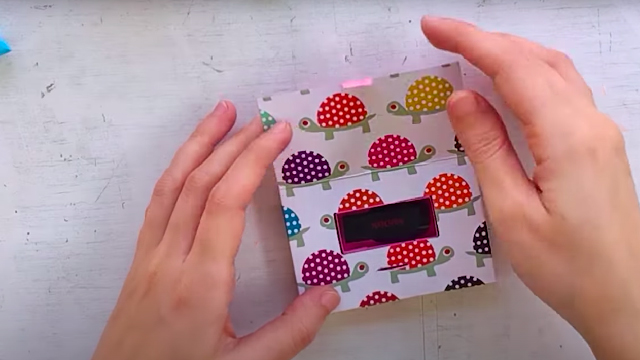
Glue the fabric or paper onto the outside of the sleeve to add padding and decoration.
- 11
Step 11
Let all glued parts dry completely for at least 10 minutes.
- 12
Step 12
Slide the USB pen drive into the case to test the fit and mark any spots that feel too tight.
- 13
Step 13
Carefully trim any tight areas with scissors to improve the fit if needed.
- 14
Step 14
Decorate the case with colouring materials stickers or washi tape to make it your own.
- 15
Step 15
Take a photo of your finished USB pen drive case and share it on DIY.org.
Fun facts
How do I make a USB pen drive case?
To make a protective USB pen drive case, start by measuring the drive's length and width and add a few millimeters for clearance. Trace a sleeve or box pattern on cardboard or stiff recycled plastic. Cut pieces (adult helps with knives), fold and glue edges to form a snug pocket, add felt or foam padding inside, then cover with fabric and glue or stitch. Let dry, trim excess, and decorate with paint, stickers, or ribbon. Test fit before sealing.
What materials do I need to make a USB pen drive case?
Materials you'll need: the USB pen drive to measure, sturdy cardboard or thin plastic, fabric or recycled materials for covering, scissors and a craft knife (adult use), ruler and pencil, glue (PVA or a hot-glue gun used by an adult), felt or foam for padding, tape, optional elastic or Velcro, needle and thread for sewing, and decorative items like paint, stickers, or ribbon. Use recycled boxes or small mint tins for sturdier cases.
What ages is this activity suitable for?
This activity suits different ages with supervision: ages 4–6 can design and decorate with adult help while an adult handles cutting and gluing. Ages 7–10 can measure, trace, and help assemble with guidance. Ages 11+ can plan, cut with supervision of sharp tools, and sew simple fabric cases. Always match tasks to the child's fine motor skills and keep adults in charge of craft knives, hot glue, and small choking hazards.
What safety tips should I follow when making a USB pen drive case?
Safety tips: always supervise children when cutting, using hot glue, or handling small decorations that pose choking risks. Keep liquids and paints away from the USB connector and allow glue to fully dry. Use blunt-tipped scissors for younger kids and reserve craft knives and hot glue for adults. Test the case fit before permanently sealing, label your drive, and store finished cases where moisture and extreme heat won't damage the drive.
Watch & Learn
Need help?
What can I use instead of cardboard if I don't have any?
Use a cereal box, folder cover, or thin piece of corrugated shipping box as the 'cardboard' and proceed with the 'Draw a case template on the cardboard' step, then cut and fold as instructed.
The sleeve feels too tight when I try to slide the USB in—what should I do?
Follow the instruction to 'slide the USB pen drive into the case to test the fit and mark any spots that feel too tight,' then carefully trim those marked tight areas with scissors to improve the fit.
How can I adapt this activity for younger or older kids?
For younger children, have an adult pre-measure and pre-cut the 'cardboard template shape' and use tape instead of liquid glue, while older kids can measure precisely, add 1 cm seams, sew the fabric onto the sleeve, or use craft foam for a sturdier case.
How can we make the case more durable or personalized?
Glue a thin layer of foam or felt inside before attaching the 'fabric or colourful paper' for extra padding, punch a small hole to add a keyring, and finish decorating with stickers or washi tape as described in 'Decorate the case.'