Make a robot hand that can throw a ball
Build a simple robot hand that grips and launches a lightweight ball using cardboard, rubber bands, string, and a lever mechanism, testing throw distances.


Step-by-step guide to make a robot hand that can throw a ball
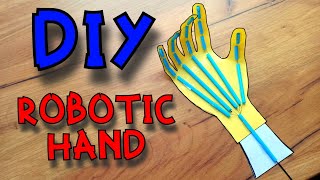
Robotic Hand Science Project | Simple Paper Robot Hand for Kids | STEM Activity
Step 1
Gather all the materials listed and find a clear flat space to work.
Step 2
Put the cardboard down and draw a palm shape about the size of your hand with a small wrist tab at the base.
Step 3
Draw three finger strips on cardboard about the same length as your fingers and about 1 to 2 centimeters wide.
Step 4
Cut out the palm and the three finger strips carefully using scissors.
Step 5
Tape the base of each finger strip to the top edge of the palm so each finger can bend up and down like a hinge.
Step 6
Cut three equal lengths of string about 30 centimeters long each.
Step 7
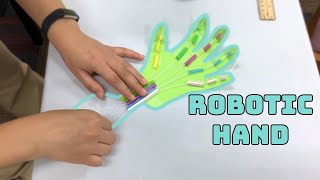
Lay one string along the top of each finger and tape the string down in a few spots so the string pulls the finger when you tug the loose end.
Step 8
Hook a small rubber band around the base of each finger and tape the other end of each rubber band to the back of the palm so the fingers are pulled open when slack.
Step 9
Tie the three loose string ends together under the wrist tab into a single tight knot.
Step 10
Tape one end of a popsicle stick to the wrist tab so the stick can pivot as a lever.
Step 11
Tie the knot of strings to the free end of the popsicle stick so pulling the stick pulls all three strings and closes the fingers quickly.
Step 12
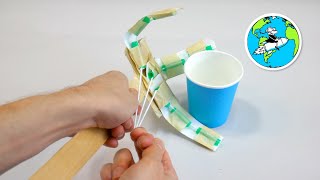
Place the lightweight ball in the palm then pull the popsicle stick sharply to close the fingers and try to launch the ball; measure how far it flies and try small adjustments to string length or rubber band tension to improve the throw.
Step 13
Share your finished robot hand and your best throw distance on DIY.org
Help!?
What can I use instead of a popsicle stick if I can't find one?
If you don't have a popsicle stick, use a similarly stiff flat piece like a wooden ruler, craft stick, or sturdy plastic stirrer taped to the wrist tab so it still pivots as a lever.
My hand doesn't launch the ball — what should I check first?
If the fingers don't close quickly or the ball won't launch, loosen the tape on the finger tops (step 6), shorten the strings a little, or replace weak rubber bands (step 8) so the popsicle stick pull (step 11) snaps the fingers shut.
How can I adapt this activity for different ages?
For younger kids, pre-cut the palm and finger strips (steps 2–4), use a soft foam ball and help with scissors, and for older kids, add extra finger strips, experiment with string lengths (step 6) and lever length (step 11) to increase the throw.
How can I extend or personalize the finished robot hand?
To improve and personalize the robot hand, paint the palm and fingers, attach the wrist tab to a longer cardboard arm so it can be worn, and try different ball weights plus varied string/rubber band tensions (steps 6–8 and 13) to optimize distance before posting your result on DIY.org.
Watch videos on how to make a robot hand that can throw a ball
Build Your Own Bionic Hand - STEM Projects for Kids. Engineer A Simple Robot Hand
4 Videos
Build Your Own Bionic Hand - STEM Projects for Kids. Engineer A Simple Robot Hand
How to Make a Robotic Hand - HCPL STEM
How To Make a Robotic Hand | DIY Paper Robot Hand | Science Project

DIY Robotic Hand | Step-by-Step Guide | Simple Science Project
Facts about simple robotics and mechanical engineering for kids
🤖 The first industrial robot, Unimate, started working on a General Motors assembly line in 1961 — robots have been helping people build things for decades!
🖐 The human hand has 27 bones and a clever tendon system that inspired many simple robot-hand designs.
🪢 Many DIY grippers use strings like tendons and rubber bands like muscles to open and close fingers — simple parts, big effect.
🔧 A lever can swap force for speed depending on fulcrum placement — move the pivot and your launcher can throw faster or farther.
🎯 Rubber bands store elastic energy and release it very quickly, which is why small rubber-band launchers can send lightweight balls surprisingly far.
How do you make a robot hand that can throw a ball?
What materials do I need to build a cardboard robot hand launcher?
What ages is the robot hand throwing activity suitable for?
What are safe variations and learning benefits of the robot hand launcher?
