Make a Paper Pop-it with @EMPERORDRAGON
Make a paper Pop-it fidget toy with @EMPERORDRAGON using folded paper, glue, and markers to design colorful bubbles and test popping patterns.


Step-by-step guide to Make a Paper Pop-it with @EMPERORDRAGON
Step 1
Gather all your materials and find a clear workspace to build your Paper Pop-it.
Step 2
Choose one sheet to be the base and one sheet to cut the pop bubbles from.
Step 3
Use the ruler and pencil to draw a 4 by 4 grid of equal squares on the bubble sheet.
Step 4
Cut out each square from the grid so you have 16 small squares.
Step 5
Decorate the top side of each square with markers to make colorful bubbles.
Step 6
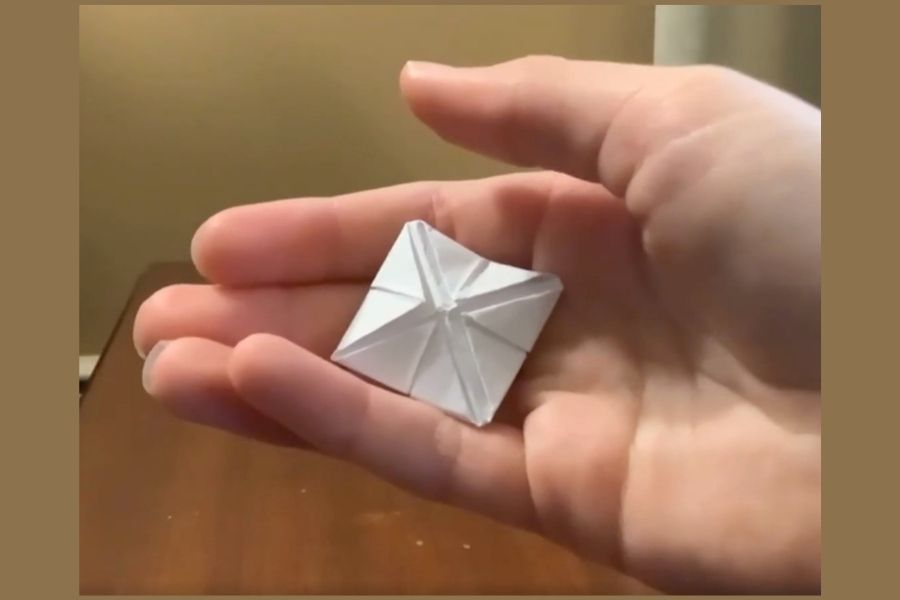
Fold each square diagonally in half to make a triangle flap.
Step 7
On the base paper mark 16 matching spots in a 4 by 4 layout where the bubbles will go.
Step 8
Put two small dots of glue on the two bottom corners along the straight edge of each triangle flap.
Step 9
Press each glued triangle onto a marked spot on the base with the folded edge facing up.
Step 10
Wait a few minutes for the glue to dry so the flaps stay secure.
Step 11
Press the center of a flap to flip it and test a single bubble "pop."
Step 12
Make popping patterns by pressing bubbles in lines shapes or color sequences to play games.
Step 13
Share your finished Paper Pop-it on DIY.org and tag @EMPERORDRAGON.
Help!?
What can we use if we don't have white glue or a ruler?
Use double-sided tape or glue dots in place of white glue for the 'two small dots of glue' step and use any straight-edged book, ruler app, or credit card with a pencil to draw the 4 by 4 grid.
My triangle flaps keep coming unstuck or tear when I press them — how can I fix that?
Make sure each square is folded neatly along the diagonal, put glue on the straight edge corners as instructed but use a stronger adhesive like a glue stick or more glue dots, press each glued triangle firmly onto the marked spot on the base, and let it dry longer before testing a pop.
How can I adapt this Paper Pop-it for younger children or older kids?
For preschoolers, an adult can pre-cut the 16 small squares and draw a larger, more widely spaced layout on the base so flaps are easier to press, while older kids can design detailed marker decorations and create complex popping pattern games or timed challenges.
How can we enhance or personalize the finished Paper Pop-it beyond the basic instructions?
After you decorate the top side of each square with markers, add numbers, letters, or stickers and use the 'make popping patterns' step to create math, spelling, or memory games, or attach small removable stickers so designs can be changed before sharing on DIY.org.
Watch videos on how to Make a Paper Pop-it with @EMPERORDRAGON
Easy paper flowers making | How to make paper flowers
4 Videos
Easy paper flowers making | How to make paper flowers

5 DIY fidget toys pop it How to make pop it
How To Paint Poppies For Kids
How To Draw A Pop It Toy
Facts about paper crafts and DIY fidget toys
🧠 Many people use fidget toys because having something to do with your hands can help some kids and adults concentrate better.
✂️ Origami is the traditional Japanese art of paper folding — you can make complex 3D shapes from a single flat sheet of paper!
🎨 Papercraft artists use cutting, folding, and glue to turn paper into toys and models; large paper sculptures have even been shown in galleries.
♻️ Making a pop-it from paper can be a greener, low-plastic alternative to silicone versions — and paper is often recyclable.
🌐 The silicone 'Pop It' fidget toy blew up online around 2020–2021 and became a global trend for kids and families.
How do you make a paper Pop-it with @EMPERORDRAGON?
What materials do I need for a paper Pop-it with @EMPERORDRAGON?
What ages is this activity suitable for?
What are the benefits and safety tips for making a paper Pop-it with @EMPERORDRAGON?
