Make a Mandala
Create a colorful paper mandala using drawing tools and simple rulers. Learn radial symmetry, pattern repetition, and relaxing concentration while decorating your design.


Step-by-step guide to make a mandala
Step 1
Gather all your materials and find a flat table or floor space to work on.
Step 2
Fold your paper in half so the short edges meet.
Step 3
Fold the paper in half again so the new short edges meet.
Step 4
Fold the paper in half one more time to make eight triangular wedge creases.
Step 5
Carefully unfold the paper so the crease lines form a star that meets at the center.
Step 6
Put the small round object centered on the crease intersection and trace around it to make the smallest circle.
Step 7
Put the medium round object centered on the same center point and trace around it to make a middle circle.
Step 8
Put the large round object centered on the center point and trace around it to make the outer circle.
Step 9
Use the ruler to draw over each crease line from the center out to the outer circle to make clear wedge boundaries.
Step 10
Pick one simple shape like a dot petal or triangle and draw it inside the first wedge of the innermost ring.
Step 11
Repeat that exact same shape in every wedge of the innermost ring so the pattern is the same all around.
Step 12
Choose a new simple shape for the middle ring and draw it in the same way in every wedge of that ring.
Step 13
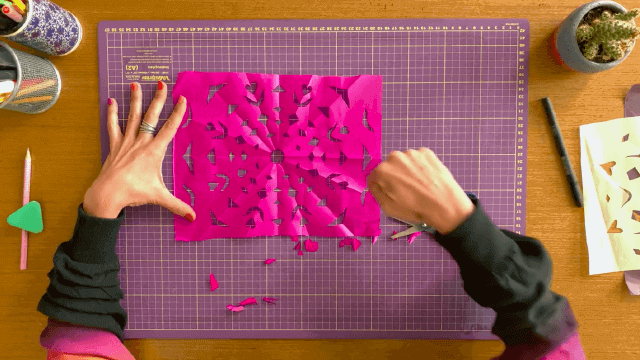
Fill the outer ring with another repeated shape or pattern in every wedge so each wedge matches its neighbors.
Step 14
Color each ring and each repeated shape keeping the same colors around the circle to show radial symmetry.
Step 15
Take a photo of your finished colorful mandala and share it on DIY.org
Help!?
What can I use if I don’t have the small, medium, or large round objects for tracing?
Use common household items as substitutes—trace a coin for the smallest circle, a jar lid or yogurt cup for the middle circle, and a dinner plate or bowl for the outer circle, all centered on the crease intersection.
My creases or wedge lines are faint or my circles look off-center — how can I fix that?
Refold along the original folds and press firmly with a fingernail to sharpen the star-shaped creases, re-center the small/medium/large round objects on the crease intersection before retracing, and use the ruler to redraw the wedge lines from the center to the outer circle for clear boundaries.
How can I adapt this mandala activity for younger kids or older kids?
For younger children, simplify by folding only into four wedges or provide a pre-folded 4-wedge template and stickers for the rings, while older kids can fold to 16 wedges, use a compass for precise concentric circles, and draw more detailed repeated motifs in each ring.
How can we enhance or personalize our finished mandala before sharing it on DIY.org?
After coloring each ring, personalize the mandala by adding glitter glue or sequins to the repeated shapes, laminating or mounting it on colored cardstock, or photographing it with a high-contrast background and editing the photo to boost colors before posting to DIY.org.
Watch videos on how to make a mandala
Easy colourful mandala art 🌈✨ | easy mandala art for beginners | step by step mandala art
4 Videos
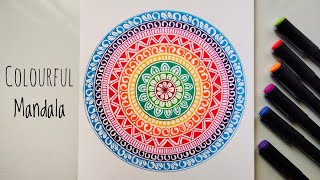
Easy colourful mandala art 🌈✨ | easy mandala art for beginners | step by step mandala art
Easy & Simple Mandala using Colored Pens | How to Draw Basic Colorful Mandala Art for Beginners

Let's create Mini Mandalas with some basic & easy Patterns ✨🥰 How to draw Mandala Art for beginners
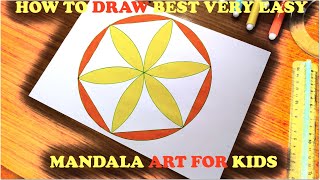
HOW TO DRAW BEST VERY EASY MANDALA ART FOR KIDS
Facts about mandala art and radial symmetry
🌀 Mandalas are circular artworks used for centuries in Hindu and Buddhist traditions to aid meditation and storytelling.
🎯 Radial symmetry means a pattern repeats around a center point — like the petals of a sunflower or slices of a pie.
📏 You don't need a fancy compass: everyday items like cups, lids, rulers, and string can help you draw perfect mandala circles.
🎨 Complementary colors (opposite on the color wheel) make parts of your mandala pop — try blue with orange or red with green.
🧘 Making mandalas is relaxing: repetitive patterns and focused drawing are used in art therapy to improve concentration and reduce stress.
How to make a colorful paper mandala with a child
Materials needed for a child-friendly paper mandala
What ages is making a paper mandala suitable for?
Benefits of making mandalas with children
