Make a gorilla using LEGO®
Build a poseable gorilla model using LEGO® bricks, follow step-by-step construction, and experiment with arm and leg movement for playful engineering exploration.


Step-by-step guide to make a gorilla using LEGO®
Build it yourself - LEGO Gorilla // Featuring LEGO Education Early Simple Machines Set (9656)
Step 1
Clear a workspace and gather all your LEGO pieces so everything is easy to reach.
Step 2
Sort your bricks by size and color into small piles so you can find pieces fast.
Step 3
Build a sturdy rectangular torso by stacking plates and bricks into a solid block.
Step 4
Build a neck and head stack using bricks and attach the head on top of the torso so it sits firmly.
Step 5
Add eyes and a nose using round tiles or studs to give your gorilla a friendly face.
Step 6
Build two identical poseable arms by combining upper arm bricks lower arm bricks and a hinge or ball joint in the middle.
Step 7
Attach both arms to the sides of the torso using the hinge or ball joint pieces so they can move.
Step 8
Build two poseable legs using bricks and hinge or ball joint pieces to make knees and hip connections.
Step 9
Attach both legs to the bottom of the torso using the connectors so the gorilla can bend its knees and hips.
Step 10
Add hands and feet using small flat tiles or slopes and attach them to the ends of the arms and legs.
Step 11
Gently move each joint to test arm and leg movement and note which joints are loose or tight.
Step 12
Adjust connector tightness or swap pieces to make movements smoother or stiffer until your gorilla can hold poses.
Step 13
Place your gorilla on a baseplate and adjust leg positions so it can stand or sit in fun poses.
Step 14
Share your finished poseable LEGO gorilla creation on DIY.org
Help!?
What can I use if I don't have hinge or ball‑joint pieces, round tiles, or a baseplate?
If you lack hinge or ball‑joint pieces for the arms/legs, substitute clip‑and‑bar assemblies or Technic pins for connectors, use 1x1 round plates or studs for the eyes and nose, and place your gorilla on a large flat plate instead of a baseplate.
My gorilla's joints are floppy or the model keeps falling over — what should I check?
Follow the instruction to gently move each joint and then adjust connector tightness or swap to tighter hinge/bush pieces and reinforce the rectangular torso by adding more stacked plates/bricks so the limbs have firmer anchor points.
How can I adapt this build for different age groups?
For younger kids, build a chunky, fixed‑limb gorilla using larger bricks and skip hinges; for middle ages use simple hinge connectors for poseable limbs; and for older kids add ball joints, smaller tiles for detailed eyes/nose, and more complex torso layering for realism.
How can we extend or personalize the gorilla after finishing the basic instructions?
Enhance your gorilla by layering staggered plates and slopes on the torso for a fur texture, create interchangeable facial expressions with extra round tiles/studs, build a jungle base using foliage pieces on a baseplate, and pose it in different stances before sharing on DIY.org.
Watch videos on how to make a gorilla using LEGO®
Lego tutorial easy | Lego gorilla instructions | Lego manuals
4 Videos
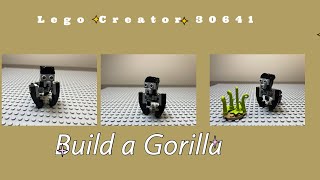
Lego tutorial easy | Lego gorilla instructions | Lego manuals
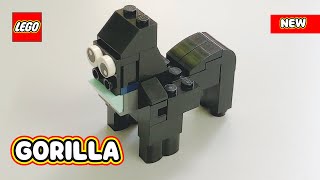
LEGO Gorilla Building Instructions — LEGO Classic Creative DIY
LEGO Universe Gorilla MOC & Tutorial
LEGO Gorilla - Build 036
Facts about LEGO engineering for kids
🦍 Gorillas are the largest living primates — adult males can weigh around 200 kg (about 440 lb) in the wild.
🧱 Over 600 billion LEGO bricks have been made since the modern stud-and-tube design was introduced in 1958.
⚙️ LEGO Technic, which adds beams, gears and axles for movable mechanisms, was first launched in 1977.
💪 Gorillas have arms longer than their legs and very strong upper bodies — perfect inspiration for poseable limb design.
🔩 You can build adjustable joints in LEGO with hinge plates, Technic pins/axles and ball-and-socket elements for smooth posing.
How do I build a poseable gorilla using LEGO bricks?
What materials and LEGO pieces do I need to build a poseable gorilla?
What ages is building a poseable LEGO gorilla suitable for?
What are the benefits of building a poseable LEGO gorilla and are there safety tips?
