Make a DIY Earphone Case
Make a soft DIY earphone case using felt, glue, and simple stitches; design, measure, and protect earbuds while learning basic sewing and measurement skills.


Step-by-step guide to make a DIY earphone case
Step 1
Lay out all your materials on a clean flat table so everything is easy to reach.
Step 2
Draw a paper pattern of a rectangle 9 cm by 6 cm and add a 3 cm flap along one short side to make the lid.
Step 3
Use the ruler and pencil to trace two rectangles and one flap onto your felt using the paper pattern.
Step 4
Cut out the two rectangle pieces and the flap from the felt carefully with scissors.
Step 5
Place the two rectangle felt pieces together so their edges match perfectly.
Step 6
Thread the needle and tie a knot at the end of the thread so it is ready to sew.
Step 7
Sew the three sides of the felt rectangles together with a whip stitch about 5 mm from the edge and make stitches roughly 5 mm apart.
Step 8
Position the flap centered on the back top edge and sew its straight edge to the back of the case with small stitches.
Step 9
Sew a button onto the front top center of the case about 1 cm down from the edge to act as a fastener.
Step 10
Make a small thread loop on the flap and sew it securely so it will hook over the button.
Step 11
Decorate the case by gluing or sewing felt shapes ribbon or beads onto the outside any way you like.
Step 12
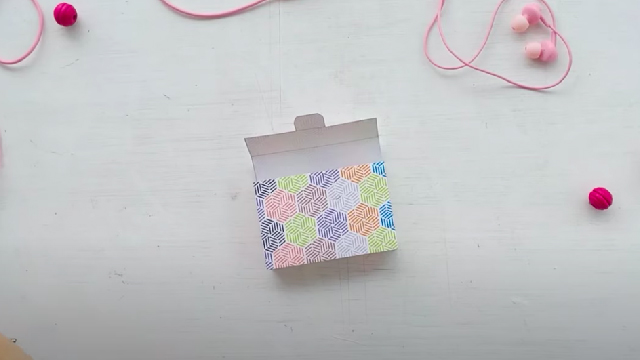
Put your earbuds inside to check the fit and tuck the wire neatly so the case closes easily.
Step 13
Share a photo of your finished earphone case on DIY.org
Help!?
What can we use instead of felt or a sharp sewing needle if they're hard to find?
Use thin fleece or craft foam to trace and cut in place of felt, and replace a metal sewing needle and thread with a blunt plastic yarn needle and embroidery floss or secure the seams with fabric glue.
My seams look uneven or the case won't close — how can I fix this while sewing the three sides and attaching the flap?
Pin or clip the two rectangle felt pieces together so their edges match perfectly before doing the whip stitch about 5 mm from the edge and keep stitches roughly 5 mm apart, then position and test the flap centered on the back top edge before sewing its straight edge so the case closes easily.
How can I adapt this project for younger children or make it more challenging for older kids?
For younger children, use pre-cut felt pieces, fabric glue instead of hand stitching, and a large button or velcro loop for the flap, while older kids can precisely measure and cut the 9 cm × 6 cm pattern, practice neat 5 mm whip stitches, and add lining or embroidery for extra challenge.
What are simple ways to personalize or upgrade the earphone case after finishing it?
Before putting your earbuds inside to check the fit, stitch in a thin fabric or foam lining for extra protection, add a small side loop or keyring for portability, and personalize the outside by gluing or sewing felt shapes, ribbon, beads, or embroidered initials during the decoration step.
Watch videos on how to make a DIY earphone case
Easy Sew DIY Headphone Case - Sewing Tutorial
3 Videos
Easy Sew DIY Headphone Case - Sewing Tutorial
DIY Origami paper Earphone Box/Case Easy Step by Step Tutorial
DIY Airpods case / earphone case│ sewing class DIY tutorial/Eng Sub【Qthousevivi】
Facts about basic sewing and fabric crafts for kids
🧵 Felt is one of the oldest textiles — people made it from animal fibers thousands of years ago.
🎧 Small earbud cases help stop cords from tangling and protect tiny headphones from getting squashed.
🪡 Basic hand stitches like the running stitch and whipstitch are perfect for beginners and hold felt pieces together well.
📏 Sewing tape measures are flexible and usually show both inches and centimeters — 150 cm / 60 in is a common length.
🧴 White craft glue (PVA) dries clear and is a safe, kid-friendly choice for many fabric projects.
How do I make a DIY earphone case?
What materials do I need for a DIY earphone case?
What ages is this DIY earphone case activity suitable for?
What are the benefits and safety tips for making a DIY earphone case?
