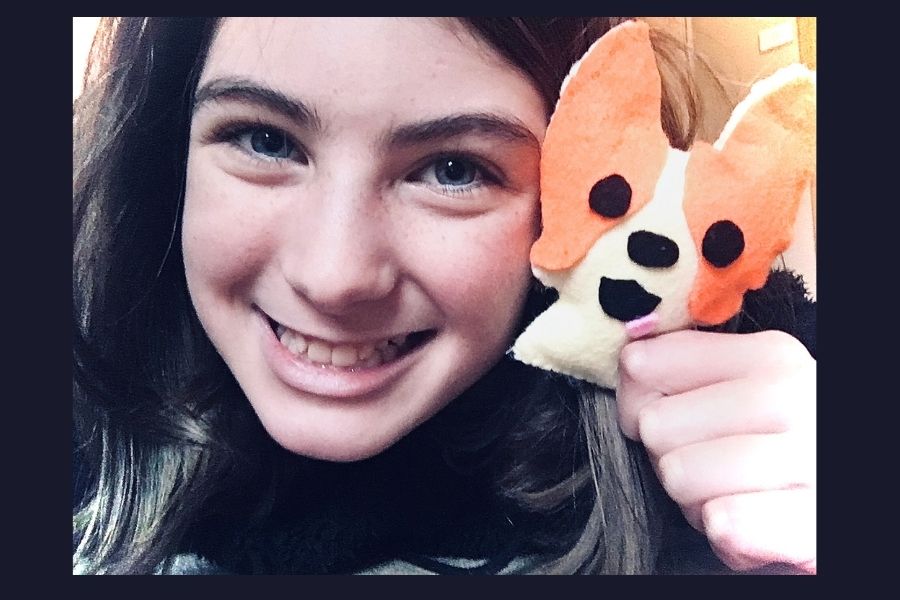
Make a Corgi Dog Plushie with DIY Star LiviaBivia
Sew a small corgi plushie using felt, embroidery thread, blunt needle, and stuffing with guidance from DIY star LiviaBivia, personalizing it safely.
About this activity
Sew a small corgi plushie using felt, embroidery thread, blunt needle, and stuffing with guidance from DIY star LiviaBivia, personalizing it safely.
What you need
Step by step
- 1
Step 1
Gather all the materials from the list and put them on a clean table.
- 2
Step 2
Ask an adult to show you DIY star LiviaBivia’s guide for tips before you start.
- 3
Step 3
Draw a simple corgi pattern on paper with a rounded rectangle for the body a circle for the head triangles for ears and small rectangles for legs and tail.
- 4
Step 4
Cut out the paper pattern pieces carefully with scissors.
- 5
Step 5
Trace each paper piece onto the felt using the fabric marker or chalk.
- 6
Step 6
Cut out the felt pieces along your traced lines.
- 7
Step 7
Embroider the eyes and nose on the front head felt piece using embroidery thread and the blunt needle.
- 8
Step 8
Sew the ears and white face and chest markings onto the front body and head pieces.
- 9
Step 9
Place the front and back felt body pieces together and align them so the edges match.
- 10
Step 10
Sew around the edge of the body and head with small stitches leaving a two-centimeter gap for stuffing.
- 11
Step 11
Stuff the corgi gently through the gap until it is fluffy but still cuddly.
- 12
Step 12
Sew the gap closed with neat small stitches to finish the seam.
- 13
Step 13
Personalize your corgi by embroidering your name or sewing on a small felt heart.
- 14
Step 14
Share a photo of your finished corgi plushie on DIY.org.
Fun facts
How do I make a Corgi dog plushie with DIY star LiviaBivia?
Follow LiviaBivia’s tutorial: print or trace her corgi pattern, cut felt pieces for body, ears, and markings. Use a blunt embroidery needle and embroidery thread to sew pieces together with small running or backstitches, leaving a gap to stuff. Add polyfill, then close the seam. Embroider the face or attach secure safety eyes per the video, and personalize colors or accessories while an adult supervises needle use.
What materials do I need to sew a small corgi plushie?
You’ll need felt in corgi colors (tan, white, black), embroidery thread, a blunt large-eye needle, polyester stuffing, scissors, the LiviaBivia pattern, pins or clips, and a water-soluble marker. For details use safety eyes or embroidery floss for embroidered features, and optional ribbon or tiny accessories for personalization. Choose child-safe, non-toxic materials and avoid small loose parts for very young children.
What ages is this Corgi plushie activity suitable for?
This sewing project suits children about 6+ with close adult supervision for handling needles. Ages 8–12 can often sew more independently with guidance. Younger kids (4–6) can participate by cutting pre-traced felt, stuffing, or choosing colors while an adult does the sewing. For children under 3, avoid small parts entirely and offer a supervised, simplified version where adults assemble most pieces.
Is making a Corgi plushie safe and are there easy variations?
Safety tips: use blunt needles, supervise all stitching, embroider eyes instead of using loose plastic for young kids, and secure seams well. Check for loose threads and use hypoallergenic stuffing if needed. Variations: make a keychain-sized corgi, change colors for fantasy breeds, add removable outfits, or attach a loop for hanging. These keep the project fresh while maintaining safety and personalization.
Watch & Learn
Need help?
What can I use if I don't have felt, a fabric marker, or a blunt needle?
If you don't have felt use cotton fabric or fleece, trace the paper pattern with a pencil or tailor's chalk instead of the fabric marker, and use a plastic safety needle or fabric glue to attach pieces in place of the blunt needle when embroidering is not possible.
My front and back body pieces don't line up or stuffing makes gaps—how do I fix that?
Pin or clip the front and back felt body pieces together before you sew, keep your small stitches even around the edge while leaving the two-centimeter gap for stuffing, and use a chopstick or blunt pencil to push stuffing into tight corners so the corgi isn't lumpy.
How can I adapt this project for different ages?
For preschoolers have an adult pre-cut the paper and felt pieces and let them glue and stuff the corgi, for elementary kids supervise simple sewing and embroidery of the eyes and nose, and for tweens/teens follow the full tracing and sewing steps with more detailed embroidery and neat small stitches using the blunt needle and embroidery thread.
What are some easy ways to personalize or extend the corgi plushie project?
Beyond embroidering your name or sewing on a small felt heart as the instructions suggest, customize colors and markings with extra felt pieces, add button or safety-eye details, make a tiny felt collar or leash, and share a photo of your finished corgi plushie on DIY.org.