Make A 3D Portrait
Create a 3D portrait of yourself or a friend using layered paper, cardboard, and simple modeling clay to explore faces, depth, and texture.


Step-by-step guide to make a 3D portrait
Character Modeling for Beginners (Blender Tutorial)
Step 1
Gather all your materials and decide whether you will make a self portrait or a friend portrait.
Step 2
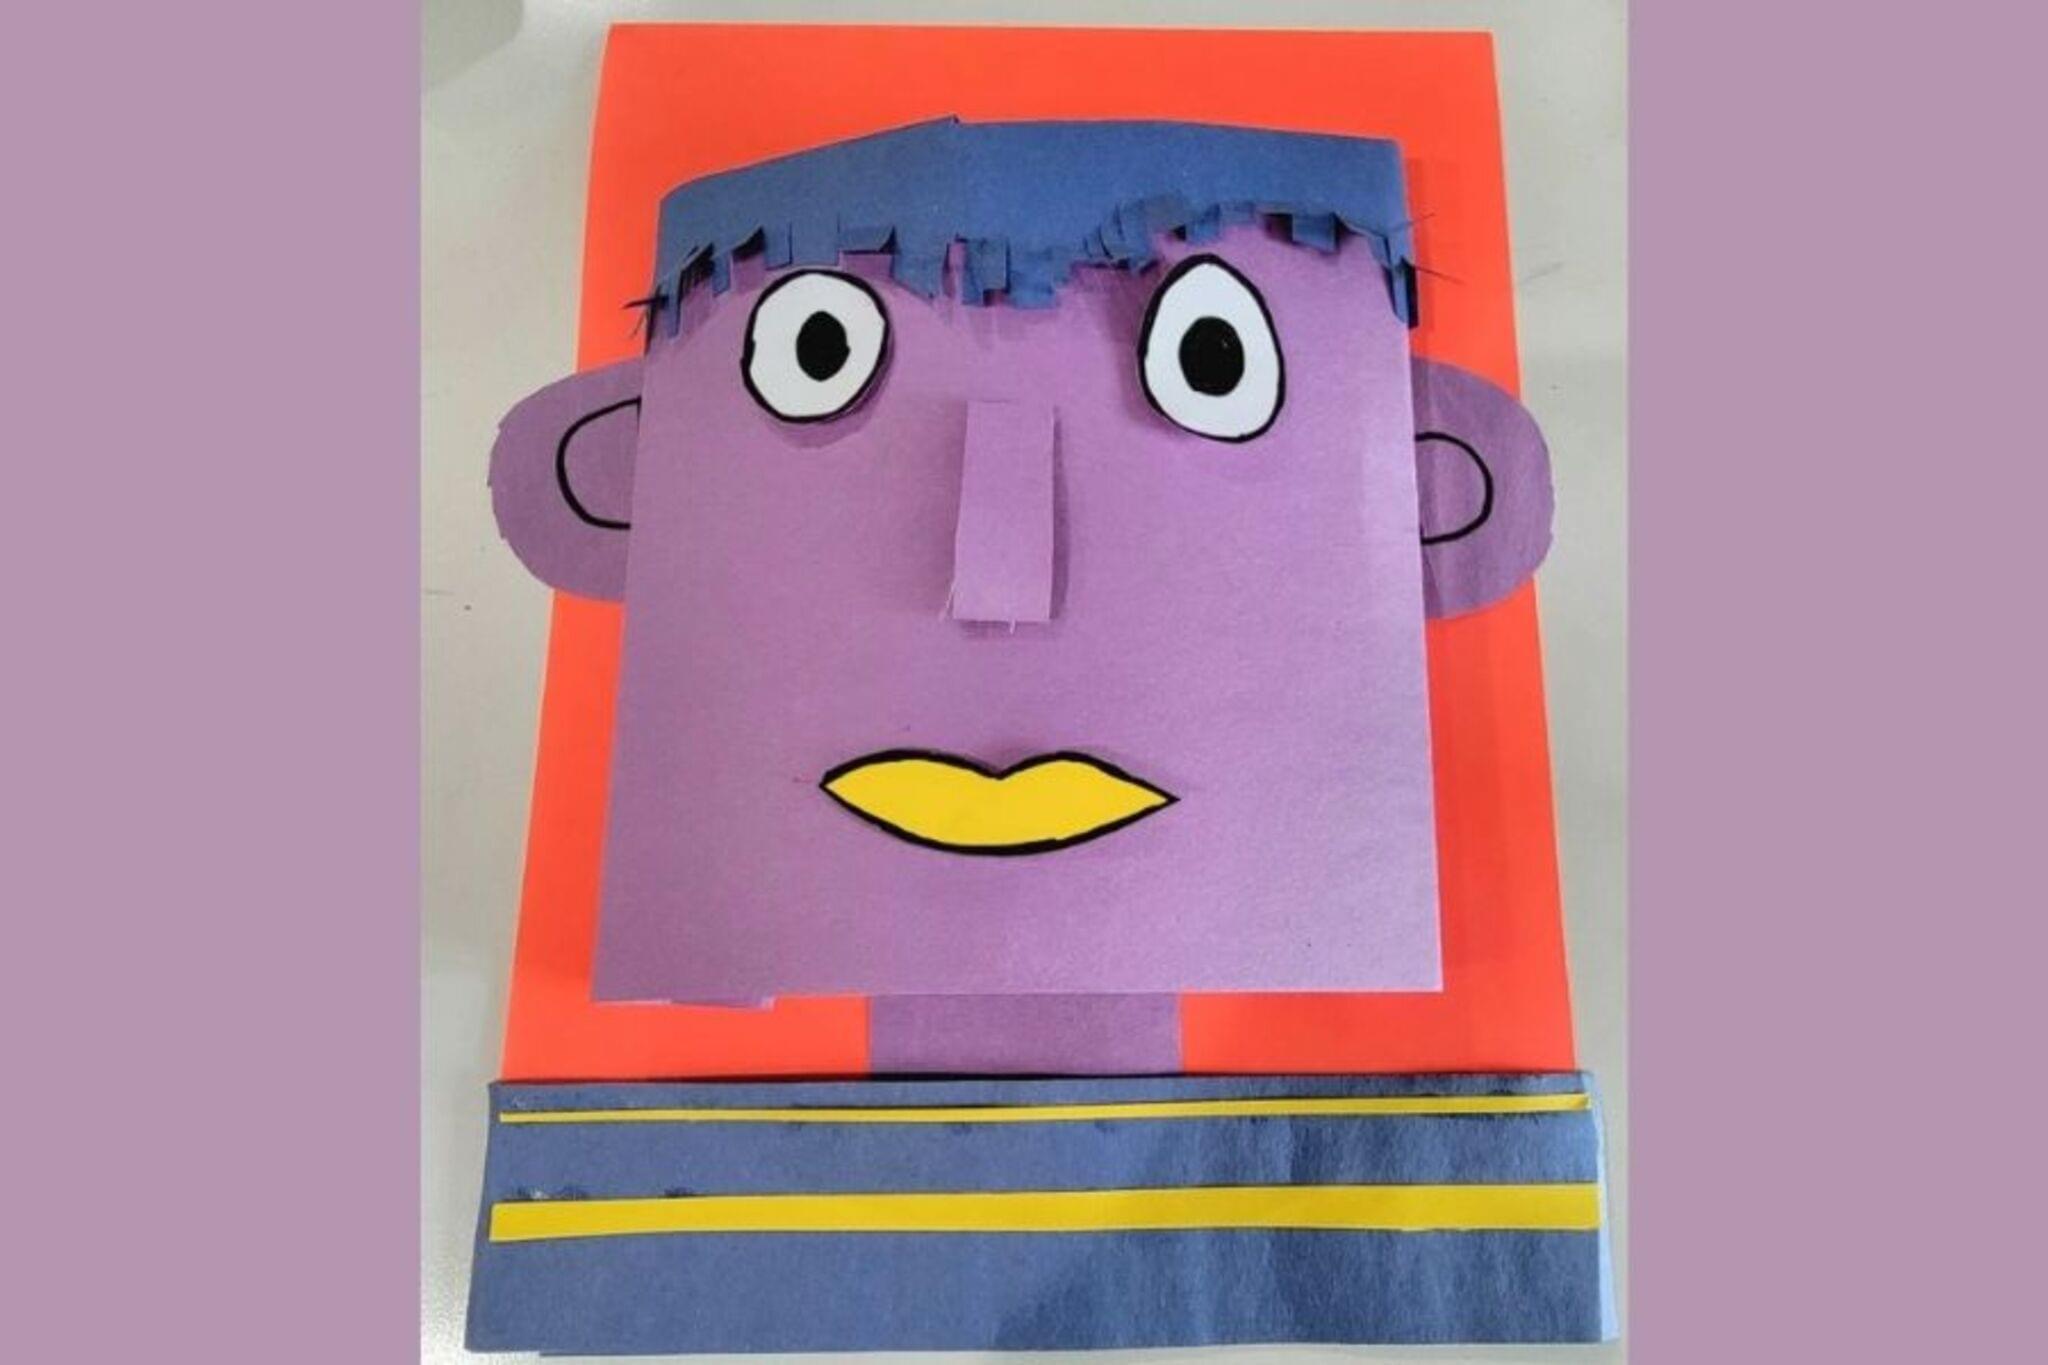
Lay the cardboard flat and use the pencil and ruler to draw a large face-shaped oval in the center.
Step 3
Cut out the cardboard oval carefully with scissors to make the base of your portrait.
Step 4
Fold or trace colored paper and cut layered shapes for hair ears and cheek patches.
Step 5
Glue the paper hair ears and cheek pieces onto the cardboard base in layers to create depth.
Step 6
Roll a small piece of modeling clay into a cone shape to make a nose.
Step 7
Press the clay nose onto the center of the cardboard face so it sticks firmly.
Step 8
Roll two small clay balls for eyes and press them into place above the nose.
Step 9
Add clay or paper strips for eyebrows lips and textured hair and press or glue them onto the face.
Step 10
Use coloring materials to draw details like freckles shading and outlines to finish the portrait.
Step 11
Let your portrait dry or set according to the clay package instructions and then share your finished creation on DIY.org
Help!?
What can I use if I don't have modeling clay or colored paper?
If you don't have modeling clay, roll small pieces of aluminum foil or tissue into a cone and balls for the nose and eyes, and substitute magazines, wrapping paper, or fabric scraps for the layered colored paper hair and cheek patches on the cardboard oval.
Why won't the clay nose stick to the cardboard, and how do I fix it?
If the modeling clay cone won't adhere to the cardboard face, roughen the spot with a pencil tip, add a dab of white craft glue or double-sided tape under the clay nose, and press firmly until set so it holds while drying.
How can I adapt this 3D portrait activity for younger or older kids?
For younger children, pre-cut the cardboard oval and large paper shapes and let them press chunky clay pieces into place with a glue stick for paper, while older kids can trace accurate facial proportions, cut finer layered hair and textured strips, and use shading pencils and the clay package drying times to create more realistic detail.
How can we enhance or personalize the finished portrait before sharing it?
To enhance the finished portrait, mount the cardboard face on a painted background, glue on yarn or textured paper for hair layers, add drawn freckles and shading with coloring materials, seal any clay with clear varnish per the clay's instructions, and then photograph it to share on DIY.org.
Watch videos on how to make a 3D portrait
Top 7 Best 3D Print Modeling Software for Beginners
4 Videos

Top 7 Best 3D Print Modeling Software for Beginners
How to 3D Model Using Blender - Easy Beginner Guide + Tips and Tricks

The SIMPLE Way to Model ANYTHING in Blender!
Tutorial: Blender MODELLING For Absolute Beginners - Simple Human
Facts about 3D art and sculpting for kids
🎨 Rembrandt painted about 80 self-portraits, making him one of history's most famous self-observers.
🪙 The tiny raised pictures on coins are bas-reliefs—little sculptures that show depth on a flat surface.
✂️ Papercraft techniques like kirigami use cutting and folding to transform flat paper into layered 3D forms.
🟦 Plasticine (modeling clay) stays soft and never fully hardens, so kids can reshape their models again and again.
👀 Babies prefer looking at face-like patterns, and people can recognize faces from very few visual clues—handy for stylized portraits.
How do I make a 3D portrait of myself or a friend?
What materials do I need to make a 3D portrait?
What ages is making a 3D portrait suitable for?
What are the benefits and safety tips for making 3D portraits?
