Learn Robotics to Crash the Castle: Level 1
Build and program a small motorized robot to gently push over a cardboard castle, learning basic gears, motors, and simple coding.


Step-by-step guide to Learn Robotics to Crash the Castle: Level 1
The Robot That Built a Castle 🤖🏰 | Fun STEM Learning & Adventure for Kids | Preschool Creativity
Step 1
Gather all the Materials Needed and set them on a clear table so you can reach everything easily.
Step 2
Cut and fold a small cardboard castle: cut out walls and towers and tape them together into a tower or wall that will stand on its own.
Step 3
Cut a rectangle of cardboard for the robot base about the size of your hand and set it flat on the table.
Step 4
Push two wooden skewers or straws through the base to make front and back axles and secure them with tape so they spin freely.
Step 5
Push bottle caps or small wheels onto each axle end and make sure the wheels can roll smoothly.
Step 6
Mount the small DC motor on the base near one axle using tape or glue so the motor shaft faces a wheel.
Step 7
Loop a rubber band from the motor shaft around the closest wheel as a belt so the motor can turn the wheel when it spins.
Step 8
Connect the motor and the motor driver to the microcontroller and battery pack using alligator clips or jumper wires following the motor driver instructions.
Step 9
Secure the battery pack to the base with tape so it stays put while the robot moves.
Step 10
Use your computer or tablet to write a simple program that tells the motor to run forward at low speed for 1 to 3 seconds and then stop.
Step 11
Upload the program to the microcontroller and make sure the battery pack switch is on.
Step 12
Place the robot about 10 to 20 centimeters from the cardboard castle and run the program one time to see if it gently pushes the castle over.
Step 13
If the push is too strong or too weak, change one thing: lower or raise the motor speed in your program or move the rubber band to a smaller or larger wheel to change the gearing.
Step 14
Test again and repeat adjustments until your robot gently topples the castle.
Step 15
Take a photo or short description of your finished robot and share your creation on DIY.org
Final steps
You're almost there! Complete all the steps, bring your creation to life, post it, and conquer the challenge!


Help!?
What can we use if we don’t have a small DC motor, motor driver, bottle-cap wheels, or wooden skewers?
Salvage a motor from a toy car if you don't have a small DC motor, use a simple transistor or an old toy speed controller instead of a motor driver, swap bottle-cap wheels for LEGO wheels or cardboard discs, and use chopsticks or pencils in place of wooden skewers as axles.
My robot doesn’t move, the wheels don't spin freely, or the rubber band keeps slipping—what should I check?
Check that the skewers or straws can rotate by loosening or removing excess tape, make sure bottle caps or wheels fit snugly on the axles and secure a slipping rubber band with a tighter loop or a dab of glue, and verify alligator-clip/jumper-wire connections, motor driver wiring, and that the battery pack switch is on before running the uploaded program.
How can I adapt this activity for different ages?
For toddlers have an adult assemble the base, motor and axles and let the child decorate and push the castle by hand, for 6–9 year olds pre-cut the cardboard and pre-mount the motor so they focus on inserting axles, wheels and uploading a simple one-second program, and for 10+ let them write motor-speed code, experiment with moving the rubber band to different wheel sizes for gearing, or add a motor driver change.
How can we extend or personalize the crash-the-castle robot after it works?
Add a distance sensor to the microcontroller so your program slows or stops the motor before hitting the castle, paint and label the cardboard castle and robot base, try a dual-motor drive for stronger pushes, and then take a photo or short description to share on DIY.org.
Watch videos on how to Learn Robotics to Crash the Castle: Level 1
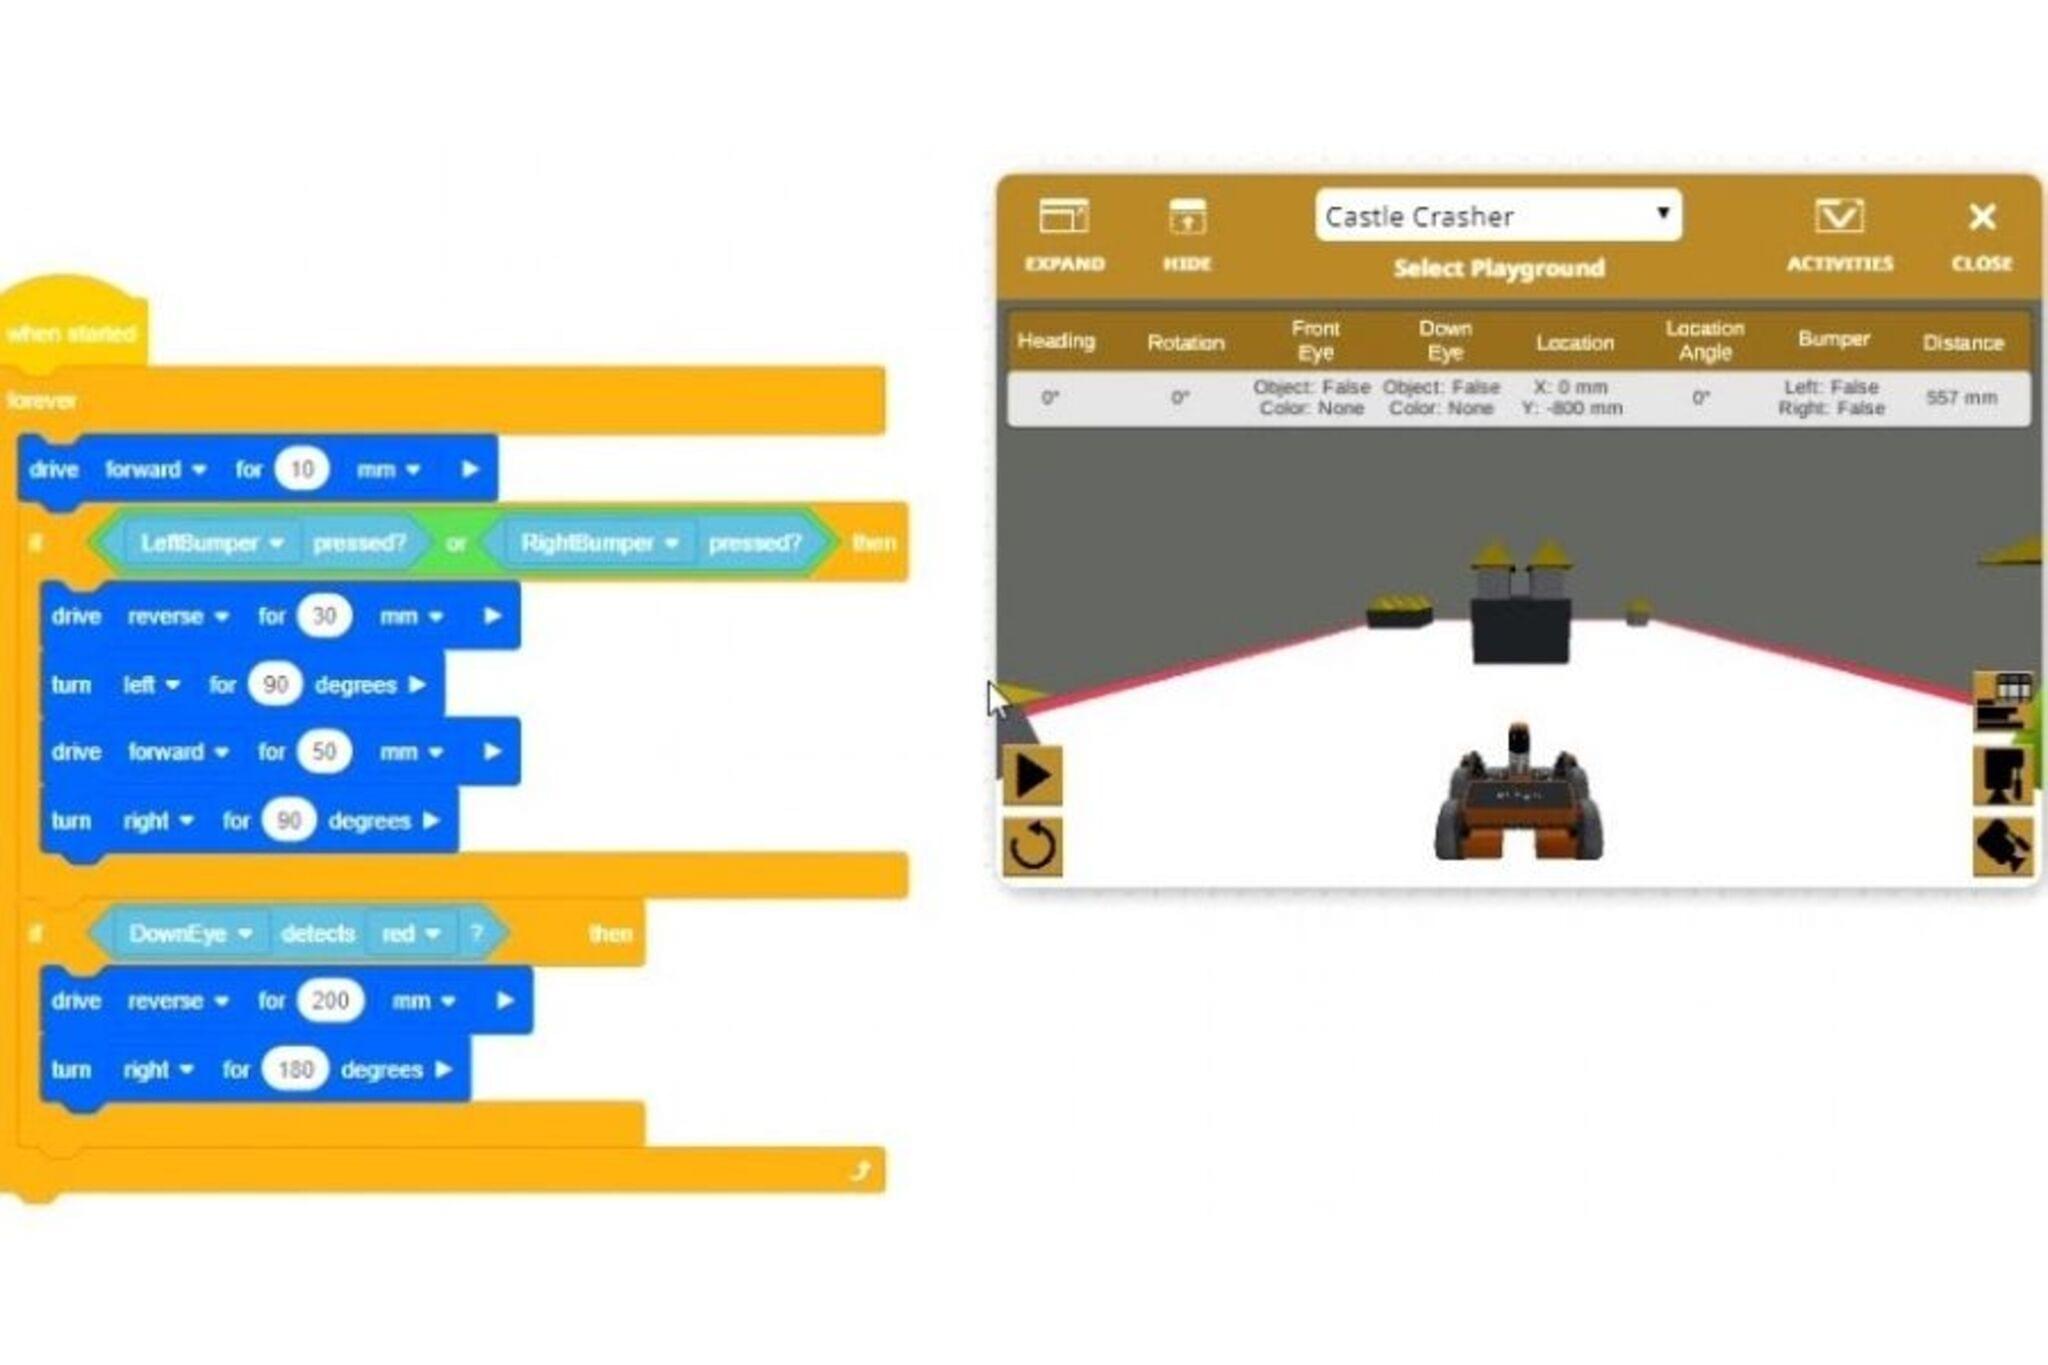
Castle Crashers Robotics Class On VEX VR & Outschool
4 Videos
Castle Crashers Robotics Class On VEX VR & Outschool

Robotics 101: Introduction to Robotics for beginners and Kids | Robotics for Class 1 to 8

An Introduction To Robotics 🤖 By Teach Kids Robotics (Full Lesson)
![How to get started with Robotics? [MUST KNOW TIPS] Building Robots for Beginners](https://img.youtube.com/vi/NRj6gzah7JA/mqdefault.jpg)
How to get started with Robotics? [MUST KNOW TIPS] Building Robots for Beginners
Facts about robotics and simple machines for kids
🤖 Hobby robots can be made from simple parts like motors, batteries, and microcontrollers — some tiny bots weigh less than a smartphone!
⚡ Electric (DC) motors spin when electricity flows; reverse the wiring and they spin the other way — great for forward/reverse robot drives.
⚙️ Gears change speed and force: a gear with twice as many teeth turns half as fast but doubles the torque of the smaller gear.
💻 Many beginner robots use Arduino boards and block-based coding before learners move on to text languages like C++ or Python.
📦 Cardboard is inexpensive, easy to cut, and recyclable — perfect for building a safe, light castle target for robot testing.

