How to draw christmas - a free christmas drawing guide
Draw a Christmas tree scene with ornaments, gifts, and a star. Practice step-by-step sketching, shading, and coloring to improve drawing skills.


Drawing Apps
Get inspired with these


Instructions
How To Draw A Christmas Tree
Step 1
Clear a flat workspace and lay out your materials so everything is easy to reach.
Step 2
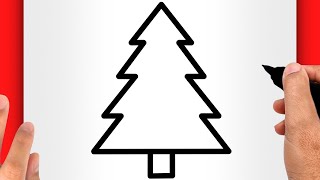
Lightly draw a large triangle in the center of the paper to make the basic shape of the Christmas tree.
Step 3
Draw a small rectangle at the bottom center of the triangle to make the tree trunk.
Step 4
Add a few curved horizontal lines across the triangle to show the tree’s layered branches.
Step 5
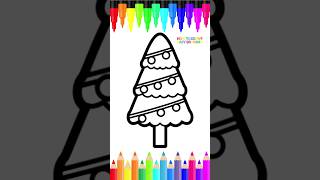
Draw several small circles and ovals on the branches to make ornaments.
Step 6
Sketch rectangles and squares at the base of the tree to create gift boxes.
Step 7
Draw simple bows and ribbon lines on top of each gift box.
Step 8
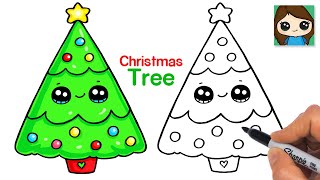
Draw a star shape at the top point of the tree.
Step 9
Draw small snowflakes or dots around the tree to make a festive background.
Step 10
Trace over the main pencil lines with a black marker to make your drawing stand out.
Step 11
Erase any extra light pencil sketch lines you no longer need.
Step 12
Shade one side of the tree with short diagonal pencil strokes to create shadow and depth.
Step 13
Add darker pencil strokes on one side of each ornament and gift to show shading.
Step 14
Color the tree green and fill in the ornaments gifts and background with bright colors using your coloring materials.
Step 15
Take a photo or scan your finished picture and share your creation on DIY.org
Help!?
What can I use if I don't have a black marker or my usual coloring materials?
If you don't have a black marker for the 'trace over the main pencil lines' step, use a dark blue or brown pen, a fine-tip permanent marker, or a sharpened colored pencil, and for coloring you can swap markers for crayons, colored pencils, or watercolor paints.
My traced lines keep smudging or bleeding—how can I avoid ruining the drawing before erasing pencil lines?
To prevent smudging when you trace the main pencil lines with a marker, place scrap paper under your hand, use a fine-tip marker or pen, let ink dry fully before erasing, and work slowly on one area at a time.
How should I change the activity for younger or older children?
For preschoolers, pre-draw the large triangle and trunk and let them stick stickers for ornaments and color with chunky crayons, while older kids can add more curved branch layers, detailed diagonal pencil shading on one side of the tree and ornaments, and create patterned gift-wrap before tracing.
How can we make the finished drawing more special before taking a photo or sharing on DIY.org?
Enhance the finished picture by adding glitter glue or metallic gel-pen highlights to ornaments and the star, decorating gift boxes with ribbon patterns, mounting on colored cardstock, or lightly washing the background with watercolor before scanning or photographing to share on DIY.org.
Related videos
HOW TO DRAW A CHRISTMAS TREE DRAWING STEP BY STEP FOR BEGINNERS (EASY AND SLOW)
4 Videos
HOW TO DRAW A CHRISTMAS TREE DRAWING STEP BY STEP FOR BEGINNERS (EASY AND SLOW)
Learn How to Draw a Christmas Tree for Kids | Easy Drawing Tutorial
How to Draw a Christmas Tree step by step easy drawing #kids #Christmas #easydrawing #stepbystep
How to Draw a SUPER EASY Christmas Tree 🎄
Fun Facts
🎄 The modern Christmas tree tradition started in 16th-century Germany when people began decorating fir trees inside their homes.
✨ Shiny glass baubles were first produced in the 19th century by glassblowers in Lauscha, Germany — that’s where many ornaments began!
🎁 Gift wrapping became popular in the 1800s; pretty paper and bows help presents look extra magical under the tree.
🖌️ Shading (also called value) is what artists use to make flat sketches look 3D — perfect for giving trees and ornaments depth.
⭐ The star placed atop many Christmas trees symbolizes the Star of Bethlehem that guided the Wise Men in the Christmas story.
How do I draw a Christmas tree scene with ornaments, gifts, and a star?
What materials do I need to draw a Christmas tree scene with ornaments, gifts, and a star?
What ages is this Christmas tree drawing activity suitable for?
What are the benefits of drawing a Christmas tree scene for children?
