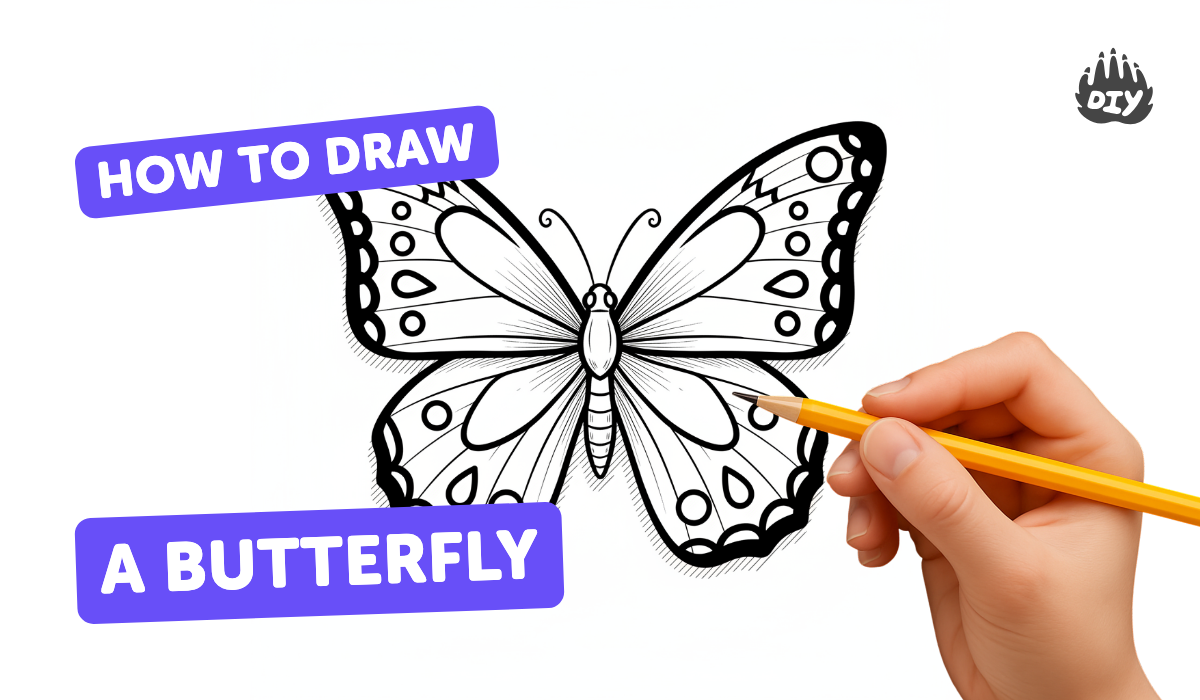
How to draw butterfly - a free butterfly drawing guide
Draw a colorful butterfly by sketching a body and mirrored wings, adding patterns, colors, and shading. Practice symmetry and observational drawing.

Drawing Apps
Get inspired with these


Instructions
Teaching Kids to Draw: How to Draw a Butterfly
Step 1
Gather your materials and find a flat table to work on.
Step 2
Fold the paper in half vertically and press the crease to make a clear center line.
Step 3
Draw the butterfly’s body along the crease by sketching a long oval for the body a smaller circle for the head and two antennae.
Step 4
On one side of the crease draw the outline of one wing using big smooth curves that start at the body.
Step 5
Fold the paper closed so the drawn wing lies exactly on top of the blank half.
Step 6
Firmly rub the back of the drawn wing with the eraser or your finger to transfer faint pencil marks to the blank side.
Step 7
Open the paper and connect the transferred marks to finish the mirrored wing outline.
Step 8
Add matching patterns on both wings by drawing the same shapes on each side like circles stripes or hearts.
Step 9
Trace over all final outlines with the black marker to make the butterfly bold and clear.
Step 10
Color the wings using your colouring materials filling each patterned area with bright colors.
Step 11
Add shading by pressing darker near the body and blending lighter toward the wing edges to make the butterfly look 3D.
Step 12
Erase any extra pencil lines and tidy up smudges to finish your picture.
Step 13
Share a photo of your finished butterfly on DIY.org to show everyone your symmetrical artwork.
Help!?
What can I use if I don't have a black marker or the listed colouring materials?
Use a dark crayon, ballpoint pen, or thin permanent marker to trace the final outlines instead of the black marker, and swap the colouring materials for colored pencils, regular crayons, or washable markers to fill the wing patterns.
Why didn't the wing transfer when I rubbed the back, and how do I fix it?
If the transferred marks are faint, refold the paper matching the crease exactly, press the drawn wing firmly against the blank side and rub again with a clean eraser or coin, or darken the original pencil wing before rubbing to improve transfer.
How can I change the activity for younger kids or make it more challenging for older kids?
For younger children, pre-fold the paper and draw the body and one wing outline for them to trace and color, while older kids can add detailed symmetrical patterns, practice the shading step to create a 3D effect, or use fine liners and watercolor for more advanced results.
What are some ways to extend or personalize the finished butterfly?
After coloring and erasing, cut out the butterfly and attach a folded paper hinge to make movable wings, add tissue-paper layers, glitter, or textured materials to the wing patterns, and then share a photo of your personalized piece on DIY.org.
Related videos
How To Draw a Butterfly 🦋Easy for Kids, Teens & Adults 🦋Beginner Step-by Step Drawing Tutorial
4 Videos
How To Draw a Butterfly 🦋Easy for Kids, Teens & Adults 🦋Beginner Step-by Step Drawing Tutorial

How to Draw a BUTTERFLY! Super EASY for Kids | Step by Step Easy for Beginners

How to Draw a BUTTERFLY! Super Easy for Kids
How to Draw a Colorful Butterfly! | Easy Step by Step Tutorial for Kids with Bri Reads
Fun Facts
🦋 There are about 17,500 species of butterflies worldwide — imagine all those wing patterns to copy!
🎨 Many butterfly colors come from tiny scales or structures that reflect light, not just pigments, so they can really shimmer.
🔁 Butterflies are bilaterally symmetrical, so drawing one wing and mirroring it helps make your butterfly look balanced and real.
🐛 Butterflies grow through complete metamorphosis: egg → caterpillar → pupa → adult, a cool story to add to your drawings.
✨ Some species (like Morpho butterflies) have iridescent wings that change color with the angle — great for practicing highlights and shading!
How do I draw a colorful butterfly with mirrored wings?
What materials do I need to draw and color a butterfly?
What ages is drawing butterflies suitable for?
What are the benefits of drawing butterflies and any safe variations?
