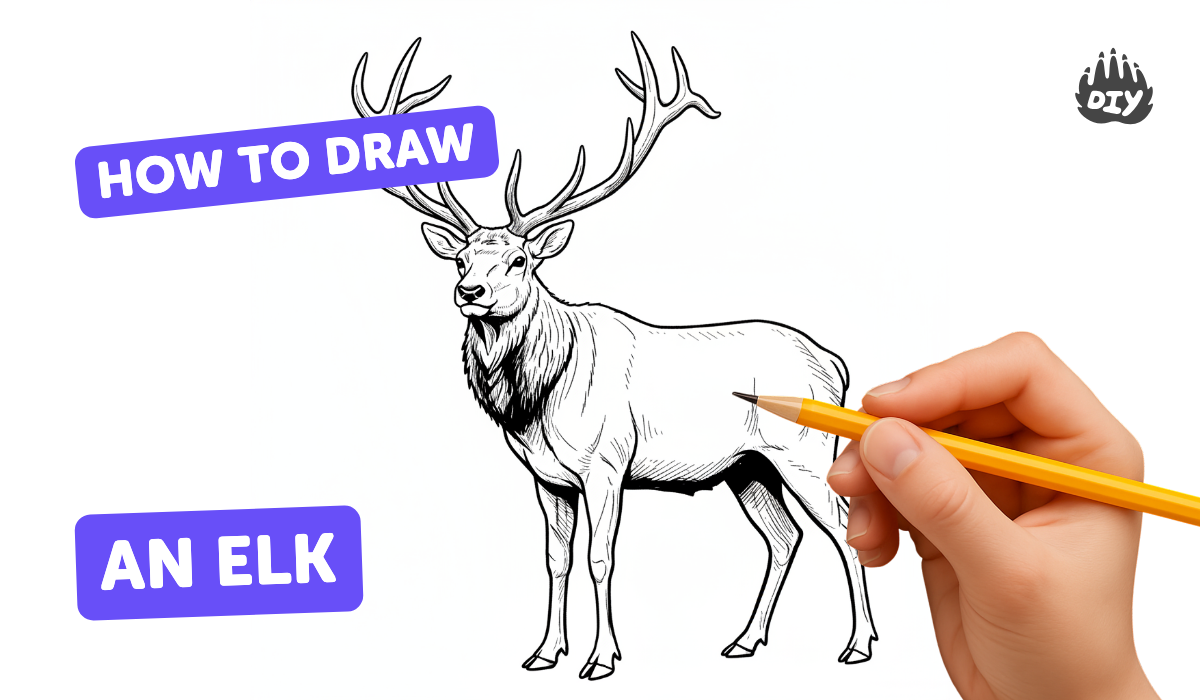
How to draw an elk - a free elk drawing guide
Draw a detailed elk step-by-step using simple shapes, proportions, and shading. Practice observation, antler structure, and texture to improve realistic animal drawing.

Drawing Apps
Get inspired with these


Instructions
Kids Teach Kids How to Draw an ELK | Educational Step-by-Step Drawing Tutorial for Kids!
Step 1
Place a clear reference photo of an elk where you can see it easily.
Step 2
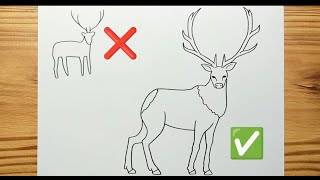
Look at the photo for one minute and notice how big the head is compared to the body.
Step 3
Lightly draw a large horizontal oval for the elk’s body with gentle pencil strokes.
Step 4
Lightly draw a smaller oval at the front of the body for the chest area.
Step 5
Lightly draw a small oval for the head ahead of the chest oval.
Step 6
Draw a smooth curved line connecting the head and chest to make the neck.
Step 7
Draw four straight guideline lines from the body down where the legs will go.
Step 8
Block in the leg shapes by drawing two parallel lines for each leg and add small rectangles for the hooves.
Step 9
Sketch two main curved beams for the antlers starting from the top of the head.
Step 10
Add shorter curved branches off the main beams to make the antler tines.
Step 11
Refine the body and head outlines by smoothing the ovals into muscle shapes and erasing extra guide lines.
Step 12
Draw the elk’s ears and a dark eye on the head using small simple shapes.
Step 13
Draw the nose and mouth and add a few short lines for fur around the face.
Step 14
Add texture and shading with short fur strokes and gentle hatching to show volume and light on the body.
Step 15
Take a photo or scan your finished elk and share your creation on DIY.org.
Help!?
What can I use if I don't have a clear reference photo of an elk?
Use a stuffed elk, a screenshot from a reputable wildlife website or a tablet showing an elk, or a quick zoo visit and place that image where you can see it easily for the one-minute observation step.
My elk's legs look stiff or out of proportion—how do I fix them?
Go back to the instruction to draw four straight guideline lines from the body, re-block each leg with two parallel lines and light pencil strokes, and adjust the small rectangles for hooves before refining so you can erase and tweak proportions against the large body oval.
How can I adapt this elk drawing activity for different ages?
For younger children, pre-draw or trace the large body and head ovals and have them add simple hoof rectangles, for school-age kids follow the full steps (one-minute look, ovals, neck, leg guidelines, antlers, refining), and for teens add detailed antler tines, advanced shading, and scan the finished elk to share on DIY.org.
What are some ways to personalize or extend the finished elk drawing?
After you refine the body and add texture and shading, personalize it by drawing a forest or seasonal background, coloring with pencils or watercolor, creating a series showing coat changes, or taking a photo/scan and posting a step-by-step or time-lapse on DIY.org.
Related videos
Learn How to Draw an ELK for Beginners | Educational Step-by-Step Drawing Tutorial for Kids!
4 Videos

Learn How to Draw an ELK for Beginners | Educational Step-by-Step Drawing Tutorial for Kids!
How to draw AMERICAN ELK Easy for kids

How to Draw an Elk in a Few Easy Steps: Drawing Tutorial for Beginner Artists
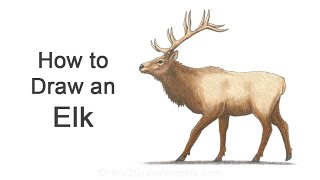
How to Draw an Elk
Fun Facts
🦌 Elk bulls can weigh up to about 700 pounds (≈320 kg), so notice big neck and shoulder shapes when sketching one.
🦴 Antlers are living bone that regrow every year and can grow as fast as about 1 inch (2.5 cm) per day in peak season.
✏️ Many artists start with simple shapes (circles, ovals, rectangles) as construction lines to get correct elk proportions.
🖤 Fur and texture are usually suggested with short, directional strokes and changing pencil pressure rather than drawing every hair.
🌲 Elk live in herds and males use their antlers for display and sparring during the rut — great reference for antler posture.
How do I teach my child to draw a detailed elk step-by-step using simple shapes and shading?
What materials do I need to draw a realistic elk with a child?
What ages is drawing a detailed elk suitable for?
What are the benefits of practicing realistic elk drawing with kids?
