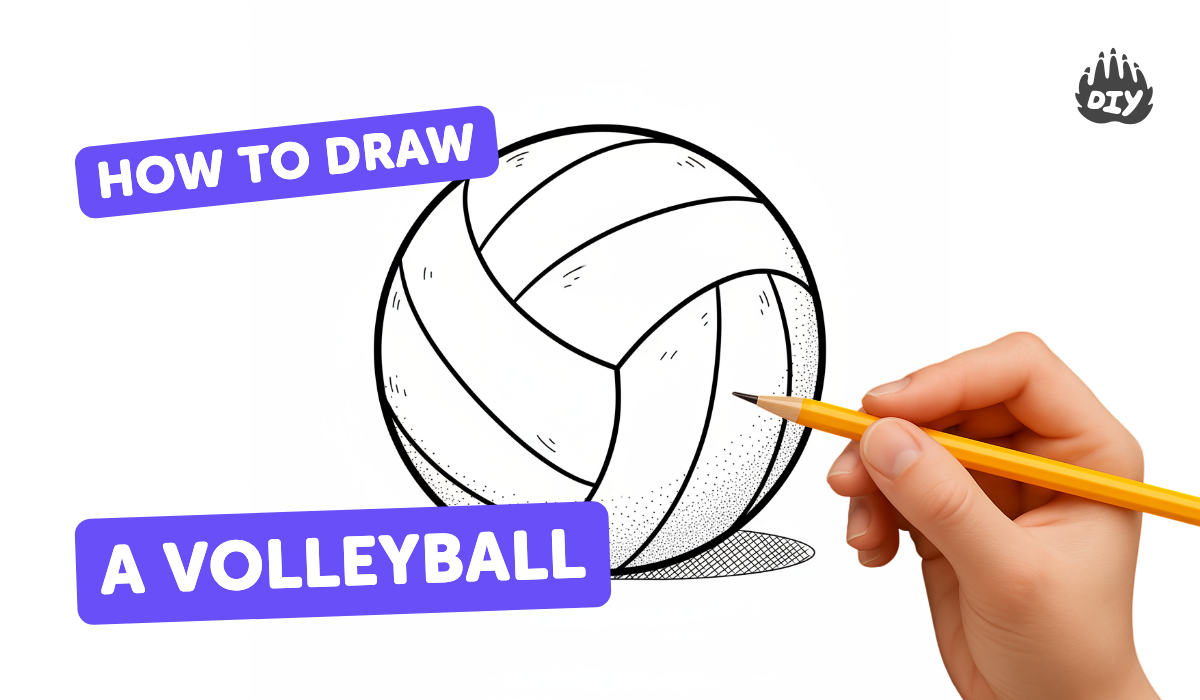
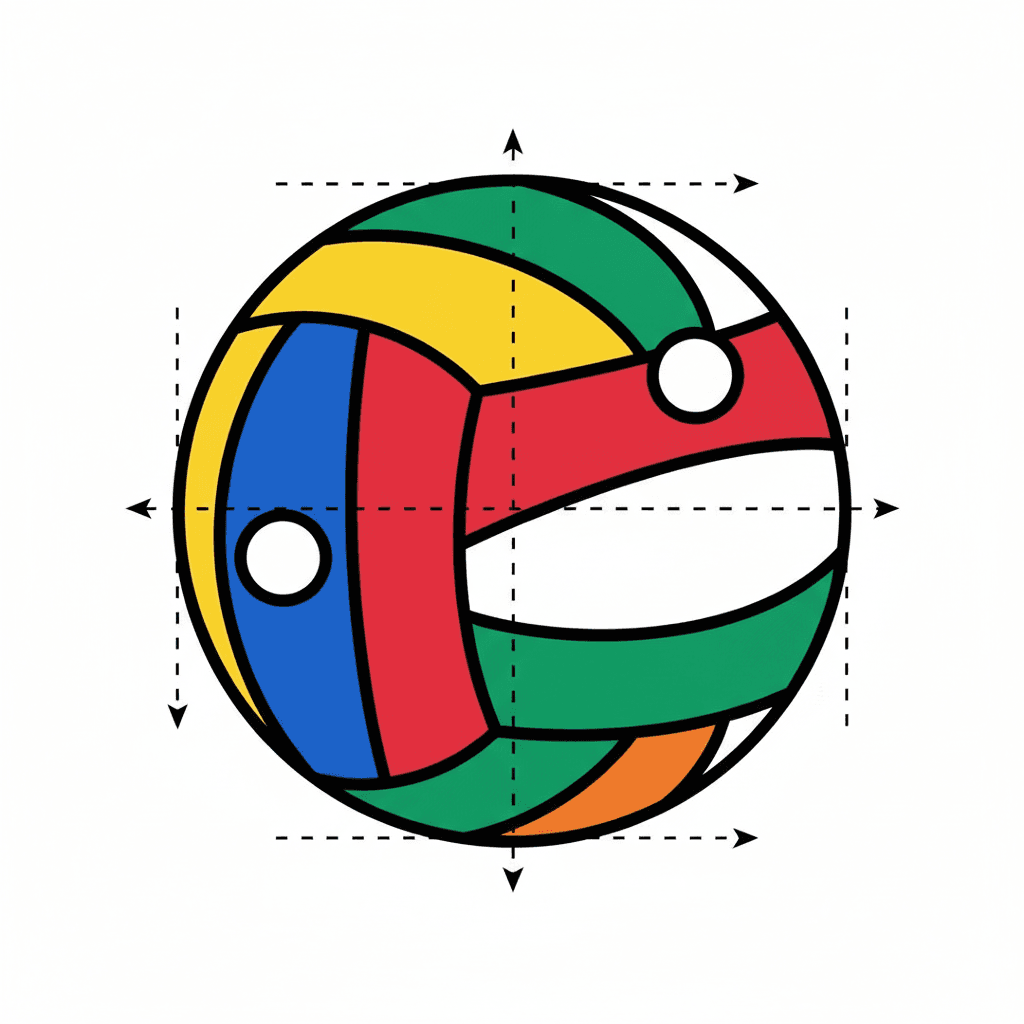
How to draw a volleyball - a free volleyball drawing guide
Draw a realistic volleyball using pencil, eraser, and markers. Practice sketching curved panels, correct proportions, and shading to make it look three dimensional.

Drawing Apps
Get inspired with these


Instructions
How to draw a Volleyball step by step | Volleyball drawing for kids | Drawing Tutorial
Step 1
Place your paper flat on a table so it won’t move while you draw.
Step 2
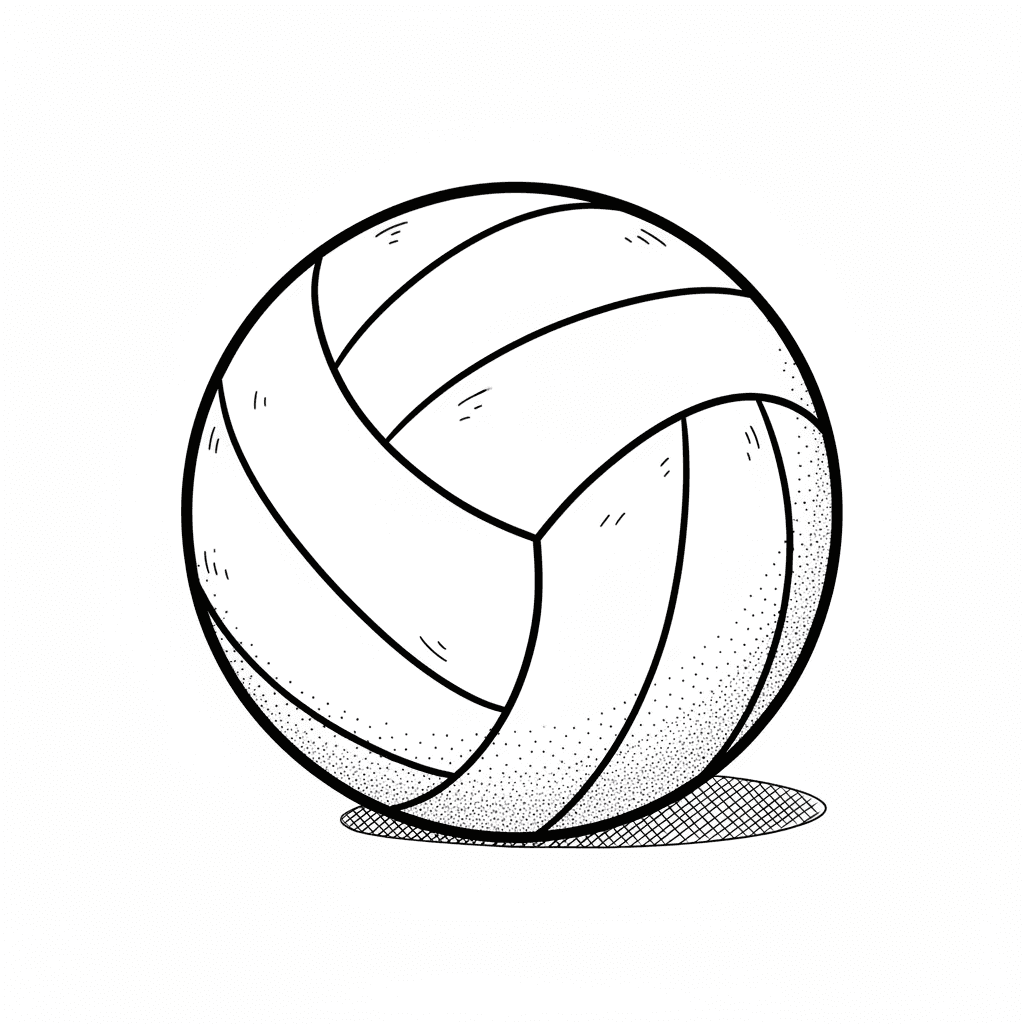
Lightly draw a circle about the size of your palm with your pencil.
Step 3
Put a small dot in the middle of the circle to mark the center.
Step 4
Draw a gentle S-shaped curved line from the top edge to the bottom edge passing near the center dot to make the first seam.
Step 5
Draw a second curved line from top to bottom curving the other way so the circle is divided into curved panels.
Step 6
Add two short curved connector lines near the left and right edges to close the outer panels.
Step 7
Erase any extra construction lines inside the circle so only the circle and panel seams remain.
Step 8
Carefully trace the circle and seam lines with your black marker to make the volleyball outline clean.
Step 9
Lightly shade the lower-right side of each panel with your gray marker or pencil to show shadow assuming the light comes from the top-left.
Step 10
Gently smudge the shading with your fingertip or a tissue for smooth shadow transitions.
Step 11
Use your eraser to lift tiny spots in the shaded areas to create small shiny highlights.
Step 12
Share your finished volleyball drawing on DIY.org
Help!?
If I don’t have a black marker or gray marker, what can I use instead?
Use a dark fine-tip pen or a sharp dark-colored pencil for the 'carefully trace the circle and seam lines with your black marker' step and a soft graphite or charcoal pencil for the 'lightly shade the lower-right side of each panel' step.
My circle looks uneven and the seams don’t meet correctly — how can I fix that?
Trace around a small plate to get 'a circle about the size of your palm', draw the S-shaped seams very lightly in pencil so you can erase and reposition them before you 'carefully trace' with marker, and erase extra construction lines inside the circle as instructed.
How can I adapt this activity for a 4-year-old or a 12-year-old?
For a 4-year-old, pre-draw the circle and main seam lines and let them color panels with thick markers, and for a 12-year-old, have them refine the 'lightly shade' step with smoother smudging and use the eraser to add realistic shiny highlights before sharing on DIY.org.
How can we make the volleyball drawing more advanced or personalized?
Personalize by adding team colors inside panels before you 'lightly shade', draw motion lines or a faint background gym, and use a white gel pen or the eraser technique from the instructions to create crisp shiny highlights after smudging.
Related videos
How to Draw a Volleyball - Very Very Easy
4 Videos

How to Draw a Volleyball - Very Very Easy
How To Draw A Volleyball Player
Learn How to Draw a Volleyball in 6 Easy Steps! 🏐
Volleyball 🏐 Drawing for beginners and kids with easy tutorial
Fun Facts
🏐 A regulation indoor volleyball is about 65–67 cm in circumference and weighs 260–280 g — perfect detail to get proportion right!
🧭 Many indoor volleyballs use an 18-panel curved pattern, which helps the seams wrap smoothly around the sphere.
✏️ Artists often start a volleyball by sketching a light circle or ellipse to keep the ball perfectly round before adding panels.
💡 Good shading follows one light source: add a bright highlight, midtones, and a dark shadow plus a cast shadow for 3D realism.
🎨 The slightly textured surface of a real volleyball catches light differently than smooth spheres — tiny bumps can add realism when shaded.
How do you draw a realistic volleyball step by step?
What materials do I need to draw a realistic volleyball?
What ages is drawing a realistic volleyball suitable for?
What are the benefits of drawing a realistic volleyball for kids?
