How to draw a spaceship - a free spaceship drawing guide
Follow step-by-step instructions to draw a simple spaceship using basic shapes, add details like windows and flames, then color your finished design.

Step-by-step guide to draw a spaceship
How to Draw a Spaceship Step by Step | Art Lesson for Kids
Step 1
Gather all your materials and place the paper flat in front of you.
Step 2
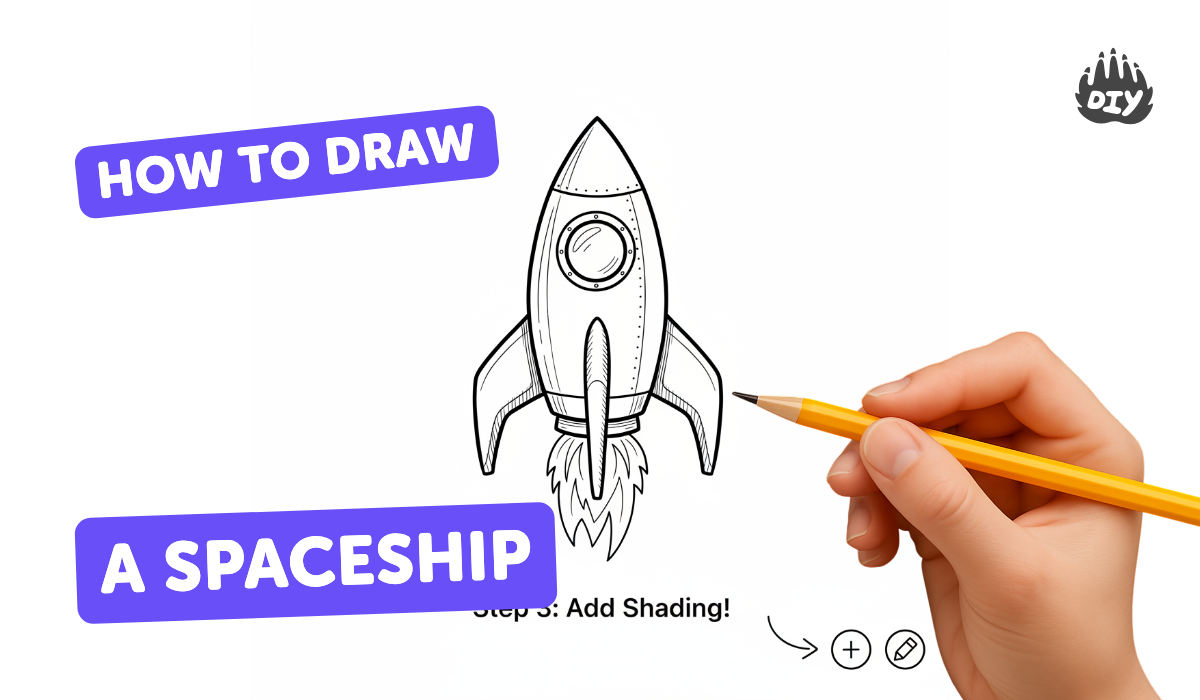
Draw a tall rounded oval in the middle of the paper for the spaceship body.
Step 3
Draw a small triangle on top of the oval to make the nose cone.
Step 4
Draw a curved fin on the left side near the bottom of the oval.
Step 5
Draw a matching curved fin on the right side near the bottom of the oval.
Step 6
Draw a wavy flame shape coming out from the bottom center of the spaceship.
Step 7
Draw two or three round windows down the center of the spaceship body.
Step 8
Add stripes or lines along the body to create panels or designs.
Step 9
Add small circles or dots to look like bolts or rivets on the panels.
Step 10
Trace over the pencil lines with a black marker or pen if you want bolder outlines.
Step 11
Gently erase any extra pencil marks you don’t need anymore.
Step 12
Color your spaceship using your colouring materials.
Step 13
Write your name or draw a little flag near the spaceship as your signature.
Step 14
Take a photo of your finished spaceship and share it on DIY.org.
Help!?
If I don't have a black marker or special colouring materials, what can I use instead?
Trace over the pencil lines with a ballpoint pen or a dark crayon instead of the black marker, and use colored pencils, crayons, or washable markers in place of other colouring materials while drawing on plain paper or a cut-open cereal box as a substitute 'paper'.
My tall rounded oval or curved fins keep looking uneven — how can I fix that step?
Lightly make small guide dots for the oval and fins or trace around a cup for a smooth rounded shape, then follow the instruction to trace over the best pencil lines with a marker and gently erase the extra pencil marks afterward.
How can I adapt this spaceship drawing for younger or older kids?
For younger children simplify by drawing one big oval, a single window, and using crayons or stickers, while older kids can add extra stripes, rivets, shading, and more detailed windows or panels as described in the steps.
What are some ways to extend or personalize the finished spaceship beyond coloring?
Add glitter or tissue-paper flames to the wavy flame shape, glue on metallic pens or sequins for the bolts and rivets, draw a space background with planets, sign it with your name or flag as the instructions say, and then take a photo to share on DIY.org.
Watch videos on how to draw a spaceship
How to Draw a ROCKET SHIP! Easy Learning Video for Kids
4 Videos
How to Draw a ROCKET SHIP! Easy Learning Video for Kids
How to Draw a Spaceship: Easy Step-by-Step Tutorial
How To Draw Spaceship Easy
How to Draw an Easy Alien Spaceship: Easy Step by Step Drawing Tutorial for Beginners
Facts about basic drawing and shapes
🚀 Rockets need to reach about 28,000 km/h (17,500 mph) to stay in low Earth orbit — that’s super fast!
🪐 Many real spacecraft, like interplanetary probes, don’t have windows at all, so artists get creative when drawing them.
🎨 A handy drawing trick is to start with simple shapes — circles, triangles, and rectangles — to build a spaceship step by step.
🔥 Flames in spaceship art often use oranges, yellows, and blues to show different temperatures and make engines look powerful.
🌟 Concept artists like Ralph McQuarrie helped design iconic movie spaceships, proving imagination makes great references for your drawings.
How do I draw a simple spaceship step-by-step?
What materials do I need to draw and color a spaceship?
What ages is this spaceship drawing activity suitable for?
What are the benefits of drawing a spaceship with kids?
