How to draw a seagull - a free seagull drawing guide
Draw a seagull step-by-step using simple shapes, shading, and perspective. Practice observation and basic drawing techniques to improve proportions and confidence.

Drawing Apps
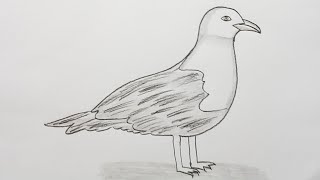
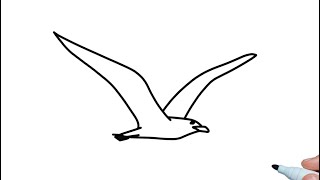
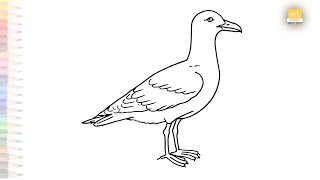
Photos of seagull drawing examples


Step-by-step guide to draw a seagull
Learn to Draw a Seagull - Fun and Easy Step-by-Step Guide! 🌊🕊️✨
Step 1
Look at a real seagull or a picture and notice the simple shapes you see like ovals circles and triangles.
Step 2
Lightly draw a big oval tilted slightly for the seagull’s body.
Step 3
Lightly draw a smaller circle overlapping one end of the oval for the head.
Step 4
Draw a short pointed triangle from the head for the beak.
Step 5
Sketch a large curved teardrop shape on the side of the body for the wing.
Step 6
Add a small fan of short straight lines at the back of the oval for the tail feathers.
Step 7
Draw two thin straight lines under the body for the legs.
Step 8
Add webbed feet at the end of each leg by drawing three short rounded toes connected with a curved line.
Step 9
Draw a small circle for the eye and add a tiny filled dot inside for the pupil.
Step 10
Lightly erase the extra overlapping guide lines so the head wing and body look connected.
Step 11
Choose where the light hits the bird and shade the belly underside of the wing and under the beak to show roundness.
Step 12
Add short feather strokes along the wing and tail to create texture.
Step 13
Trace over the final lines you want to keep with a darker pencil to make your drawing bold.
Step 14
Color your seagull and the background with your coloring materials to finish the picture.
Step 15
Share your finished seagull drawing on DIY.org.
Help!?
What can we use if we don't have a darker pencil or specific coloring materials mentioned?
If you don't have a darker pencil to 'trace over the final lines,' use a black fine-tip marker or ink pen for bold lines and substitute crayons, washable markers, or watercolor paints for the 'Color your seagull' step.
My head and body look disconnected after erasing guide lines—how can I fix that?
Before you 'lightly erase the extra overlapping guide lines,' redraw the connecting neck line softly with your regular pencil and use a kneaded eraser to lift only the unwanted guides so the head, wing, and body stay connected.
How can I change the activity to suit different ages or skill levels?
For preschoolers limit the drawing to a big oval, circle, and triangle and let them color, for early elementary follow all steps but simplify shading, and for older kids add detailed feather strokes, careful shading of the belly and wing underside, and a composed background before tracing.
What are some ways to extend or personalize the seagull drawing once it's finished?
Extend the activity by adding a shoreline, sky, or other birds to create a scene, experimenting with different 'where the light hits' directions to practice shading, or turning the finished drawing into a card or step-by-step upload for DIY.org.
Watch videos on how to draw a seagull
How to Draw a Seagull (Step by Step Tutorial)
4 Videos
How to Draw a Seagull (Step by Step Tutorial)
How to draw a Seagull easy step by step for beginners
Seagull drawings easy | Bird drawing tutorial | How to draw A Seagull step by step | #artjanag
How to Draw a Seagull in a Few Easy Steps: Drawing Tutorial for Beginner Artists
Facts about basic drawing techniques
🐦 Gulls (often called seagulls) include about 50 species found on coasts, lakes, and even cities around the world.
✏️ Artists often begin with simple shapes—circles, ovals, and triangles—to build accurate proportions for animals like seagulls.
🌊 Gulls glide and tilt their bodies while flying; capturing that angled pose with ovals makes your drawing look dynamic.
🎯 Adding a horizon line and basic perspective helps a flying gull look like it's coming toward or moving away from the viewer.
🪶 Feathers are layered—sketching the big wing feathers first makes shading and texture much easier to add later.
How do you draw a seagull step-by-step?
What materials do I need to draw a seagull?
What ages is drawing a seagull suitable for?
What are the benefits of drawing a seagull?
