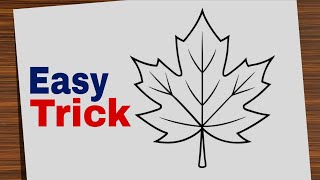
How to draw a maple leaf - a free maple leaf drawing guide
Follow step by step instructions to draw a detailed maple leaf using simple shapes, symmetry, and shading. Create a colored, realistic maple leaf.

Drawing Apps
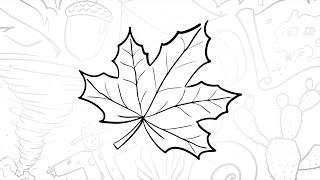
Photos of maple leaf drawing examples


Step-by-step guide to draw a maple leaf
How To Draw A Maple Leaf For Kids #kidsart
Step 1
Use the ruler and pencil to draw a straight vertical center line down the middle of your paper to be the leaf’s symmetry axis.
Step 2
Lightly mark a top tip point and a bottom stem point on the center line to set how tall your leaf will be.
Step 3
Draw a light horizontal guideline across the center line halfway between the top and bottom points to show the leaf’s middle.
Step 4
Mark four guide points for the lobes: upper-left upper-right lower-left and lower-right spaced from the center line to set the leaf width.
Step 5
Draw the full leaf outline by connecting the top tip to the upper guide points then to the lower guide points and down to the stem using jagged curved lines and try to keep both sides mirrored.
Step 6
Draw a slightly curved central vein from the top tip straight down to the stem.
Step 7
Add side veins by drawing lines from the central vein out toward each lobe tip on both sides.
Step 8
Add small serrated notches along the leaf edges to make the outline look more realistic and spiky.
Step 9
Trace the final pencil outline and veins with your black pen or fineliner.
Step 10
Wait for the ink to dry completely before touching it.
Step 11
Gently erase all remaining pencil guide lines so only the inked drawing remains.
Step 12
Fill the whole leaf with a base mid-tone color using your coloring materials.
Step 13
Add darker shading along the veins and near the edges to create depth.
Step 14
Add lighter highlights on the raised parts of the leaf to make it look shiny and realistic.
Step 15
Share your finished colored maple leaf on DIY.org.
Help!?
I don’t have a black pen or fineliner — what can I use to trace the final outline and veins?
Use a fine-tipped black marker or a sharp dark colored pencil to trace the final outline and veins, testing on scrap paper first to make sure it won’t smear when you erase the pencil guide lines.
My left and right lobes don’t look mirrored — how can I make both sides match better?
Fold the paper along the ruler-drawn center vertical line after lightly drawing one side’s jagged curved outline to transfer a faint mirror guide onto the other side, then refine both sides before inking.
How can I adapt this activity for different ages, like a preschooler versus a preteen?
For preschoolers, pre-draw the center line, top/bottom points and the four lobe guide points and let them connect with simple smooth curves and use washable markers for coloring, while preteens can add serrated notches, detailed side veins, and layered shading with colored pencils or watercolors as in the later steps.
What are some ways to extend or personalize the finished maple leaf drawing?
Personalize the leaf by experimenting with seasonal color palettes and textured shading using your coloring materials, adding a background branch or overlapping leaves, and photograph your step-by-step process to share on DIY.org as suggested.
Watch videos on how to draw a maple leaf
How to Draw a Maple Leaf | Easy Step-by-Step for Kids | Lalagram
4 Videos
How to Draw a Maple Leaf | Easy Step-by-Step for Kids | Lalagram
🍁 How to Draw a Simple Maple Leaf | Step-by-Step Lesson 🍂
How To Draw A Maple Leaf Step By Step
How to Draw a Maple Leaf | Easy Drawing Trick for Beginners
Facts about botanical drawing for kids
🍁 Maple leaves are usually palmate, with 3–9 lobes that spread out like the fingers of a hand.
🍂 In autumn, maple leaves change color because chlorophyll fades and carotenoids and anthocyanins reveal bright reds, oranges, and yellows.
🇨🇦 The stylized maple leaf has been a national symbol of Canada and appears on the Canadian flag since 1965.
🌿 Maples have opposite leaf arrangement and palmate venation — several main veins radiate from the leaf base, great guides for drawing veins.
✏️ Artists often build a realistic maple leaf by starting with simple shapes and using symmetry and vein lines to guide shading.
How do I teach my child to draw a detailed, realistic maple leaf step by step?
What materials do I need to draw a colored, realistic maple leaf with my child?
What ages is drawing a detailed maple leaf suitable for?
What are the benefits of having my child draw a realistic maple leaf?
