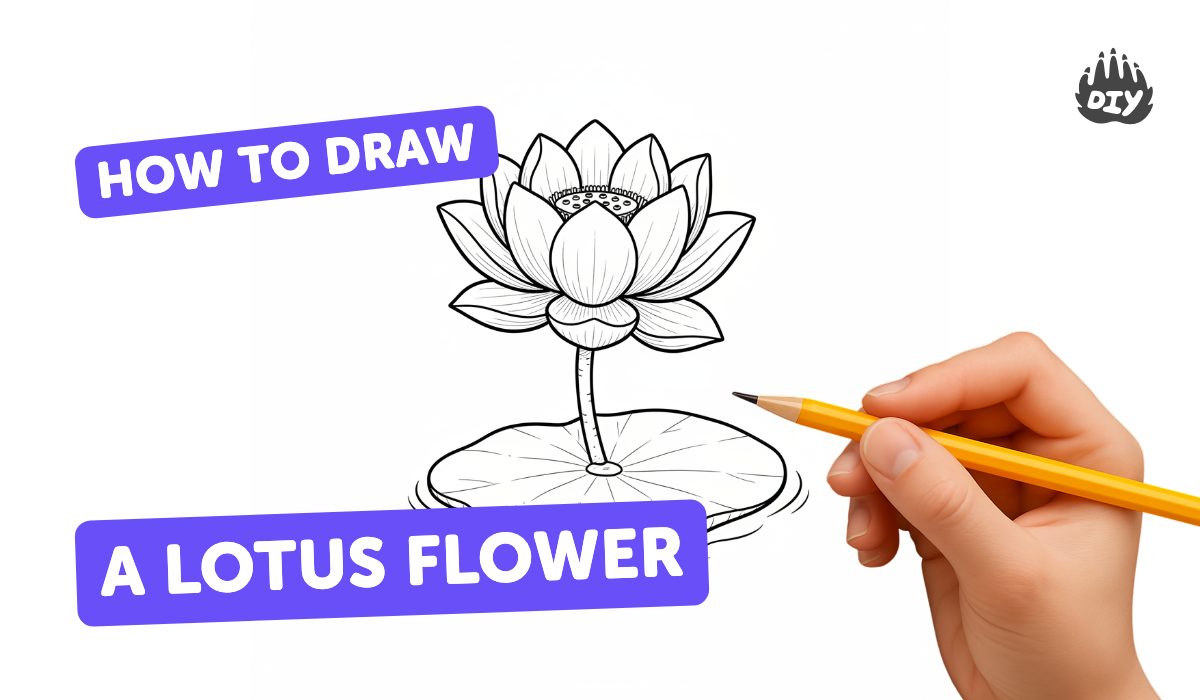
How to draw a lotus flower - a free lotus flower drawing guide
Draw a lotus flower step by step using simple shapes and shading. Practice symmetry, petal placement, and smooth pencil control.

Drawing Apps
Photos of lotus flower drawing examples


Step-by-step guide to draw a lotus flower
How to Draw a Beautiful Lotus Flower 🌸 | Step by Step for Kids & Beginners
Step 1
Gather all your materials and find a flat place to draw.
Step 2
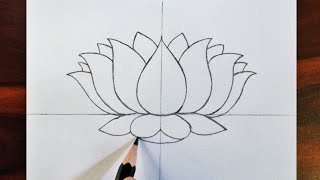
Lightly put a small dot in the middle of the paper to mark the lotus center.
Step 3
Lightly draw a vertical guideline through the dot to help keep the petals symmetrical.
Step 4
Draw a small circle around the dot to make the lotus seed pod at the center.
Step 5
Draw five large rounded outer petals evenly around the center using smooth curved lines.
Step 6
Draw five slightly smaller inner petals between the outer petals to make layers.
Step 7
Trace each petal again with a steady hand to smooth and clean the petal edges.
Step 8
Erase the vertical guideline and any stray pencil marks gently.
Step 9
Add one or two curved vein lines from the base toward the tip on each petal.
Step 10
Shade the base of each petal and the seed pod with light pencil strokes following the petal curves.
Step 11
Gently blend the shading with a tissue or blending tool to make soft shadows.
Step 12
Use a sharp pencil to darken shadow areas where petals overlap and keep a few light spots as highlights.
Step 13
Take a picture of your finished lotus and share your creation on DIY.org.
Help!?
What can I use if I don't have a blending tool or tissue for smoothing the shading?
If you don't have a blending tool or tissue, gently use a clean fingertip, a cotton swab, or folded scrap paper to blend the light pencil strokes as instructed in step 11.
My petals look uneven — how can I fix symmetry problems?
Use the small dot (step 2) and the vertical guideline (step 3) to measure spacing, lightly erase and redraw uneven outer or inner petals before tracing in step 7, then erase the guideline in step 8 only after you're satisfied.
How can I adapt this lotus drawing for different ages or skill levels?
For younger kids, pre-draw the center dot, circle, and outer petal outlines for them to trace and add one or two simple veins, while older kids can add more petal layers, detailed veins, stronger shading with a sharp pencil (step 12), or try blending techniques from step 11.
How can we personalize or enhance the finished lotus drawing?
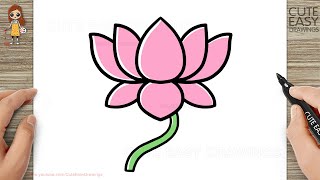
After blending and darkening overlaps (steps 11–12), personalize the lotus by adding color with colored pencils or watercolor over the light pencil, drawing a background of leaves or water, and then photograph your finished piece to share on DIY.org as suggested.
Watch videos on how to draw a lotus flower
How to Draw LOTUS✨ | Super Easy | Step by Step Tutorial | Lotus flower drawing
4 Videos
How to Draw LOTUS✨ | Super Easy | Step by Step Tutorial | Lotus flower drawing
How to Draw a Lotus Flower - Easy Drawing and Coloring Step by Step Tutorial for Kids

How To Draw A Lotus Flower Easy Step By Step

Lotus Flower Drawing for Kids | Easy Step by Step Drawing | Learn to Draw Lotus for Children
Facts about pencil drawing techniques for kids
🌸 The sacred lotus (Nelumbo nucifera) has seeds that can remain viable for over 1,000 years — one famously sprouted after about 1,300 years!
💧 Lotus leaves are super water-repellent (the “lotus effect”), so water beads roll off and carry dirt away — nature’s self-cleaning trick.
✏️ Artists use pencil grades from H (hard, light) to B (soft, dark) to build smooth shading — practicing 2H to 4B helps petals look 3D.
🔁 Lotus flowers show radial symmetry: petals radiate from a central point, making them perfect for learning balanced drawing.
🌿 Wild lotus often has about 20–30 petals, while cultivated varieties can have dozens or even hundreds of extra petals.
How do you draw a lotus flower step by step?
What materials do I need to draw a lotus flower?
What ages is drawing a lotus flower suitable for?
What are the benefits and variations of drawing a lotus flower?
