How to draw a lightbulb - a free lightbulb drawing guide
Draw a realistic lightbulb step-by-step: sketch the glass shape, add filament and base, then shade and color to learn basic drawing techniques.


Drawing Apps
Photos of realistic lightbulb drawing examples


Step-by-step guide to draw a realistic lightbulb
How to Draw a Light Bulb Cute and Easy
Step 1
Place your paper on a flat surface and put your pencil eraser and sharpener within reach.
Step 2
Lightly draw a vertical guideline down the middle of your paper to help keep the bulb symmetrical.
Step 3
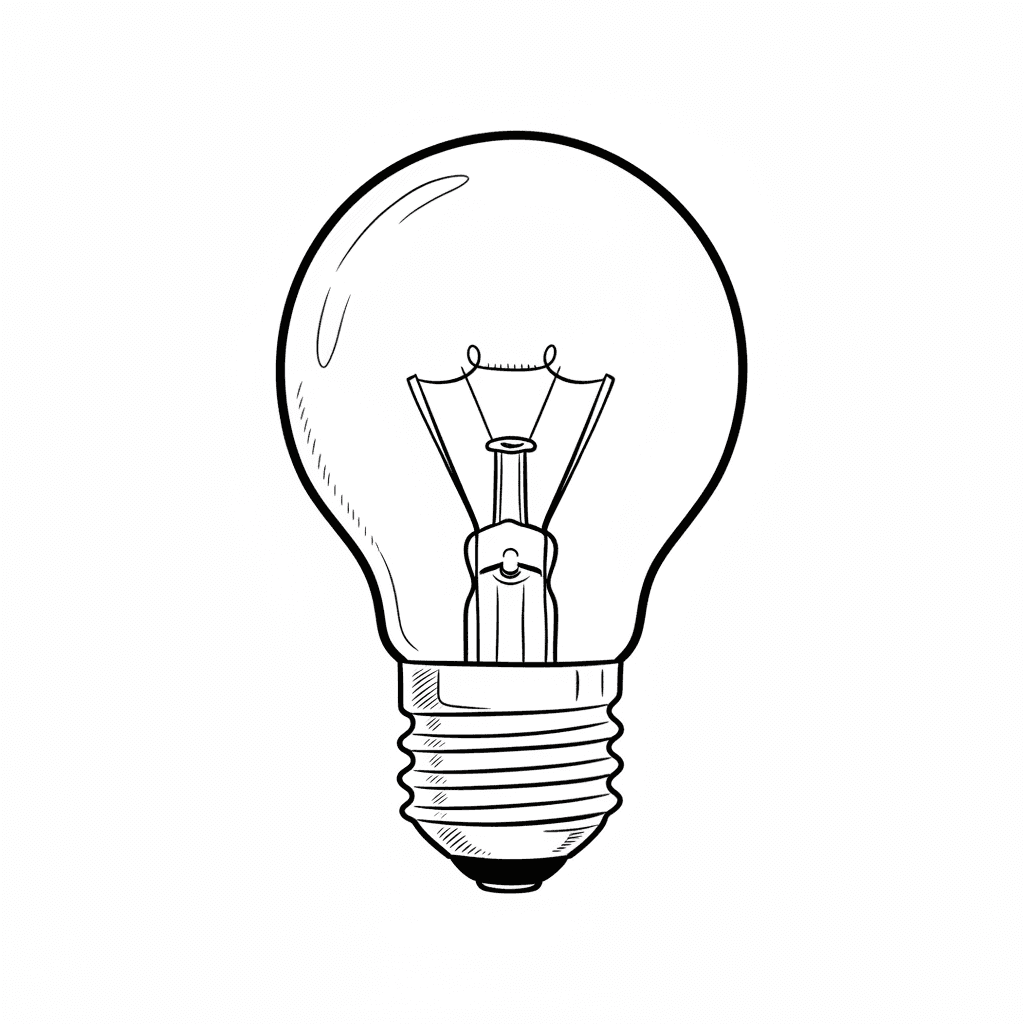
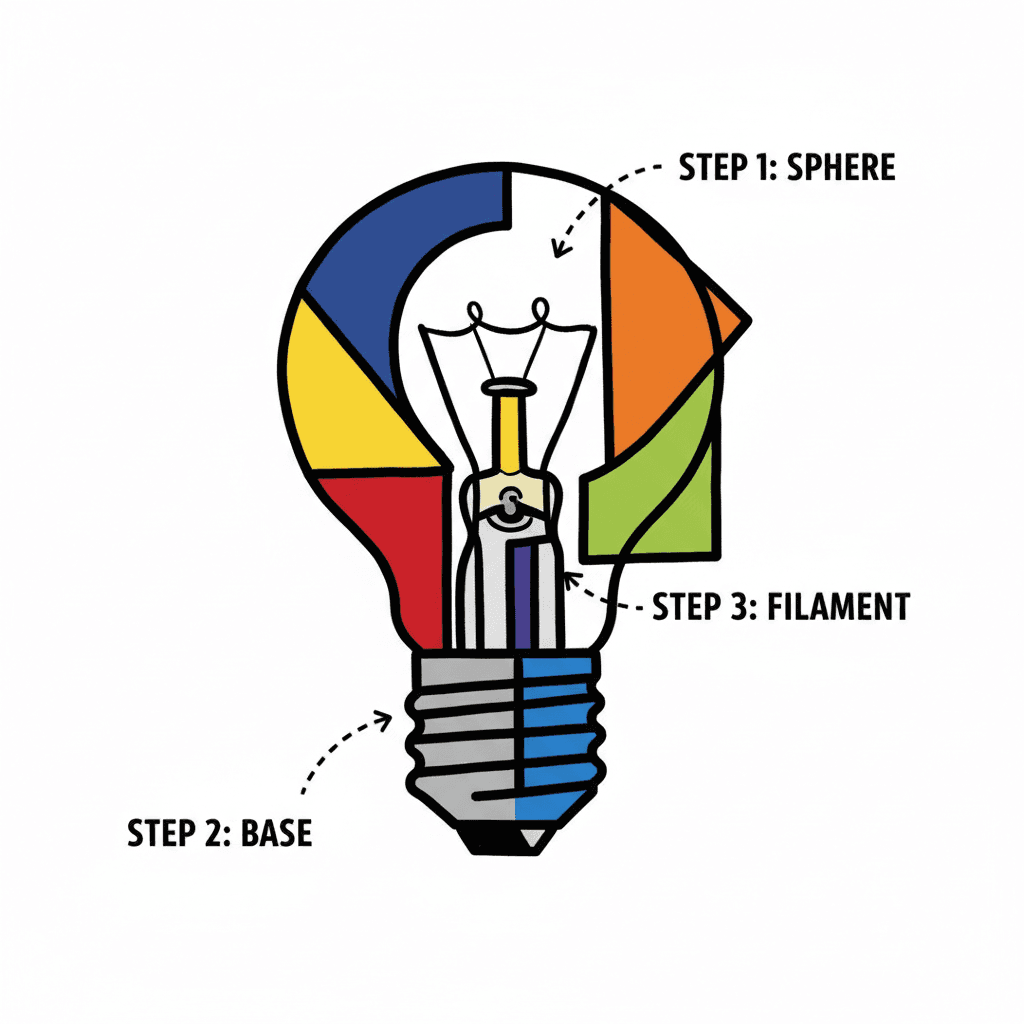
Sketch a large rounded teardrop shape around the guideline for the glass bulb using light strokes.
Step 4
Erase stray construction lines so the outer glass curve looks smooth and clear.
Step 5
Draw a short cylinder at the bottom of the bulb for the metal base by sketching two close horizontal lines and connecting them with slightly curved sides.
Step 6
Add screw grooves on the metal base by drawing several thin curved parallel lines across the cylinder.
Step 7
Draw two thin support wires from the metal base up into the bulb by sketching two straight vertical lines ending near the bulb center.
Step 8
Create the filament by connecting the support wires with a small looped coil or spiral in the bulb’s center.
Step 9
Lightly shade the glass with soft pencil strokes keeping the strokes curved to follow the bulb shape.
Step 10
Shade the metal base darker with short strokes to make it look metallic.
Step 11
Gently blend the glass shading with a tissue or cotton swab to smooth tones while keeping a bright highlight near the top.
Step 12
Share your finished lightbulb drawing on DIY.org.
Help!?
What can we use instead if we don't have a tissue, cotton swab, eraser, or pencil sharpener?
Use a folded soft tissue or cotton ball to blend the glass (step 11), a clean fingertip for gentle smudging, a kneaded or corner of a white eraser for erasing stray lines (step 4), and a craft knife or a mechanical pencil if you don't have a sharpener.
My bulb looks lopsided or the glass curve isn't smooth—how do I fix it?
Keep and retrace the vertical guideline (step 2), redraw the teardrop with very light strokes on both sides (step 3), then erase stray construction lines (step 4) before proceeding to the metal base.
How can I adapt this activity for different ages or skill levels?
For younger kids trace a pre-drawn teardrop and color the bulb, for elementary kids follow steps 2–8 and skip blending, and for older kids add a detailed spiral filament and realistic curved shading and blending from steps 9–11.
How can we make the finished lightbulb drawing more realistic or personalized?
Enhance realism by darkening the metal base with short strokes (step 10), adding reflected highlights and a soft glow around the bulb with curved shading and blending (steps 9–11), or personalize the filament shape and sign it before sharing on DIY.org (step 12).
Watch videos on how to draw a realistic lightbulb
How to make a light bulb Science Project
4 Videos

How to make a light bulb Science Project

How to Draw Christmas Holiday Lights step by step Easy and Cute

How To Draw Christmas Lights
![Lightworks - Tutorial for Beginners in 12 MINUTES ! [ FULL GUIDE 2025 ]](https://img.youtube.com/vi/68O3LXbhVfM/mqdefault.jpg)
Lightworks - Tutorial for Beginners in 12 MINUTES ! [ FULL GUIDE 2025 ]
Facts about drawing and shading techniques for kids
💡 The first commercially practical incandescent light bulb is credited to Thomas Edison and his team in 1879.
✏️ Artists often use tiny white highlights and unshaded spots to make glass look shiny and transparent.
🔧 Most modern filaments are made of tungsten because it can glow very brightly without melting.
🎨 Drawing a lightbulb is a classic still-life exercise for practicing reflections, shading, and form.
🔍 The curved surface of a bulb bends and reflects its surroundings—simplifying those reflections gives a realistic look fast.
How do I draw a realistic lightbulb step-by-step?
What materials do I need to draw a realistic lightbulb?
What ages is this lightbulb drawing activity suitable for?
What are the benefits, safety tips, or variations for drawing a lightbulb?
