How to draw a graduation cap - a free graduation cap drawing guide
Learn to draw a graduation cap step by step using simple shapes, add a tassel and shading, and practice variations to improve your drawing skills.

Drawing Apps
Photos of graduation cap drawings


Step-by-step guide to draw a graduation cap
How to Draw a Graduation Cap Step by Step Easy for Beginners/Kids - Simple Caps Drawing Tutorial
Step 1
Place your paper on a flat surface.
Step 2
Put your pencil next to the paper.
Step 3
Put your eraser and coloring materials nearby.
Step 4
Lightly draw a diamond shape in the center of the page for the flat top of the graduation cap.
Step 5
Draw a small circle at the center of the diamond for the cap button.
Step 6
Draw a short straight line from the circle toward one corner of the diamond to start the tassel knot.
Step 7
Extend a slightly curved line down from that short line to make the tassel cord.
Step 8
Draw several short strokes at the bottom of the cord to make the tassel strands.
Step 9
Draw a short horizontal rectangle directly under the diamond to form the headband that sits on the head.
Step 10
Erase any extra guide lines inside or around the shapes to clean up the drawing.
Step 11
Add light shading with diagonal lines on one side of the diamond and under the headband to make shadows.
Step 12
Draw two more caps on the same page using different sizes angles or tassel styles to practice variations.
Step 13
Share your finished graduation cap drawings on DIY.org.
Help!?
What can we use instead of the listed coloring materials or pencil if we don't have them?
Use crayons, washable markers, or water-based paint to color and shade the diamond and headband, and replace the pencil with a ballpoint pen or a sharpened stick for the initial diamond and tassel lines if needed.
My diamond top looks lopsided or the tassel is messy — how can I fix it?
Lightly add a faint vertical and horizontal guideline to center the diamond, redraw the short tassel knot line and cord with soft pencil strokes, then gently erase extra guide lines as instructed to clean up the shapes.
How can this activity be adapted for different ages or skill levels?
For toddlers or preschoolers, give a large printed diamond and rectangle template to trace and use chunky crayons, while older kids can refine the slightly curved tassel cord, practice diagonal shading for shadows, and draw two more caps with varied sizes and angles to increase challenge.
What are some ways to enhance or personalize the graduation cap drawing?
Add a school name or pattern on the headband, try different tassel styles and heavier diagonal shading under the headband for depth, or turn one drawing into a cut-out cardstock cap to make a 3D keepsake before sharing on DIY.org.
Watch videos on how to draw a graduation cap
How to Draw a Graduation Hat | Easy Step by Step Drawing Tutorial
4 Videos
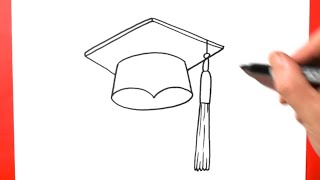
How to Draw a Graduation Hat | Easy Step by Step Drawing Tutorial

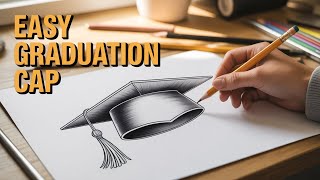
How to DRAW GRADUATION CAP Easy Drawing Tutorials
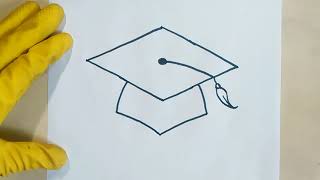
How To Draw A Graduation Cap Step By Step
how to draw a Graduation Cap 🎓 Hat Step By Step Easy Instructions scroll Middle High School College
Facts about drawing for kids
🎓 The graduation cap is commonly called a mortarboard because its flat square resembles the board bricklayers used to hold mortar.
🏛️ Academic dress — including caps — goes back to medieval European universities, so graduation hats have a centuries-old history.
✏️ Drawing tip: a graduation cap can be built from simple shapes — a diamond for the top and a short cylinder or band for the skullcap.
🎗️ Tassel tradition: many ceremonies have graduates move the tassel from the right side to the left to show their degree is conferred.
💡 Shading magic: adding darker tones on one side of the cap and a shadow under the brim makes a flat drawing look 3D.
How do I teach my child to draw a graduation cap step by step?
What materials do I need to draw a graduation cap with my child?
What ages is learning to draw a graduation cap suitable for?
What are the benefits and fun variations of drawing a graduation cap?
