How to draw a cowboy boot - a free cowboy boot drawing guide
Draw a cowboy boot step by step using basic shapes, lines, and shading. Practice proportion and add decorative stitching to personalize your drawing.

Drawing Apps
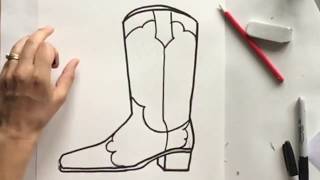
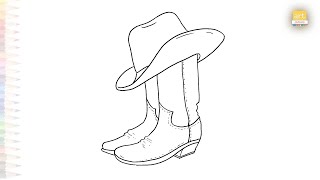
Photos of cowboy boot drawing examples


Step-by-step guide to draw a cowboy boot
How to Draw Cowboy Boots - Easy Western Drawing Guide for Kids
Step 1
Gather all your materials and find a flat table to work on.
Step 2
Draw a light vertical center guideline down the middle of your paper.
Step 3
Draw a light horizontal baseline near the bottom where the boot will sit.
Step 4
Draw a tall rectangle above the baseline along the center line to make the boot shaft.
Step 5
Draw a long curved shape from the bottom of the shaft to the right to form the boot toe.
Step 6
Draw a small angled rectangle at the back of the baseline to create the heel block.
Step 7
Draw a smooth outer curve connecting the shaft toe and heel to make the boot outline.
Step 8
Draw a thin line parallel to the bottom of the boot to show the sole thickness.
Step 9
Draw a curved inner line near the top of the shaft to show the boot opening.
Step 10
Add stitching details on the shaft and seams using dashed lines and little curved shapes.
Step 11
Draw a decorative ornament on the toe like a swirl V or star to personalize the boot.
Step 12
Shade gently under the sole and along the inner curve of the foot to make the boot look 3D.
Step 13
Erase the light guide lines and tidy any sketchy lines for a clean drawing.
Step 14
Color your cowboy boot using your favorite colors to finish your design.
Step 15
Take a picture and share your finished cowboy boot creation on DIY.org.
Help!?
What can I use if I don't have a light pencil or eraser?
If you don't have a light pencil or eraser for the center guideline and later erasing step, make faint guide lines with a light-colored crayon or a hard HB pencil and remove them with a kneaded eraser or a soft cloth.
My boot outline looks uneven when I connect the shaft, toe, and heel — how do I fix it?
Use the vertical center guideline and horizontal baseline to reposition the tall shaft rectangle and small angled heel rectangle, then draw the long curved toe and smooth outer curve lightly in several passes before committing to the final line.
How can I adapt the activity for younger and older kids?
For younger kids, trace or pre-draw the tall rectangle shaft, toe curve, and heel block and let them add simple stickers for the decorative ornament, while older kids can add detailed dashed stitching, complex toe ornaments, and stronger 3D shading under the sole.
How can we extend or personalize the boot beyond the basic drawing?
Personalize and extend the design by experimenting with mixed media like markers, fabric, or glitter on the toe ornament, drawing a matching second boot or cowboy scene, and completing the final step to photograph and share it on DIY.org.
Watch videos on how to draw a cowboy boot
How To Draw Cowboy Boots EASY!
4 Videos
How To Draw Cowboy Boots EASY!
How to Draw a Cowboy/ Cowgirl Boot
How to Draw Cowboy Boots: Easy Step by Step Drawing Tutorial for Beginners
Cowboy hat boots drawing easy | Outline sketches | How to draw boots hat step by step | #artjanag
Facts about drawing and sketching for kids
👢 Cowboy boots have high shafts and no laces so riders can slip them on and off quickly while in the saddle.
🤠 The classic cowboy boot style was popularized in the 19th-century American West and blended function with fashion.
🪡 Decorative stitching on cowboy boots began as reinforcement for the leather and evolved into unique personal designs.
🐴 While cowhide is common, cowboy boots are also made from exotic leathers like ostrich, snake, and alligator.
🎨 Drawing a boot is a great way to practice proportion, perspective, and adding texture with shading and stitch details.
How do I draw a cowboy boot step by step?
What materials do I need to draw a cowboy boot?
What ages is drawing a cowboy boot suitable for?
What are the benefits, safety tips, and variations for this drawing activity?
