How to draw a compass - a free compass drawing guide
Draw a compass rose using pencil, ruler, and protractor. Label cardinal and intermediate directions to practice measuring angles and map skills.

Drawing Apps
Photos of compass rose examples


Step-by-step guide to draw a compass rose
How to Draw a Compass - Easy Step by Step Tutorial for Kids
Step 1
Put your paper on a flat surface and place your pencil eraser ruler and protractor beside it so they are easy to reach.
Step 2
Use the ruler to draw a light vertical line down the middle of the paper.
Step 3
Use the ruler to draw a light horizontal line across the middle so the two lines cross at the center.
Step 4
Make a small dot at the place where the two lines cross to mark the center of your compass rose.
Step 5
Put the protractor's midpoint on the center dot align 0° with the top of the vertical line mark 45° and draw a light line through the center to make one diagonal.
Step 6
Put the protractor back on the center dot mark the opposite 45° (or 135°) and draw the other diagonal through the center.
Step 7
Use the ruler to measure the same distance from the center along each of the eight lines and put a small dot at that equal distance on every line.
Step 8
Draw a small triangle or pointed petal at each dot so every line ends in a neat compass point.
Step 9
Gently erase the extra light guide lines so only your compass points center and dots remain visible.
Step 10
Write N at the top point E at the right point S at the bottom point and W at the left point then label the diagonal points NE SE SW NW.
Step 11
Color your compass rose using colored pencils or crayons to make it bright and easy to read.
Step 12
Take a photo of your finished compass rose and share your creation on DIY.org.
Help!?
What can we use if we don't have a protractor, ruler, or pencil eraser as the instructions ask?
If you don't have a protractor, print a paper protractor or use a protractor app to mark 45° and 135°, use a straight-edged book or the edge of a cereal box as a ruler for the vertical/horizontal lines, and use the pencil tip or a small coin to make the center dot instead of the eraser.
My diagonal lines don't meet exactly at the center or my guide lines smudge when erasing—how can I fix that?
Make sure the protractor's midpoint sits exactly on the center dot before marking 45° and 135°, draw all guide lines lightly with the pencil as the steps say, and erase gently with short strokes to remove extra lines without smudging the compass points.
How can I adapt the activity for different ages so it's easier for little kids and more challenging for older kids?
For younger children, skip the diagonal steps and just draw and label the four points N, E, S, W after drawing the vertical and horizontal lines, while older kids can follow all steps precisely, measure equal distances with the ruler for all eight lines, and add smaller, sharper triangles at each dot.
What are some creative ways to extend or personalize our compass rose after finishing and before sharing on DIY.org?
Enhance your finished compass by tracing a light circle with a lid around the points, adding degree labels beside each line, decorating the center with patterns or your name, and mounting it on cardboard before coloring and photographing it for DIY.org.
Watch videos on how to draw a compass rose
How to draw a Compass / easy drawing for beginners
4 Videos
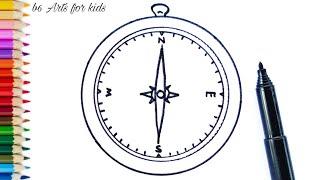
How to draw a Compass / easy drawing for beginners
🧭 How to Draw a Compass - Easy Step-by-Step Guide! #howtodraw #drawingtutorial #learntodraw

Compass Drawing Tutorial - Easy Art for Little Hands
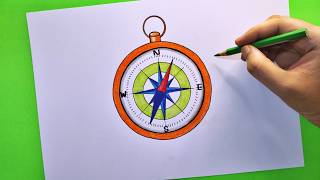
Navigation Compass Drawing | how to draw compass easily step by step | magnetic compass drawing
Facts about map skills and basic geometry
🧭 Many compass roses show 32 points — the classic mariner’s compass — but simple map roses often show just 4 or 8 directions.
📐 Most classroom protractors measure 0°–180°, while full-circle protractors can measure a full 360° for exact bearings.
🧲 A magnetic compass points toward magnetic north, which can be several degrees away from true (geographic) north — that difference is called magnetic declination.
🌍 Cardinal directions (N, E, S, W) are each 90° apart; intermediate directions like NE, SE, SW, and NW sit at 45° angles between them.
✏️ Medieval mapmakers often marked north on a compass rose with a fleur-de-lis — a decorative touch you can try when drawing your rose.
How do you draw a compass rose step-by-step?
What materials do I need to draw a compass rose?
What ages is drawing a compass rose suitable for?
What are the learning benefits of drawing a compass rose?
