Hack Your Remote Control!
Build a custom remote using cardboard, batteries, LEDs, and pushbuttons to learn about simple circuits, signaling, and how remotes send commands.


Step-by-step guide to Hack Your Remote Control
How To Connect Parental Remote Control On Power Wheels Car
Step 1
Gather all materials and clear a flat workspace
Step 2
Cut a rectangle from the cardboard to make the remote shape
Step 3
Use the marker to draw and label where each button will go on the cardboard
Step 4
Cut or poke small holes at each button spot just big enough for an LED to fit
Step 5
Look at each LED and find the longer leg which is the positive leg and the shorter leg which is the negative leg
Step 6
Push each LED through its hole with the longer leg pointing inside the remote and tape or glue the LED in place
Step 7
Use a short piece of wire to connect the longer leg of an LED to one terminal of its pushbutton and repeat for each LED and button pair
Step 8
Connect a wire with a 220 ohm resistor inline from the other terminal of each pushbutton to the positive terminal of the battery holder and repeat for each button
Step 9
Connect a wire from the shorter leg of each LED to the negative terminal of the battery holder and repeat for each LED
Step 10
Insert the two AA batteries into the battery holder
Step 11
Press each pushbutton to test that its LED lights and tighten any loose taped connections if a light does not come on
Step 12
Decorate your remote with the marker tape and stickers to make it look cool
Step 13
Share your finished creation on DIY.org
Help!?
Can we substitute any hard-to-find parts like the battery holder or pushbuttons?
If you don't have a battery holder, tape two AA batteries end-to-end and attach wires to the + and - ends for the battery connections, and if you can't find pushbuttons use a paperclip or small binder clip as a makeshift switch in place of the pushbutton when you 'connect a wire...to one terminal of its pushbutton' step.
What should we check if an LED doesn't light when its button is pressed?
Make sure the LED's longer leg is pushed inside and connected to the pushbutton terminal, the shorter leg is wired to the battery negative terminal, the 220 ohm resistor leads from the other pushbutton terminal to battery positive are connected, and tighten any loose taped connections or replace the two AA batteries.
How can we adapt this activity for younger or older kids?
For younger children have an adult pre-cut the cardboard rectangle and poke the LED holes while they draw, label, and stick LEDs in place, and for older kids extend the project by wiring more LED-button pairs on a breadboard or soldering connections instead of using tape as described in the 'connect a wire...repeat for each button' steps.
How can we enhance or personalize the finished remote?
After pressing each pushbutton to test the LEDs, personalize the outcome by using different colored LEDs tied to labeled buttons, adding a buzzer or simple microcontroller for patterns, and decorating the cardboard with marker, tape, and stickers from the final step.
Watch videos on how to Hack Your Remote Control
How to Use a Universal Learning Remote. and Simplify Your Remote Controls
4 Videos
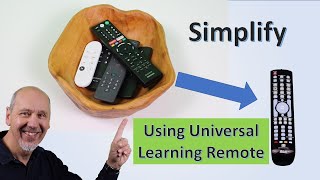
How to Use a Universal Learning Remote. and Simplify Your Remote Controls
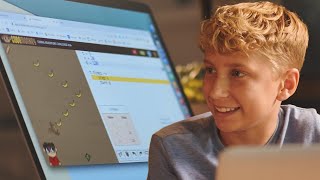
CodeMonkey - The Leading Coding for Kids Platform

how to setup ipad for children to keep them safe | ipad parental controls
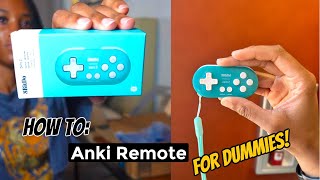
HOW TO: Anki remote for dummies (VERY DETAILED)
Facts about basic electronics for kids
🕹️ The first mass-market TV remote, Zenith's "Lazy Bones" (1950), was actually wired — wireless remotes came later.
📡 Most TV remotes use infrared (IR) light to send commands — IR is invisible to our eyes but your smartphone camera can often spot the flashes.
🔦 LEDs were first practical in 1962 and early LEDs only emitted red light; today LEDs come in many colors and use very little energy.
🔋 A simple DIY remote can run for days or weeks on AA batteries, but LEDs need current-limiting resistors or they'll burn out and drain power fast.
⚡ Wiring tip: LEDs in series need higher voltage, while LEDs in parallel keep the same voltage but draw more current — great to test with cardboard mock-ups.
How do I build a custom 'Hack Your Remote Control' project with cardboard, LEDs, and pushbuttons?
What materials do I need to hack my remote and build a custom cardboard remote?
What ages is the 'Hack Your Remote Control' activity suitable for?
What are the benefits of having my child build a custom remote?
