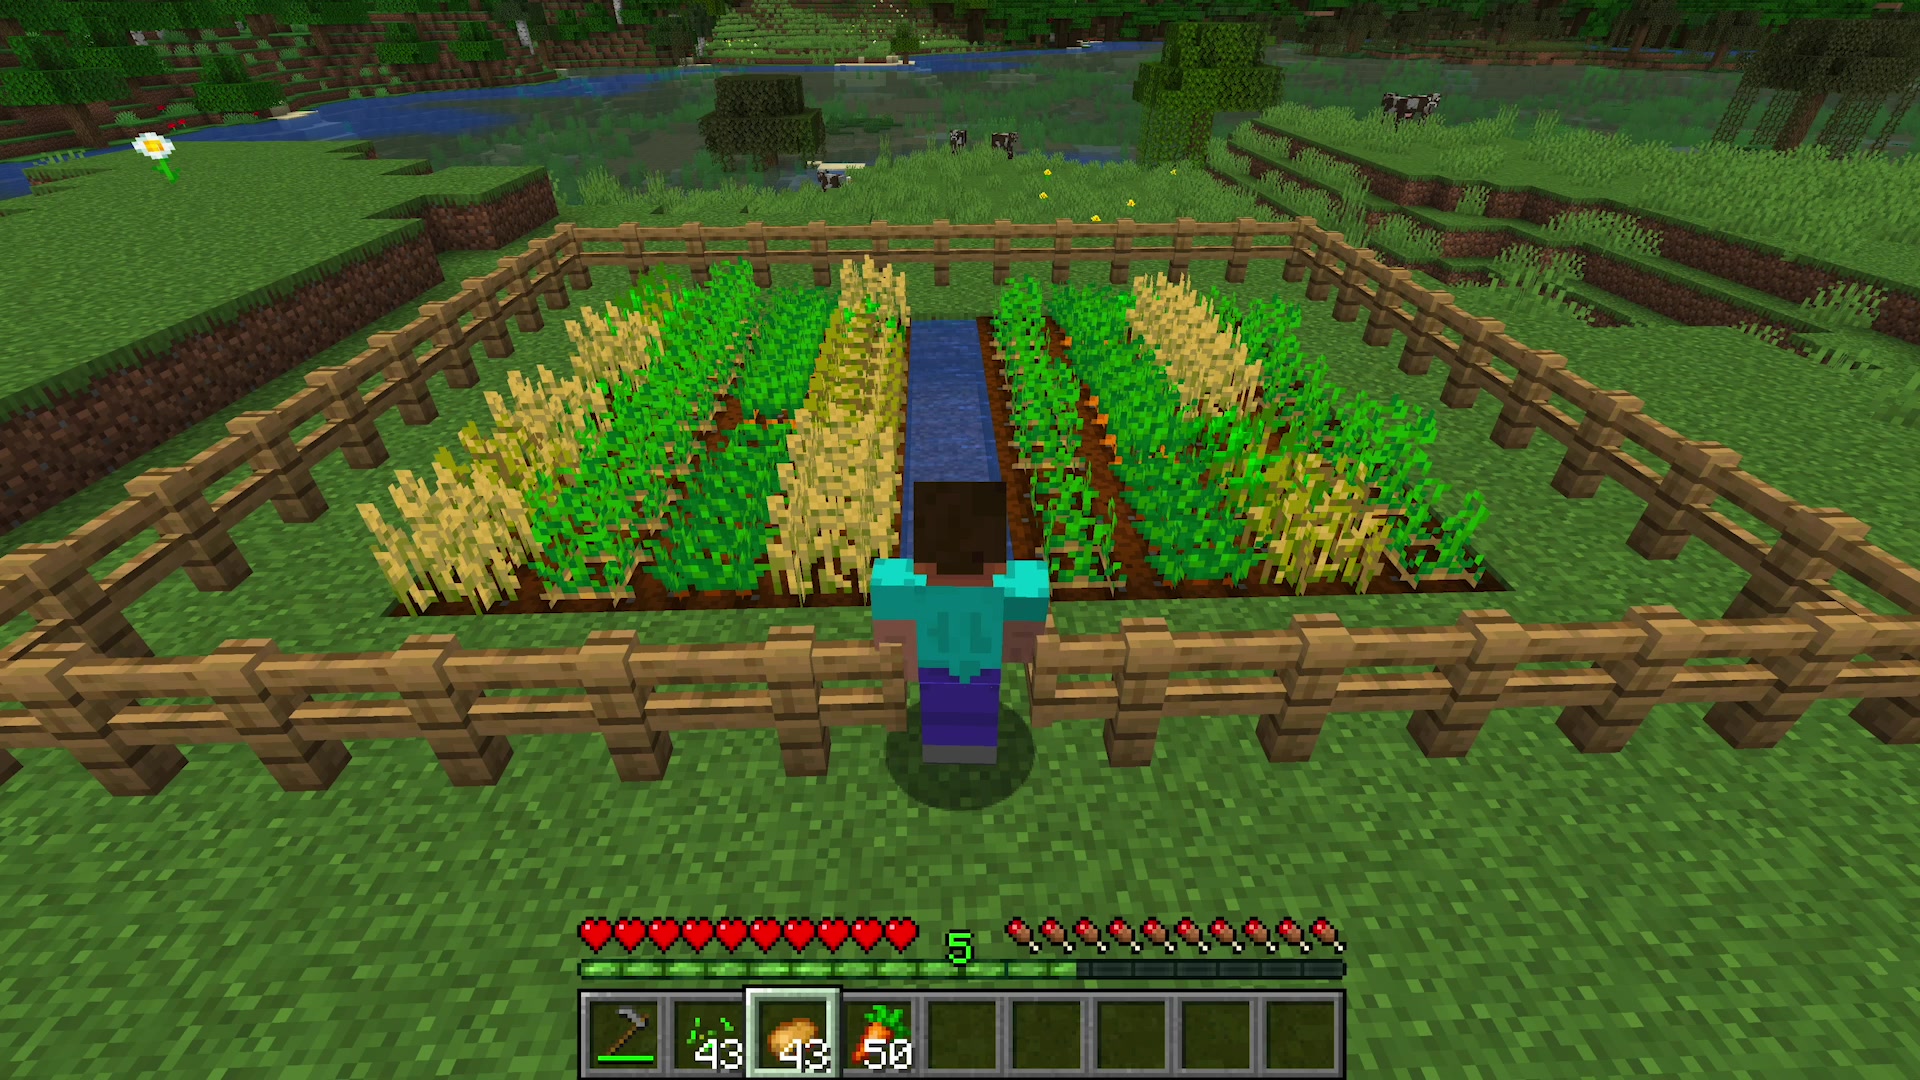
Grow a Crop in Minecraft
Plant seeds in Minecraft, water and light the farm, use bone meal to speed growth, then harvest and count your crop yield.


Step-by-step guide to grow a crop in Minecraft
Step 1
Open Minecraft and enter a world where you can build a farm.
Step 2
Grab or craft a hoe and put it in your hotbar.
Step 3
Find a flat dirt area about five by five blocks to make your farm.
Step 4
Use the hoe on each dirt block to turn them into farmland.
Step 5
Place a water source block near the farmland so all blocks stay hydrated.
Step 6
Put torches or other light sources around the farm so it stays bright at night.
Step 7
Select your seeds and plant one seed on each tilled farmland block.
Step 8
Use bone meal on some planted seeds to make them grow faster.
Step 9
If plants are not fully grown, wait in game until you see the crops reach maturity.
Step 10
Harvest only fully grown crops by breaking them to collect the items.
Step 11
Open your inventory and count the number of crop items you collected.
Step 12
Replant seeds on the empty farmland blocks so your farm will grow again.
Step 13
Place a chest near your farm to store extra crops and seeds.
Step 14
Put extra harvested crops into the chest to save them for later.
Step 15
Share your finished Minecraft farm and your crop count on DIY.org.
Help!?
What can I use if I don't have a hoe, seeds, or torches?
If you don't have a hoe, craft any wooden/stone/iron hoe (step 2); if torches are missing, use lanterns or glowstone for light (step 5); and if seeds are scarce, get seeds by breaking tall grass or use seeds from harvested crops (steps 7 and 9).
My farmland keeps turning back to dirt or seeds won't plant—what should I check?
If farmland reverts to dirt or seeds won't plant, confirm you used the hoe on each dirt block (step 4), that a water source block is within four blocks to keep farmland hydrated (step 5), and that there is enough light from torches at night (step 6), and use bone meal (step 8) to speed growth if needed.
How can I adapt this farm activity for different ages?
For younger kids, make a smaller 3x3 farm and pre-till soil and place seeds and torches for them to harvest (steps 3–7), while older kids can expand to larger plots, experiment with bone meal and automated collection into a chest using hoppers (steps 8 and 12–14) before sharing on DIY.org (step 15).
What are some ways to improve or personalize my Minecraft farm?
Enhance your farm by adding a fence and gate to protect crops (steps 5–6), mixing crop types and using bone meal on select plots for quick harvests (steps 7–8), connecting hoppers to the chest for automatic storage (steps 12–14), and decorating with paths or signs before posting your crop count on DIY.org (step 15).
Watch videos on how to grow a crop in Minecraft
NEW Ultimate Minecraft Farming Guide 1.21 | How To Farm EVERY Crop in Minecraft
4 Videos
NEW Ultimate Minecraft Farming Guide 1.21 | How To Farm EVERY Crop in Minecraft

Minecraft Crop Farming Guide - How to Make Crops Grow Fast

The Ultimate Minecraft 1.21 Crop Farming Guide - Tips and Tricks to Efficiently Grow Food
Minecraft: 5 AESTHETIC Crop Farm Tutorial (how to build 1.21)
Facts about Minecraft farming
🌾 Minecraft wheat drops 1 wheat and 0–3 seeds when harvested, so you can replant from your haul.
💀 One bone crafts into 3 bone meal — a quick fertilizer that advances crop growth stages instantly.
💦 A single water source hydrates farmland in a 9×9 area (4 blocks away), so one water block can cover many crops.
☀️ Crops need a light level of 9 or higher to grow, so add torches or glowstone for night farming.
🔢 Using bone meal plus proper hydration and light can turn a tiny starter plot into a self-sustaining farm.
How do I grow a crop in Minecraft?
What materials do I need to grow a crop in Minecraft?
What ages is growing crops in Minecraft suitable for?
What are the benefits, safety tips, or fun variations for Minecraft farming?
