Draw in perspective
Draw a simple room and street using one point and two point perspective, practicing horizon lines, vanishing points, and creating depth.

Drawing Apps
Step-by-step guide to drawing in perspective
How to Draw Perspective for Beginners
Step 1
Place one sheet of paper on the table in landscape (wide) position.
Step 2
Draw a straight vertical line down the center to make two drawing areas.
Step 3
On the left area draw a horizon line about one third from the top.
Step 4
Make one small dot on that left horizon to be the one-point vanishing point.
Step 5
Draw a rectangle in the middle of the left area to be the back wall of the room.
Step 6
Use your ruler to draw straight lines from each corner of that rectangle toward the vanishing point to form the room sides.
Step 7
Draw horizontal lines between the side lines to close the floor and ceiling of the room.
Step 8
On the right area draw a horizon line about one third from the top for the street scene.
Step 9
Put two small dots far apart on that right horizon to be the two vanishing points.
Step 10
Draw a straight vertical line in the right area to be the corner edge of a building.
Step 11
Draw straight lines from the top and bottom of that vertical line toward each vanishing point to make two building faces.
Step 12
Draw small rectangles on the building faces to be windows and one rectangle for a door.
Step 13
Color your room and street to show light and depth using your colouring materials.
Step 14
Share your finished creation on DIY.org
Help!?
What can we use if we don’t have a ruler to draw the center line and the vanishing-point lines?
Use a straight edge like a hardcover book, the edge of a cereal-box cardboard, or a printable ruler and keep it flush to the paper when drawing the vertical center line and the corner-to-vanishing-point lines.
My room sides look skewed and don't meet the one-point vanishing dot—how do I fix that?
If the room sides don't meet the one-point vanishing dot cleanly, erase and redraw them lightly with your straightedge from each corner of the back-wall rectangle directly to the vanishing dot, extending the lines until you can draw neat horizontal floor and ceiling lines between them.
How can I change the activity for different ages so it's not too hard or too easy?
For younger children, pre-draw the vertical center line, the left horizon and the back-wall rectangle so they only have to connect corners to the one-point vanishing dot and color, while older kids can add the two-point street scene, extra buildings, foreshortened furniture and stronger shading with colouring materials to increase complexity.
What are some ways to extend or personalize the drawing once the room and street are complete?
Personalize the scene by choosing a light source and adding cast shadows in the room, taping patterned paper or magazine cutouts for window details, drawing people and street signs on the two-point right area, and using gradient coloring to emphasize depth before sharing on DIY.org.
Watch videos on how to draw in perspective
How to Draw using 1-Point Perspective: Simple Hallway for Beginners
4 Videos
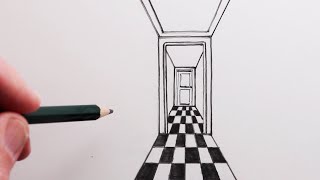
How to Draw using 1-Point Perspective: Simple Hallway for Beginners
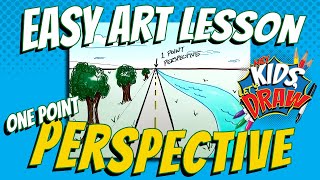
How to Draw One-Point Perspective - Easy Art Lesson for Kids
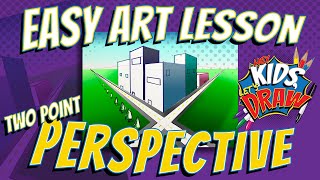
How to Draw Two-Point Perspective - Easy Art Lesson for Kids

How to Draw Perspective - A Simple Guide and Sketching Tutorial
Facts about perspective drawing
🎯 In one-point perspective, all receding lines meet at a single vanishing point on the horizon.
🧭 Two-point perspective uses two vanishing points to show corners and make scenes look more realistic.
🕰️ Artists like Filippo Brunelleschi demonstrated linear perspective in the early 1400s, changing how we draw space!
👀 The horizon line equals the viewer's eye level — moving it up or down changes how tall or deep a scene feels.
📐 Objects appear smaller the farther away they are (foreshortening), a key trick to create depth.
How do I teach a child to draw a simple room and street using one-point and two-point perspective?
What materials do I need to draw one-point and two-point perspective with kids?
What ages are perspective drawing activities suitable for?
What are the benefits of teaching kids one-point and two-point perspective?
