Design Your Own Gift Paper!
Decorate and create your own gift wrapping paper using paints, stamps, and stencils; learn pattern design, measuring, and creativity while making unique sheets.


Step-by-step guide to design your own gift paper
Step 1
Spread newspaper across your table to protect it.
Step 2
Tape your large sheet of paper to the table so it stays flat while you work.
Step 3
Use the ruler and pencil to measure and lightly mark the area you want to decorate.
Step 4
Squeeze two or three paint colors onto your palette so they are ready to use.
Step 5
Practice pressing your stamps or stencils on the scrap paper to see how they look.
Step 6
Use a sponge or large brush to paint a light background color over the gift paper.
Step 7
Let the background dry completely before you add more paint.
Step 8
Make evenly spaced guide dots with the ruler and pencil to plan your repeating pattern.
Step 9
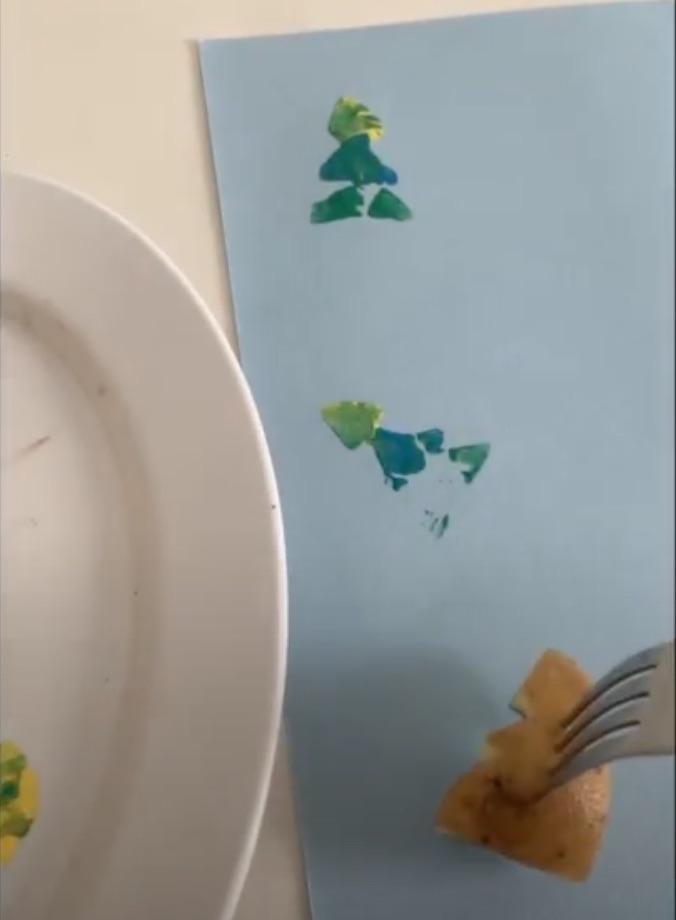
Dip a stamp or sponge into paint and press it onto each guide dot to build a pattern.
Step 10
Hold a stencil in place and dab paint inside the shape to add special accents.
Step 11
Add small details like dots lines or tiny drawings with a paintbrush or markers.
Step 12
Let your finished wrapping paper dry then gently remove the tape and trim any edges.
Step 13
Share your finished creation on DIY.org.
Help!?
What can we use if we don’t have stamps, stencils, or a paint palette?
If you don’t have stamps or stencils use cut potatoes, bottle caps, or cardboard shapes and replace a paint palette with a paper plate or old ice-cream lid for squeezing your paint colors.
My stamps smudge or the paint bleeds — what should I do?
Blot excess paint on the scrap paper after practicing, press stamps straight down (don’t slide) onto each guide dot, and wait until the sponge-painted background is completely dry before stamping to prevent smudging.
How can I change the activity for younger or older kids?
For younger kids, tape the large sheet and pre-make the guide dots and let them use sponges and washable paint with adult help for trimming, while older kids can measure with the ruler, create precise repeating patterns, add tiny details with markers, and experiment with layered stencils.
How can we personalize or make the wrapping paper fancier?
Add metallic or glitter paint for accents, use the stencil step to paint names or initials, layer colors from the palette when stamping, and trim the edges into neat shapes before sharing your finished creation on DIY.org.
Watch videos on how to design your own gift paper
Paper Craft ideas for Kids - 7 simple crafts for kids
3 Videos
Paper Craft ideas for Kids - 7 simple crafts for kids

How To Make A Candy Gift Box | Paper Craft Ideas
Paper craft / Art and craft / Easy craft ideas / Crafting / Cute gift ideas / How to make
Facts about paper crafts and pattern design
🎁 Before store-bought wrapping paper, people wrapped gifts in reusable cloth, newspapers, or decorated boxes — you're continuing an old tradition!
🎨 Stencils have been used for thousands of years to repeat shapes quickly — ancient artists used them for murals and decorations.
✏️ Printmaking techniques like stamping let you create many matching patterns fast, while each print still stays a tiny one-of-a-kind!
📏 Designers make seamless repeating patterns by measuring and repeating a motif evenly so sheets look continuous.
🥔 Potato stamps are a classic kid-friendly trick — carve a shape into a halved potato, dip in paint, and stamp away!
How do I make custom gift wrapping paper with my child?
What materials do I need to design my own gift paper?
What ages is designing your own gift paper suitable for?
What are the benefits and creative variations of making your own gift paper?
