Craft DIY Coasters Using Rope!
Make sturdy DIY coasters by coiling and gluing rope or twine onto cardboard or cork; learn measuring, pattern-making, and safe crafting methods.

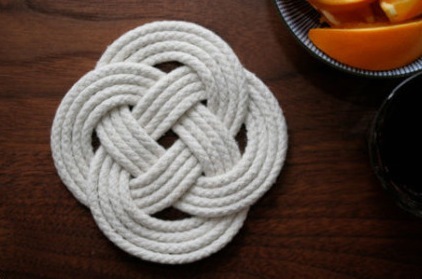

Step-by-step guide to make DIY rope coasters
How to make rope coasters
Step 1
Put your coaster base flat on your clean workspace so it sits steady.
Step 2
Pick whether you want one color or a stripe pattern so you know which rope(s) to use.
Step 3
Use the ruler to measure 120 centimeters of rope and hold the rope straight before cutting.
Step 4
Cut the rope at the measured spot with the scissors to make one piece for your coaster.
Step 5
Make a tiny pencil dot at the exact center of the coaster base to mark where the coil will start.
Step 6
Squeeze a small dot of hot glue on the pencil center mark (ask an adult to help with the glue).
Step 7
Press one end of your rope onto the center dot of glue and hold it still until it sets.
Step 8
Squeeze a small dab of hot glue about one centimeter ahead of the outer edge of the coil.
Step 9
Wrap the rope one full loop around the center so the new loop sits on top of the glued spot.
Step 10
Press the new loop gently onto the dab of glue so it sticks firmly (hold until set).
Step 11
Repeat steps 8 through 10, moving the glue dab outward and wrapping each loop, until the coaster is covered and reaches the edge of the base.
Step 12
Trim the rope end leaving a one centimeter tail and glue that tail down securely to the back of the coaster.
Step 13
Cut a felt circle to the size of the coaster back and glue it on for a soft finish.
Step 14
Let the glue dry completely for at least 10 minutes before using the coaster.
Step 15
Share a photo of your finished coaster creation on DIY.org
Help!?
If I can't find hot glue or the exact rope, what can I substitute?
If you don't have hot glue, use a strong craft or fabric glue but press and hold each loop longer than step 9 because steps 6 and 8–10 rely on quick setting, and if rope isn't available use thick cotton twine, jute, or a flat shoelace cut to the 120 cm called for in step 3.
My coils keep sliding or the rope lifts—how do I fix that?
Ensure the pencil center dot in step 5 is precise, apply small dabs of glue as instructed in step 8 about one centimeter ahead, press each loop onto the dab in step 9 holding until set or use a clothespin to clamp briefly so the coil lays flat to the edge.
How can I adapt this activity for younger children or for older kids who want more challenge?
For younger children, pre-measure and pre-cut the 120 cm rope in step 3 and have an adult handle the hot glue in steps 6–10, while older kids can plan stripe patterns in step 2, measure and glue independently, and try more precise trimming and decorative stitches in step 11.
What are simple ways to personalize or enhance the finished coaster?
Personalize the coaster by choosing two-color rope from step 2 for stripes, glue small beads or sequins between loops before the glue sets in step 9, seal with clear craft varnish, or replace the felt circle in step 12 with patterned fabric for a decorative back.
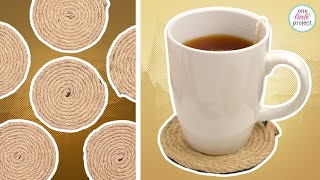
Watch videos on how to make DIY rope coasters
ROPE COASTER TUTORIAL
4 Videos

ROPE COASTER TUTORIAL

How to make coasters with rope and fabric
Jute Coasters | How to Make Easy Twine Coasters
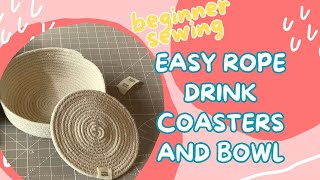
DIY Rope Coasters & Bowl | Easy Sewing Project Using Clothesline & Climbing Rope
Facts about rope and twine crafts for kids
☕ Coasters help protect tables from heat and moisture — a typical coaster is about 10 cm (4 inches) across.
🪢 Coiling rope and twine into mats and coasters is an ancient technique sailors used to make useful items on ships.
🌿 Twine is often made from natural fibers like jute, hemp, or cotton, so many rope coasters are biodegradable.
🌳 Cork comes from the bark of cork oak trees and can be harvested every ~9–12 years without harming the tree.
🔥 Hot glue sticks melt hot (often ~120–200°C), so kids should be supervised and let glued pieces cool before touching.
How do you make DIY coasters using rope?
What materials do I need to make rope coasters?
What ages are rope coaster crafts suitable for?
What are the benefits of making rope coasters and are there safety tips?
