Build 3d game elements in blender
Create three low poly game elements in Blender: a tree, a rock, and a crate, learning basic modeling, coloring, and exporting for games.


Step-by-step guide to create three low-poly game elements in Blender
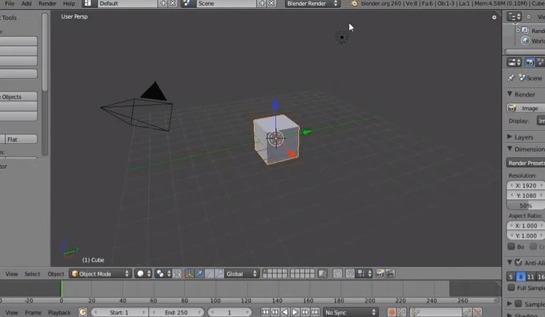
Getting started - Blender for complete beginners
Step 1
Open Blender and start a new General project so you have a fresh scene to build in.
Step 2
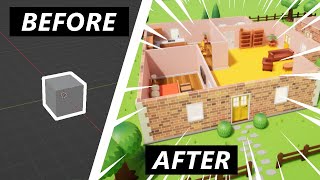
Select the default cube and delete it to clear the scene (press X and confirm).
Step 3
Add a cylinder to make the tree trunk (Shift + A > Mesh > Cylinder).
Step 4
Scale the cylinder to be a short narrow trunk by pressing S then Z then type 0.6 and Enter.
Step 5
Move the trunk up so its base sits on the grid floor by pressing G then Z and dragging it up.
Step 6
Add a cone for the tree foliage (Shift + A > Mesh > Cone).
Step 7
Scale the cone so it looks like treetop by pressing S and making it slightly wider than the trunk.
Step 8
Move the cone up to sit on top of the trunk by pressing G then Z and positioning it.
Step 9
Select the trunk and cone and join them into one object (select both then Ctrl + J).
Step 10
Create simple colors for the tree by opening the Material Properties, making a brown material for the trunk and a green material for the leaves, and assigning them.
Step 11
Make a low-poly rock by adding an Icosphere (Shift + A > Mesh > Icosphere), then go to Edit Mode and use Proportional Editing to grab and move vertices to make a bumpy rock shape.
Step 12
Make a crate by adding a Cube (Shift + A > Mesh > Cube), scale it into a box shape with S, add simple plank lines with Loop Cut if you like (Ctrl + R), and give it a wood-colored material in Material Properties.
Step 13
Select all three game elements and export them for games using File > Export > glTF 2.0 (choose Selected Objects and export as .glb).
Step 14
Share your finished creations on DIY.org so everyone can see your low-poly tree rock and crate!
Help!?
What can we use if the Cone or Icosphere meshes are hard to find in Blender?
If the Cone or Icosphere aren't available, add a UV Sphere and scale it taller for the foliage (Shift+A > Mesh > UV Sphere then S) and use a subdivided Cube (Subdivide in Edit Mode) with Proportional Editing turned on to shape a bumpy rock.
My cone keeps floating off the trunk or the tree parts separate when I move them—what should I check?
Make sure you move the cone up with G then Z until it visually sits on the trunk grid, then select both the trunk and cone and press Ctrl+J to join them into one object so they won't separate when moved.
How can I change this activity to suit different ages?
For younger kids (4–6) simplify by only adding and scaling the Cube, Cylinder, and Cone; for elementary (7–11) keep the steps including Loop Cut (Ctrl+R) for the crate and simple materials; and for older kids (12+) add Proportional Editing in Edit Mode for the rock, more detailed materials in Material Properties, and export to glTF.
How can we extend or personalize the low-poly tree, rock, and crate after finishing the basic steps?
Enhance the scene by adding loop cuts to the crate planks (Ctrl+R), applying an image wood texture in Material Properties for the crate, painting vertex colors on the rock in Edit Mode, and then export the personalized assets as a .glb to share on DIY.org.
Watch videos on how to create low-poly game elements in Blender
Blender 3 - Complete Beginners Guide - Part 1
4 Videos
Blender 3 - Complete Beginners Guide - Part 1
The best course to start learning 3D | BLENDER BASICS 4.5
Blender for Beginners: Learn 3D Modeling & Animation Step by Step!
How to make Game Models (For Beginners) from Start to Finish (blender)
Facts about 3D modeling and game asset creation for kids
🎨 Blender is free and open-source and is used by hobbyists and professional studios to model, animate, and export game assets.
🌲 Low-poly game trees can use as few as 10–30 faces and still read clearly from a distance in gameplay.
📦 A single small texture (like 128×128) can be reused and tiled across a crate to save memory on mobile games.
🪨 Normal maps let a low-poly rock look bumpy and detailed without increasing its polygon count.
📁 glTF is a compact, modern 3D file format designed for fast loading and broad compatibility with game engines.
How do I create three low poly game elements (tree, rock, crate) in Blender?
What materials and tools do I need to build these low poly game elements in Blender?
What ages is this Blender activity suitable for?
What are the benefits of building low poly game elements and any safety tips or variations?
