Write a story for DIY Times
Write and illustrate a short DIY Times story about a simple project, describing materials, step-by-step instructions, and basic safety tips for readers.


Step-by-step guide to write and illustrate a DIY Times story
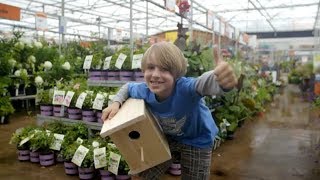
Homemade BIRD HOUSE | Full-Time Kid | PBS Parents
Step 1
Pick one simple DIY project to write about such as a bird feeder paper rocket or friendship bracelet.
Step 2
Gather all the materials for your chosen project and place them neatly on a table.
Step 3
Think of a catchy title and write it big at the top of your page.
Step 4
Write one short sentence that introduces what your project makes and why it is fun.
Step 5
Write a clear materials list for your readers using short words and exact amounts.
Step 6
Write 4 to 8 short numbered steps that someone else can follow to make the project.
Step 7
Write 2 or 3 simple safety tips that readers should follow while making the project.
Step 8
Draw one small illustration for each instruction step next to the matching text.
Step 9
Label each drawing with a short caption or arrow that shows what the picture is doing.
Step 10
Add color and fun decorations to your page to make it look like a magazine.
Step 11
Read your story out loud so you can hear any words that sound odd.
Step 12
Fix any unclear words or pictures so your instructions are easy to understand.
Step 13
Ask an adult to check your safety tips and help if you need a photo or scan.
Step 14
Share your finished DIY Times story on DIY.org
Help!?
What can we use instead of hard-to-find materials listed in the materials list (for example embroidery floss, wooden dowel, or craft glue)?
If you don't have embroidery floss, a wooden dowel, or craft glue from your materials list, substitute thin yarn or dental floss for string, a pencil for a dowel, and school glue or a glue stick for craft glue, and write the exact amounts so the 4–8 numbered steps still work.
My reader can't follow a step or the drawings don't match the text—how can I fix that?
Follow the instruction to 'Read your story out loud,' then rewrite the unclear numbered step using shorter words, redraw the matching illustration with an arrow or short caption next to the step, and have an adult check the safety tips and clarity.
How can I adapt the project for younger children or older kids?
For younger kids, simplify to 4 short numbered steps, use pre-cut materials and bigger illustrations and an adult helper as noted in 'Ask an adult,' while older kids can add exact measurements to the materials list, 6–8 detailed steps, and more advanced decorations.
What are some ways to enhance or personalize our finished DIY Times story?
Enhance your DIY Times story by adding photos or scanned step images as suggested, creating a colorful magazine-style title and decorations at the top, and including one extra safety tip or a creative challenge for readers to try.
Watch videos on how to write and illustrate a DIY Times story
Kids Carpentry: Build a simple Birdhouse
4 Videos
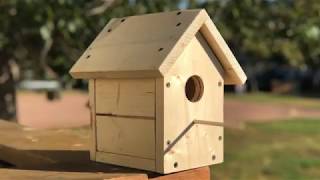
Kids Carpentry: Build a simple Birdhouse
How to Build a Birdhouse | Mitre 10 Easy As for Kids DIY
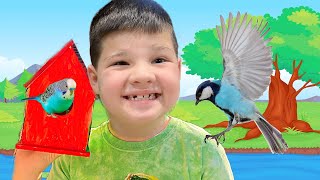
DIY BIRDHOUSE! Kids Crafting with Caleb and Mom! Learn Colors with Caleb! Family DIY Fun
$3 DIY Birdhouse! - Simple, Easy & Affordable
Facts about children's creative writing and DIY projects
🛠️ DIY stands for "do it yourself" and covers projects from tiny crafts to big home improvements.
✍️ Great stories often start with a short, catchy hook that makes readers want to keep reading.
🎨 Simple illustrations can help readers follow steps faster — pictures + words make a perfect team!
♻️ Many fun craft supplies are recycled household items like cardboard, jars, and paper rolls.
🦺 Wearing goggles and asking an adult for help with hot glue or sharp tools prevents most craft accidents.
How do I help my child write and illustrate a short DIY Times story about a simple project?
What materials are needed to create a DIY Times story with illustrations?
What ages is this DIY Times story activity suitable for?
What are the benefits of having my child write and illustrate a DIY Times story?
