Write a Calligram
Create a calligram by arranging words into a matching picture using pencils and colored markers, practicing handwriting, layout, and visual storytelling skills.


Step-by-step guide to write a calligram
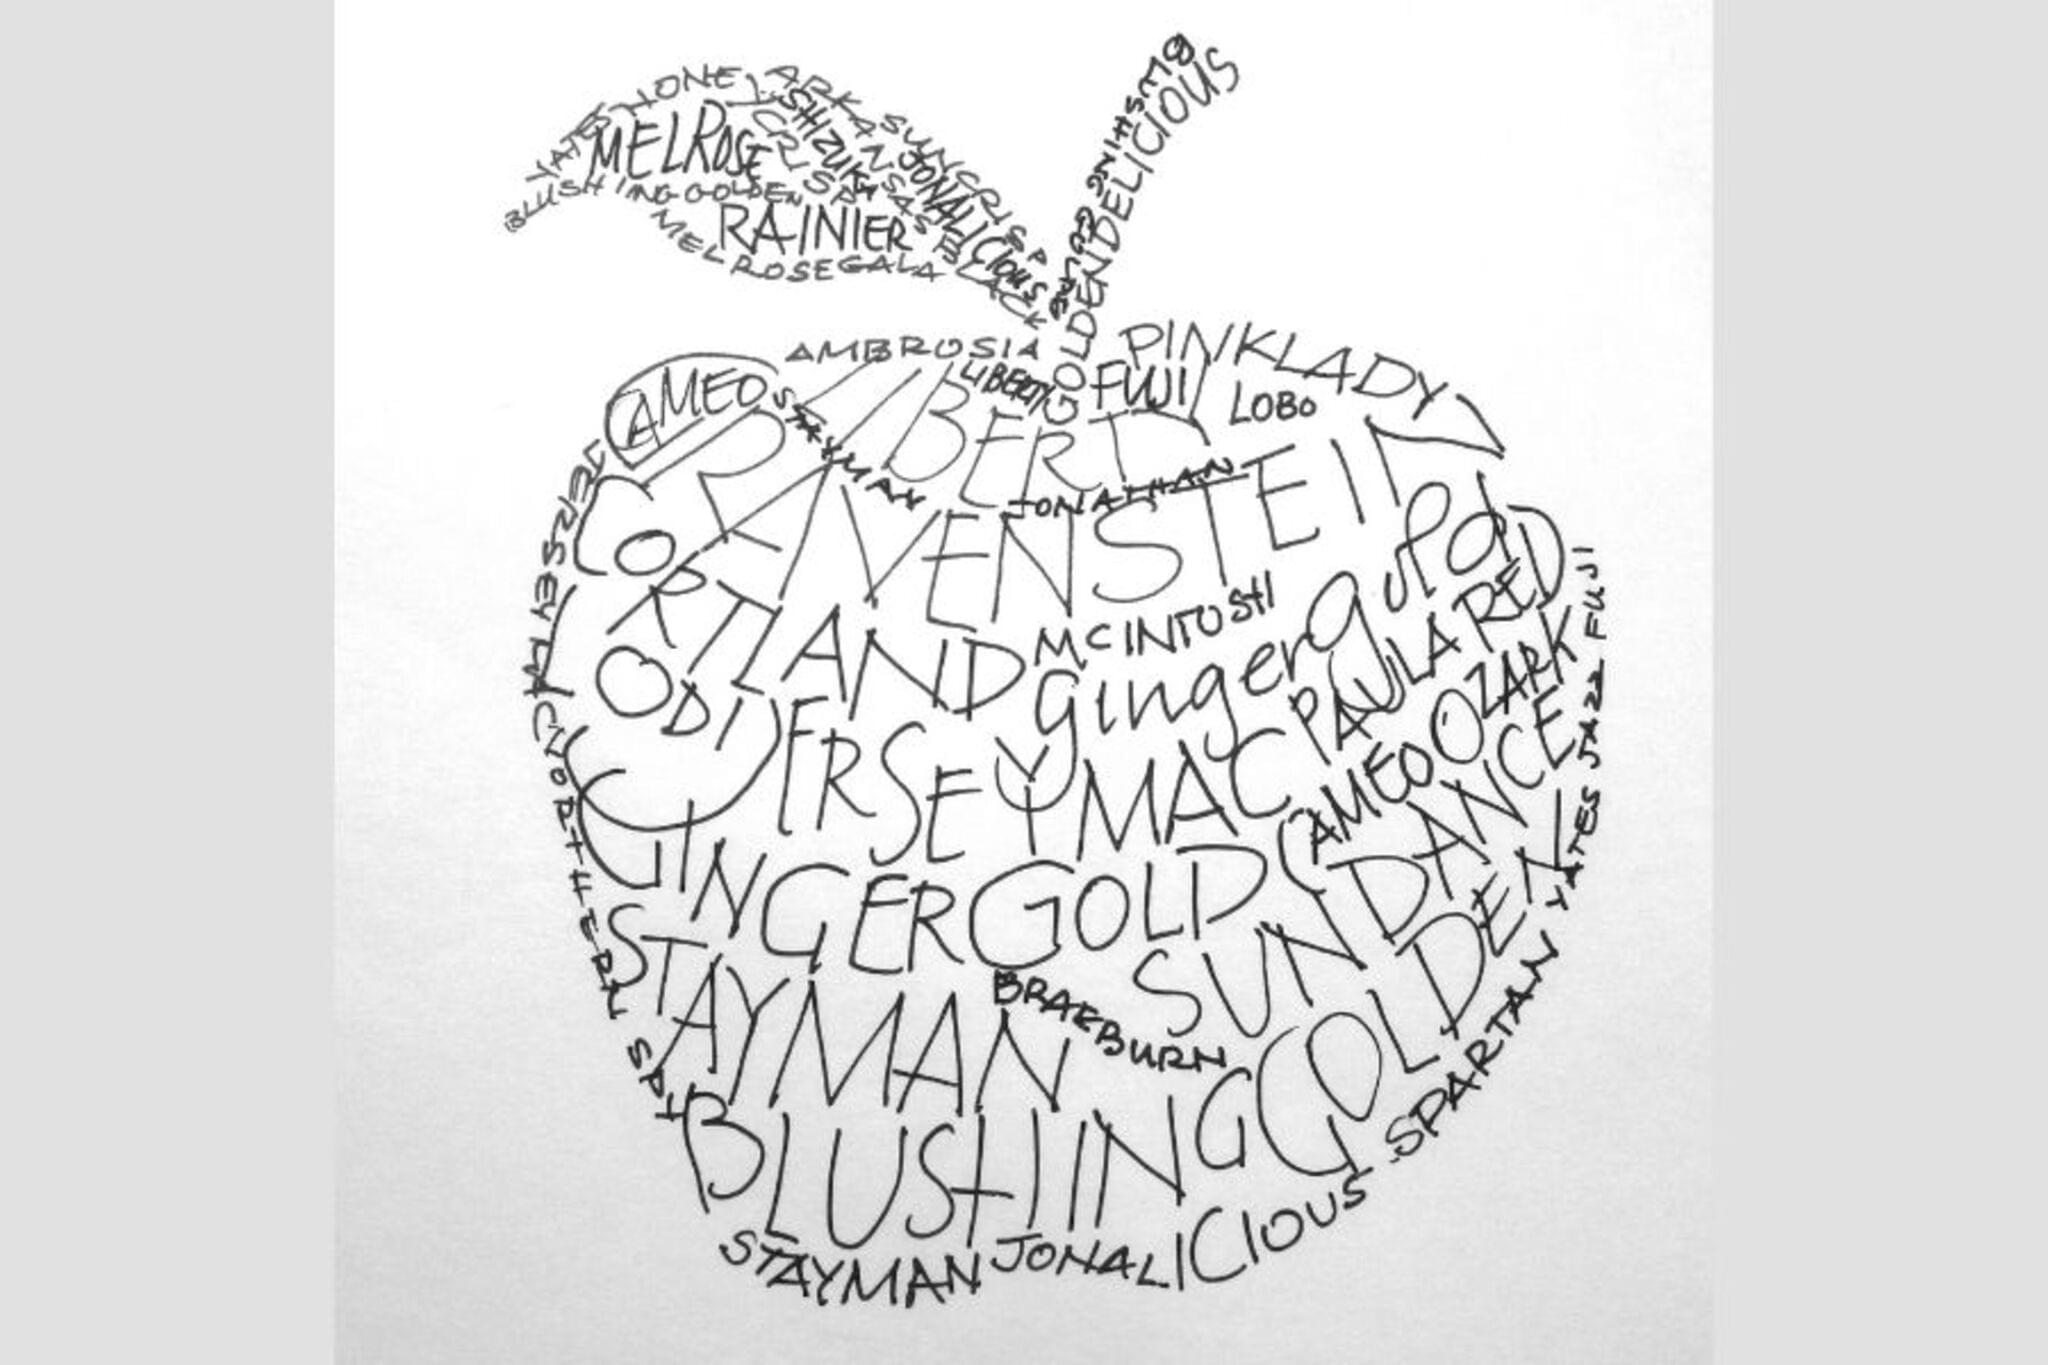
Calligrams
Step 1
Pick a fun subject for your calligram like a cat tree rocket or flower.
Step 2
Write a list of words and short phrases that describe your subject or tell its story.
Step 3
Lightly draw the outline of your chosen shape on the paper with your pencil.
Step 4
Choose one main word that will be the biggest part of the picture.
Step 5
Lightly write the main word inside the outline so it follows the shape.
Step 6
Fill the rest of the shape by writing your other words to curve or stack along the outline.
Step 7
Rearrange or erase any words that look too crowded so the shape reads clearly.
Step 8
Use the ruler for any straight word lines you want to keep neat.
Step 9
Trace over each pencil word with colored markers to make them bold and bright.
Step 10
Gently erase any leftover pencil lines that you don’t want to see.
Step 11
Add small drawings or color decorations around the words to make your picture pop.
Step 12
Write a title at the top of your page.
Step 13
Sign your name at the bottom of your artwork.
Step 14
Share your finished calligram on DIY.org.
Help!?
What can we use instead of colored markers or a ruler if they’re not available?
If you don't have colored markers, use colored pencils, crayons, or gel pens to 'Trace over each pencil word with colored markers', and replace the ruler in 'Use the ruler for any straight word lines' with a straight book edge or piece of cardboard.
My words look crowded or the shape is hard to read—what should I do?
Follow 'Rearrange or erase any words that look too crowded' by lightly erasing and rewriting words smaller, angling them to follow the outline from 'Lightly draw the outline', and use the ruler from 'Use the ruler for any straight word lines' to keep nearby lines neat.
How can I adapt this calligram activity for younger kids or older children?
For younger children, pre-draw the outline from 'Lightly draw the outline' and have them fill one main word from 'Choose one main word' or use stickers, while older kids can write longer phrases from 'Write a list of words and short phrases', experiment with lettering styles, and add detailed decorations in 'Add small drawings or color decorations'.
How can we extend or personalize the finished calligram before sharing it on DIY.org?
Turn your word list in 'Write a list of words and short phrases' into a color-coded legend, add mixed-media accents when you 'Trace over each pencil word with colored markers' and 'Add small drawings or color decorations', then 'Sign your name' and 'Share your finished calligram on DIY.org'.
Watch videos on how to write a calligram
Creating Calligrams
4 Videos
Creating Calligrams
Calligram Art For Beginners | Calligram Drawing | Calligram Art Tutorial | Calligram Art For Learner
Easy Tutorial for the Calligram Creator Procreate Toolkit! + FREE Mini Toolkit
How to Draw a Calligram
Facts about visual poetry and lettering
🖼️ Calligrams arrange words into pictures—Guillaume Apollinaire's 1918 book "Calligrammes" helped make the form famous.
✍️ Handwriting activates motor areas of the brain differently than typing, which can help memory and learning.
🎨 Concrete poetry (a close cousin of calligrams) treats the poem's shape as part of its meaning.
🖍️ Using different colors, pen strokes, and sizes in a calligram guides the reader's eye and adds emotion to the image.
🧩 Creating a calligram blends language and visual-spatial skills—it's like solving an art-and-word puzzle!
How do you make a calligram with your child?
What materials do I need to make a calligram?
What ages is making calligrams suitable for?
What are the benefits of making calligrams and fun variations?
