Why Be a Kid Entrepreneur
Create and test a simple kid business plan, design a small product or service, set prices, and learn earning, saving, and giving responsibly.


Step-by-step guide to Why Be a Kid Entrepreneur
Step 1
Think of one simple product or service you could make or do for other people today.
Step 2
Pick a short fun name for your business and write it at the top of your paper.
Step 3
Draw a quick sketch of your product or write the steps of the service you will offer.
Step 4
Write the materials needed to make one product on your paper.
Step 5
Calculate the total cost to make one item by estimating each material cost and adding them.
Step 6
Choose a selling price that is higher than your cost so you can earn a small profit.
Step 7
Make one prototype of your product or perform the service once as a test.
Step 8
Create a small price tag and a simple sign that shows what your product is and how much it costs.
Step 9
Decide where and when you will show or sell your product to friends or family.
Step 10
Practice one short sentence that tells why someone should buy your product.
Step 11
With an adult's help, show your product to a customer.
Step 12
If the customer buys it, accept the payment with your adult helper.
Step 13
Count the money you earned and write the total amount on your paper.
Step 14
Label three envelopes Save Spend Give and put your money into them using the amounts you choose.
Step 15
Share a photo and a short note about your business and what you learned on DIY.org.
Help!?
What can we use instead of specialty craft supplies, price tags, or envelopes if we don't have them at home?
Use recycled cardboard or cereal-box pieces and markers for your prototype and sign, index cards or folded scrap paper for price tags, and any small folded paper or an old envelope labeled Save/Spend/Give for step 12.
My prototype fell apart during the test—what should I do?
If your prototype breaks during the test in step 6, simplify the design, pick sturdier materials listed in your 'materials needed', and test again before showing customers.
How can I change this activity for younger or older kids?
For younger kids, focus on choosing a fun name, drawing the product, role-playing the sale with an adult helper for counting and envelopes (steps 2–4 and 11–12), while older kids should calculate exact costs, set a profit margin, make multiple prototypes, and write a polished DIY.org post (steps 5–6 and 13).
How can we make the mini-business project more exciting or personal?
Personalize it by designing a simple logo and colorful sign (steps 2 and 7), offering small custom options during your prototype in step 6, and keeping a short sales-and-feedback note to improve before posting on DIY.org (steps 11–13).
Watch videos on how to be a kid entrepreneur
Teach kids entrepreneurship today for their success tomorrow | Brian Weisfeld | TEDxLAHS
4 Videos

Teach kids entrepreneurship today for their success tomorrow | Brian Weisfeld | TEDxLAHS
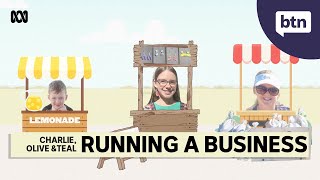
Kids Running Their Own Business - Behind the News

What is an Entrepreneur? For Kids!
KID ENTREPRENEUR TIPS | How To Start A Business As A Kid
Facts about entrepreneurship and financial literacy for kids
🚀 Many famous entrepreneurs started young — Moziah Bridges launched Mo's Bows at age 9!
🍋 Lemonade stands are a classic kid business that teach pricing, costs, and customer service in one sunny afternoon.
💰 Small savings add up fast — putting aside just a few dollars each week can turn into hundreds over a year.
🧾 A simple one-page business plan (what you sell, who buys it, how much it costs, and your price) is often enough to test an idea.
🤝 Sharing a portion of profits with a cause teaches responsibility and makes customers feel great about supporting your business.
How do I run the "Why Be a Kid Entrepreneur" activity with my child?
What materials are needed for the "Why Be a Kid Entrepreneur" activity?
What ages is "Why Be a Kid Entrepreneur" suitable for?
What are the benefits of doing "Why Be a Kid Entrepreneur" with my child?
