Use yarn, string or wool
Make a colorful friendship bracelet using yarn, string, or wool by learning basic knots and patterns; decorate wrists and practice fine motor skills.


Step-by-step guide to make a colorful friendship bracelet with yarn, string, or wool
Super Easy Pom Pom Heart Making with Fork - Amazing Craft Ideas with Wool - How to Make Yarn Heart
Step 1
Pick three bright colors of yarn and cut three equal strands about 60 to 70 cm long.
Step 2
Tie the three strands together with a tight overhand knot about 5 cm from one end.
Step 3
Wrap the knotted end around your wrist to check how long you want the bracelet to be.
Step 4
Secure the knotted end to a table or pillow using tape or a safety pin so the strands stay still.
Step 5
Spread the three strands out flat so they do not tangle.
Step 6
Cross the right strand over the middle strand once.
Step 7
Cross the left strand over the new middle strand once.
Step 8
Repeat the two crossing moves (right over middle then left over middle) until the braid reaches the length you checked on your wrist.
Step 9
Tie a tight overhand knot at the end of the braid to keep it from unravelling.
Step 10
Trim excess yarn but leave a 3 to 4 cm tail so you can tie the bracelet on.
Step 11
Put the bracelet on and tie a snug bow or knot to wear it.
Step 12
Share a photo of your finished friendship bracelet on DIY.org and tell everyone which colors you used.
Help!?
What can we use if we don't have yarn or a safety pin to secure the bracelet?
If you don't have yarn you can use embroidery floss, thin ribbon, or a shoelace, and instead of tape or a safety pin to secure the knotted end you can use a clothespin, paperclip, or a heavy book on the table.
My strands keep tangling or the braid twists—what should I do?
Re-secure the knotted end with tape or a clothespin, spread the three strands out flat before you start (step 5), and smooth or re-arrange the strands every few crossings so the right-over-middle and left-over-middle moves (steps 6–7) stay separate.
How can I change the activity for younger or older kids?
For younger children use thicker yarn cut to about 40 cm and have an adult tie the starting knot and secure it with tape (step 4), while older kids can try six strands or add beads before tying the final overhand knot (step 9) for a more advanced bracelet.
How can we personalize or extend the friendship bracelet project?
Try using more than three strands or adding small beads onto a strand before repeating the cross moves (steps 6–8) to make patterned or beaded bracelets, then trim leaving the 3–4 cm tail (step 10) and share a photo on DIY.org.
Watch videos on how to make a colorful friendship bracelet with yarn, string, or wool
Amazing Woolen Flower Craft Idea using Finger - Easy Woolen Flower Making
4 Videos
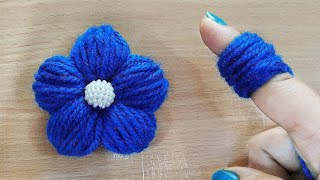
Amazing Woolen Flower Craft Idea using Finger - Easy Woolen Flower Making
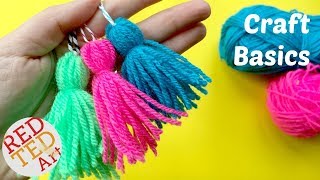
How to make a Tassel - Quick & Easy Yarn Tassel DIY - CRAFT BASICS

DIY YARN ART | Make Your Own Fun Mini Canvases with Yarn or String | Fun Craft Idea
Easy craft: How to make a yarn doll
Facts about fiber crafts and basic knotting for kids
🧶 Friendship bracelets became especially popular worldwide in the 1970s and are usually made with embroidery floss or yarn.
🤝 A common tradition says you tie a friendship bracelet on someone’s wrist, make a wish, and when it naturally falls off the wish comes true.
✋ Practicing knotting and braiding for just a few minutes helps build fine motor skills, finger dexterity, and hand-eye coordination.
🎨 The chevron pattern is made by mirroring knot sequences across the center and works best with matching pairs of colored strands.
⏱️ A simple 4-strand or basic knotted bracelet can often be completed in 15–30 minutes — great for quick craft sessions.
How do I make a colorful friendship bracelet with yarn, string, or wool?
What materials do I need to make friendship bracelets using yarn, string, or wool?
What ages are friendship bracelets suitable for and how much supervision is needed?
What are the benefits of making friendship bracelets and what safety tips should parents know?
