Upgrade Your Mug - Fav to Fab
Decorate a plain mug using ceramic markers, acrylic paint, stickers, and simple embellishments to safely create a personalized favorite-to-fab cup.


Step-by-step guide to Upgrade Your Mug - Fav to Fab
Painting On Mugs With Acrylic Paint | Decorate Mugs and Pots | DIY Customized Mug For Kids
Step 1
Wash the mug with soap and water and dry it completely with a paper towel.
Step 2
Draw your favorite-to-fab design on a scrap of paper so you know what to make.
Step 3
Use masking tape to mark off any areas you want to stay white or make straight edges.
Step 4
Lightly sketch your design onto the mug with a pencil.
Step 5
Trace the sketch with ceramic markers to make bold outlines.
Step 6
Paint in colors using acrylic paint and a paintbrush for solid fills or fun patterns.
Step 7
Let the paint and marker work dry completely for at least one hour.
Step 8
Attach stickers and glue on small embellishments using craft glue and press them gently to secure.
Step 9
Ask an adult to bake the mug in a cool oven set to 350°F for 30 minutes then let the mug cool completely inside the oven before handling.
Step 10
Share a photo and a short description of your finished favorite-to-fab mug on DIY.org.
Help!?
What can I use if I don't have ceramic markers or acrylic paint?
If ceramic markers are unavailable, use oil-based porcelain or enamel paint pens (or enamel craft paint made for ceramics in place of acrylics) and follow the same drying and adult-supervised oven baking step to set the design.
My paint or marker lines keep smudging—how do I fix that?
To prevent smudging, follow the instruction to let the paint and marker work dry completely for at least one hour (or longer between thin layers), dry with a cool hair dryer if needed, and only attach stickers or glue embellishments after the paint is fully dry before baking.
How can I adapt this activity for different ages?
For younger kids, skip the oven step and use washable, non-toxic paints and lots of stickers while an adult handles any baking and sharp tools, and for older kids let them use masking tape for straight edges, fine ceramic markers for detail, and supervise the 350°F oven-bake to set their work.
How can we extend or personalize the finished mug beyond the basic steps?
Enhance the mug by using masking-tape stencils for crisp shapes, adding names or dates with metallic ceramic markers, carefully gluing small heat-safe embellishments to the handle, and then photographing the baked finished mug to share on DIY.org with a short description.
Watch videos on how to Upgrade Your Mug - Fav to Fab
Easy Handprint Mug Craft for kids | Gift Ideas | DIY Arts and Imagination | Miss Jessica's World
3 Videos
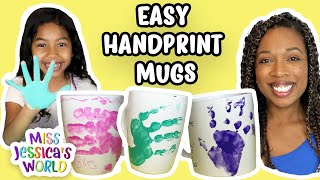
Easy Handprint Mug Craft for kids | Gift Ideas | DIY Arts and Imagination | Miss Jessica's World
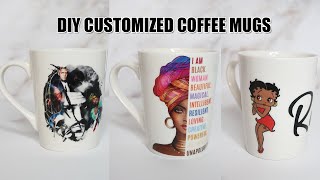
How to make Customized Mugs | DIY MUGS (easy)
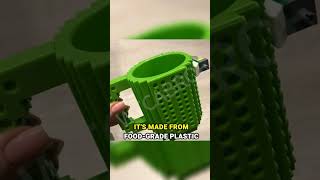
Sip, Build & Play! 🧱✨ The Coolest Custom Kids Travel Mug Ever! 🚀🥤
Facts about mug decorating and ceramic painting for kids
🎨 Many ceramic markers and special mug paints become more permanent after baking in a home oven—always follow the maker's instructions for temperature and time.
☕ The word “mug” has been used since the 17th century and mugs have been popular everyday vessels for hundreds of years.
🧪 Acrylic paint was developed in the 20th century and dries quickly, which makes it perfect for fast, kid-friendly decorating sessions.
🖼️ Decoupage—decorating with paper cutouts and stickers—was used in 17th-century Europe to spruce up furniture and boxes.
♻️ Turning a plain mug into a favorite-to-fab cup is a fun form of upcycling: it gives new life to something you already own and reduces waste.
How do you upgrade a plain mug for the 'Fav to Fab' activity?
What materials do I need to decorate a mug safely?
What ages is the 'Upgrade Your Mug - Fav to Fab' activity suitable for?
What safety tips should parents follow when decorating mugs?
