Upgrade a T-shirt: Basic to Boho!
Transform a plain T-shirt into a boho style top using safe cutting, tying, fabric paint, and bead embellishments while learning design, patterns, and simple sewing.


Step-by-step guide to Upgrade a T-shirt: Basic to Boho!
Step 1
Lay the T-shirt flat on a clean table and smooth out any wrinkles so you have a neat work surface.
Step 2
Use the ruler and washable marker to draw a curved boho neckline on the front about 2 to 3 inches down from the collar.
Step 3
Use the ruler and marker to draw vertical lines for fringe across the bottom hem spaced about 1 inch apart and stopping about 4 inches up.
Step 4
Cut along the marked neckline carefully with fabric scissors to create the new boho neckline.
Step 5
Cut along each marked vertical line to make the fringe strips across the bottom hem.
Step 6
Pick three adjacent fringe strips and braid them together by crossing the outer strips over the middle strip until the braid reaches the ends.
Step 7
Tie a tight knot at the end of each braid to secure it and create a tassel.
Step 8
Use fabric paint and your brush or sponge to paint simple boho patterns like dots lines or small flowers around the neckline and on some fringe pieces.
Step 9
Thread the needle with embroidery thread and tie a knot at the end of the thread before you start sewing.
Step 10
Sew small beads onto the ends of each braid or along the neckline by pushing the needle through the fabric adding a bead and tying a knot to secure each bead.
Step 11
Dab a tiny bit of fabric glue where you want extra bead security and let any glued areas set slightly before finishing.
Step 12
Let the paint and glue dry completely flat for the time recommended on the paint bottle and then trim any loose threads with scissors.
Step 13
Share a photo of your finished boho T-shirt creation on DIY.org
Help!?
What can I use if I don't have some of the materials listed, like a washable marker, embroidery thread, or beads?
If you don't have a washable marker, embroidery thread, or beads, substitute tailor's chalk or a fabric pencil for marking, thin yarn for thread when braiding or sewing, and buttons or sequins in place of beads.
My neckline or fringe looked uneven or a braid kept unravelling—what should I try to fix that?
If the curved neckline or 1-inch fringe lines are uneven or a braid unravels, re-measure the 2–3 inch neckline with your ruler before cutting, cut slowly with fabric scissors, tie a tight knot at each braid end, and add a tiny dab of fabric glue for extra security while letting the shirt dry flat.
How can I adapt this Upgrade a T‑shirt activity for different ages?
For younger kids have an adult pre-cut the neckline and fringe and let them paint and braid thicker pre-cut strips, while older kids can use the needle and embroidery thread to sew beads and create more detailed painted boho patterns.
What are some ways to enhance or personalize my boho T‑shirt after finishing the basic steps?
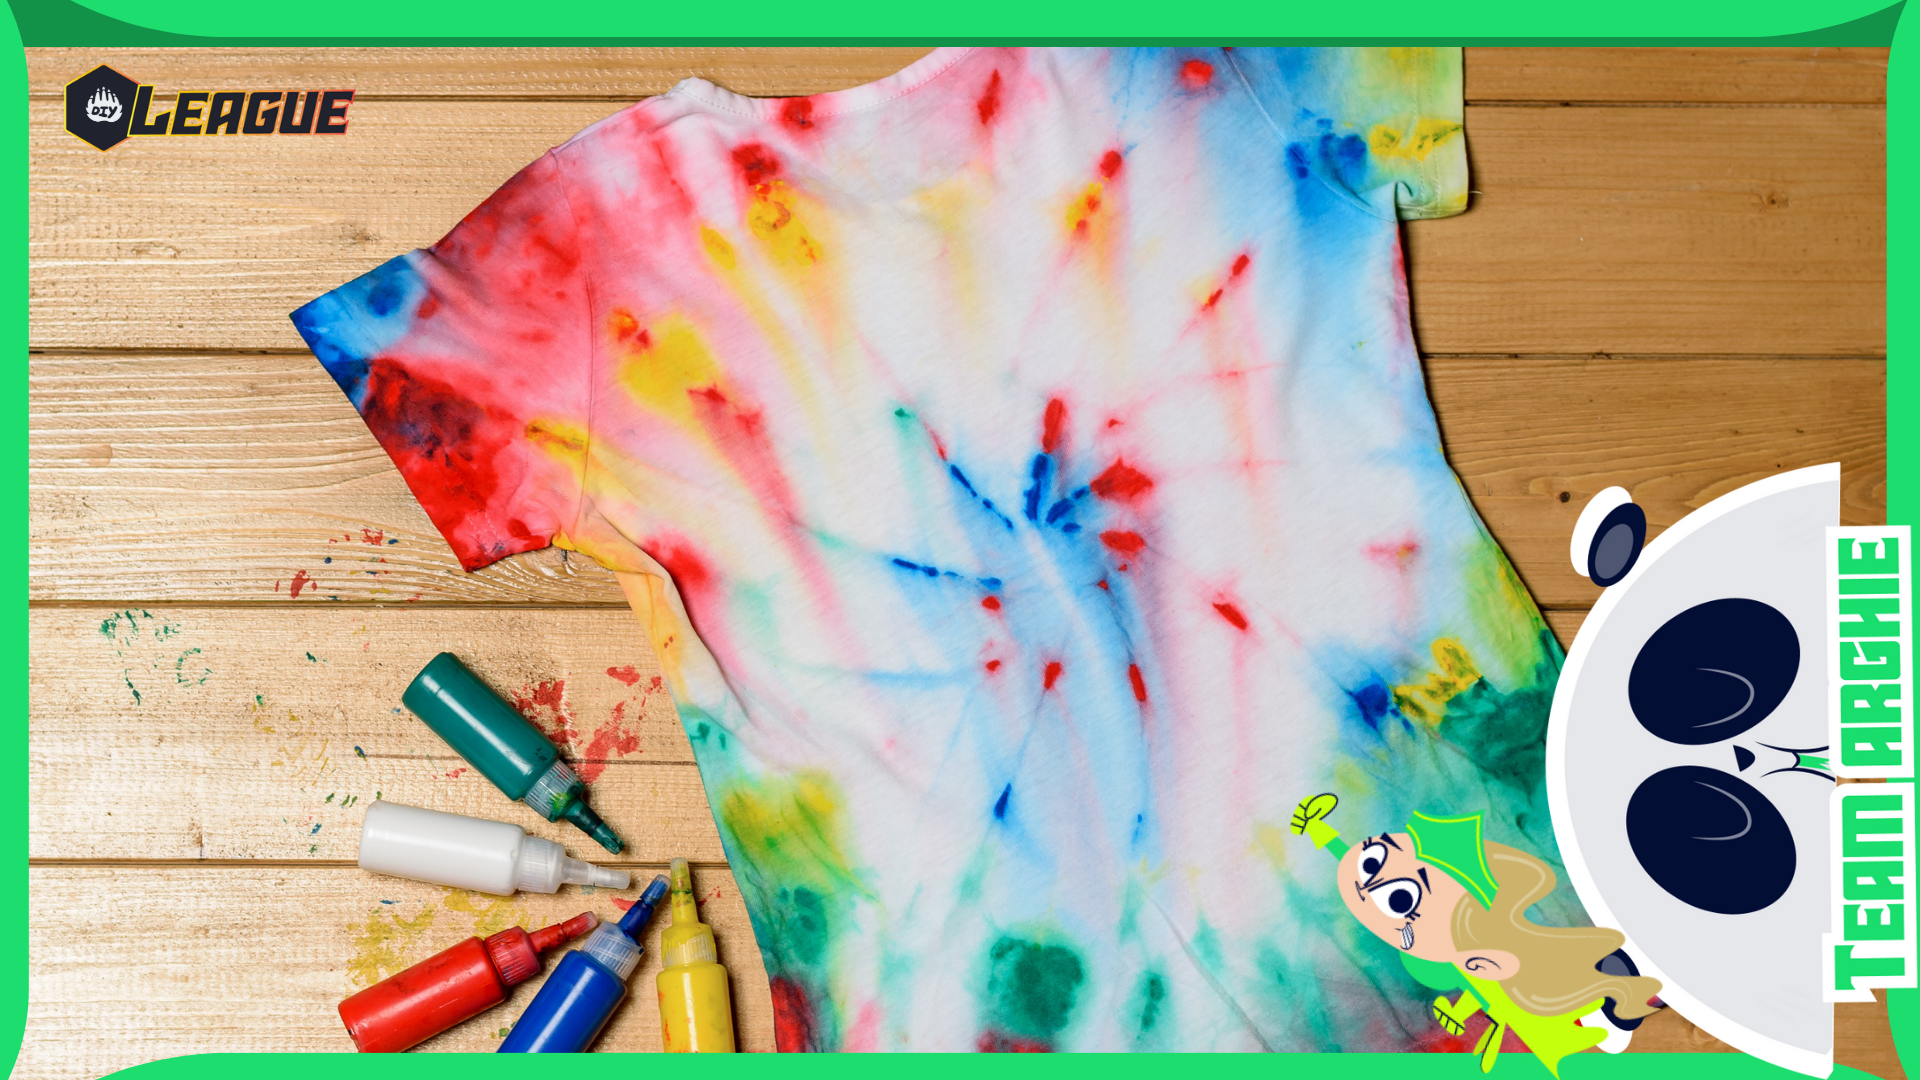
To enhance the finished T‑shirt, try tie-dyeing or tea-staining the fabric before cutting, braid groups of different-width fringe for texture, stitch initials with embroidery thread along the neckline, or add metallic fabric paint and extra beads on the fringe and neckline.
Watch videos on how to Upgrade a T-shirt: Basic to Boho!
DIY Boho T shirt Cutting Tutorials with Easy Fringe, Beads, and Macrame
4 Videos
DIY Boho T shirt Cutting Tutorials with Easy Fringe, Beads, and Macrame

4 Easy Ways to Make the BOHO Flower T-Shirt Design
Easy Boho T shirt upcycle (plus 2 easy sewing projects)
How to Upcycle an old T-Shirt into fabulous Wearable Art
Facts about clothing upcycling for kids
🌼 Boho style mixes 19th-century bohemian art vibes with 1960s hippie fashion—perfect for flowy, handmade looks.
👕 The T-shirt started as an undergarment in the 19th century and became a global everyday staple by the mid-1900s.
🎨 Fabric paint bonds to fibers and can be heat-set so your painted designs stay through washing (adult help with the iron!).
🪢 Macramé is all about knots—simple ones like square knots and lark's head make gorgeous fringe and straps without complicated sewing.
🌟 Beads have decorated clothes for thousands of years—lightweight wooden or plastic beads are great for kid-safe embellishments that add color and movement.
How do I transform a plain T-shirt into a boho-style top step by step?
What materials do I need to upgrade a T-shirt from basic to boho?
What ages is this boho T-shirt craft suitable for and how much supervision is needed?
What safety tips should I follow when making a boho T-shirt with my child?
