Upcycle Your Denim!
Turn old denim into a personalized tote bag or pencil pouch using cutting, sewing or fabric glue; learn measuring, decorating, and simple mending skills.


Step-by-step guide to upcycle your denim
Step 1
Gather all your materials and bring them to a clear workspace.
Step 2
Decide whether you will make a tote bag or a pencil pouch and choose the denim area you will use.
Step 3
Use your ruler to measure the finished size you want and add 1 cm on all sides for seam allowance.
Step 4
Mark the cutting lines on the denim with fabric chalk or pencil.
Step 5
Cut the denim carefully along your marked lines.
Step 6
Fold each raw edge under 1 cm to make a neat seam allowance.
Step 7
Secure the folded edges with pins or binder clips.
Step 8
Choose whether you will sew the pieces together with needle and thread or join them with fabric glue.
Step 9
If you chose to sew thread your needle and tie a knot at the end of the thread.
Step 10
Sew the pinned edges using a running stitch about 1 cm from the folded edge and finish with a backstitch to secure the ends.
Step 11
If you chose fabric glue apply a thin line of glue to the folded edges press the pieces together and let dry following the glue instructions.
Step 12
Cut two straps from leftover denim for a tote or cut a small flap for a pouch and attach them by sewing or gluing to the top edge.
Step 13
Decorate your tote or pouch with fabric markers patches and buttons to personalize it.
Step 14
Share a photo and a short description of your finished creation on DIY.org.
Final steps
You're almost there! Complete all the steps, bring your creation to life, post it, and conquer the challenge!

Help!?
What can I use if I don't have fabric chalk, pins, or fabric glue?
Use a washable marker or regular pencil to mark the cutting lines, swap binder clips for clothespins or safety pins to secure the folded 1 cm seam allowance, and substitute strong craft or school glue labeled for fabric if you can't find fabric glue.
My seams are coming undone or my stitches are uneven—how can I fix that?
Make sure you added the 1 cm seam allowance before cutting, tie a knot at the end of your thread, keep your running stitches about 1 cm from the folded edge, use pins or clips to hold the folds steady, and finish with a backstitch to secure the ends so seams won't come undone.
How can I adapt this upcycling project for different age groups?
For younger kids have an adult pre-measure and pre-cut denim and let them glue straps and decorate with fabric markers, for elementary-age children let them measure, mark, fold and pin with supervision, and for teens challenge them to hand-sew the running stitch and backstitch, add a lining, or make structured tote straps from leftover denim.
What are some ways to enhance or personalize my tote or pencil pouch after finishing the basic steps?
Sew or glue in a cotton lining for a neater interior, topstitch the top edge and straps for strength and a finished look, add embroidery or denim patchwork from other jeans, and attach a button or snap to the flap before decorating and sharing your finished creation on DIY.org.
Watch videos on how to upcycle your denim
40+ Cool Ways to Upcycle Jeans & Sew Denim Projects!
4 Videos

40+ Cool Ways to Upcycle Jeans & Sew Denim Projects!

50+ Ways to Upcycle Old Jeans into Something New When You're Bored
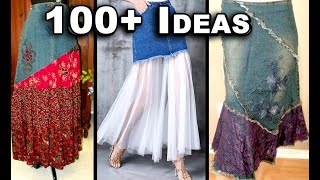
50+ Unique Ways to Upcycle Jeans & Sew Denim Projects
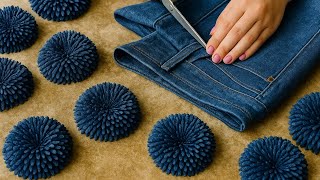
🌹 Turn Old Jeans Into Beautiful Flower | Easy DIY Denim Flower Craft for Kids!
Facts about upcycling and basic sewing for kids
♻️ Making a new pair of jeans can use up to about 1,800 gallons (≈7,000 liters) of water, so upcycling saves a lot of resources.
✂️ Denim is woven in a twill pattern (a diagonal weave), which gives it extra strength — perfect for durable tote bags and pouches.
🧵 Archaeologists have found sewing needles made from bone dating back over 20,000 years — people have been mending clothes for millennia!
👖 The word "denim" comes from the French phrase "serge de Nîmes" — a sturdy fabric originally from Nîmes, France.
🎨 Visible mending, patches, and embroidered decorations turned upcycled denim into a popular fashion trend that celebrates creativity and repair.
How do you upcycle old denim into a tote bag or pencil pouch?
What materials do I need to upcycle denim into a bag?
What ages is upcycling denim suitable for?
What are the benefits of turning old denim into bags?


One subscription, many ways to play and learn.
Only $6.99 after trial. No credit card required