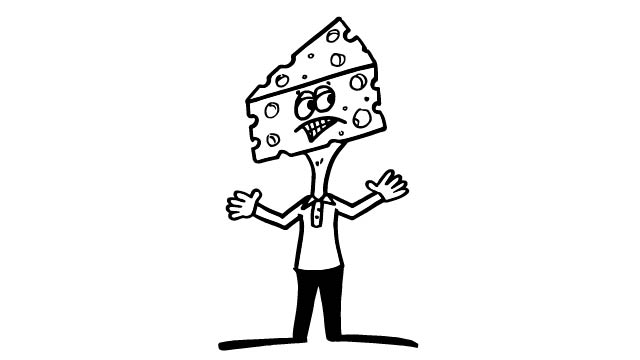
Turn Cheese Into A Cartoon
Design and assemble a cartoon character from cheese slices using food safe markers, toothpicks for limbs, and paper props, then photograph your creation.


Step-by-step guide to Turn Cheese Into A Cartoon
Step 1
Wash your hands and wipe the table clean.
Step 2
Ask an adult to help with scissors and toothpicks for safety.
Step 3
Put a plate on the table to be your character’s stage.
Step 4
Lay one cheese slice flat on the plate as your character base.
Step 5
Use food-safe markers to draw a face and body details on the cheese slice.
Step 6
Cut extra cheese slices into shapes for hair or clothes using scissors.
Step 7
Insert toothpicks into the cheese slice to make arms and legs.
Step 8
Cut small paper shapes to make props like a hat or a tiny sign.
Step 9
Decorate the paper props with markers.
Step 10
Attach the paper props to your cheese character using small pieces of tape or by securing with toothpicks.
Step 11
Arrange your cheese character neatly on the plate for a photo.
Step 12
Take a photo of your cheese cartoon to capture your creation.
Step 13
Share your finished cheese cartoon on DIY.org.
Help!?
What can we use instead of food-safe markers if we can't find any?
If food-safe markers aren't available, draw facial details using edible gel icing pens or carefully paint on food coloring with a clean toothpick as you would in the "Use food-safe markers to draw a face" step.
The toothpicks keep popping out of the cheese — how can we fix that?
If toothpicks keep popping out when you "Insert toothpicks into the cheese slice to make arms and legs," chill the cheese briefly so it's firmer and insert the toothpicks angled toward the center of the slice for a stronger hold.
How should we adapt the activity for younger or older kids?
For preschoolers, have an adult pre-cut the shapes from the "Cut extra cheese slices into shapes for hair or clothes" and the paper props while the child focuses on coloring with markers, and for older kids let them design multiple characters, cut detailed costumes with supervision, and create a photo story.
How can we make the cheese cartoon more unique or turn it into a longer project?
To enhance and personalize, use cookie cutters to shape the cheese base, add edible garnishes like olive eyes or bell pepper hair when you "Cut extra cheese slices," and take a series of photos to make a short stop-motion movie from the "Arrange your cheese character neatly on the plate for a photo" and "Take a photo" steps before sharing on DIY.org.
Watch videos on how to Turn Cheese Into A Cartoon
🧀 Rainbow Cheese Art 🌈 | Fun Emoji Drawing 😁✨ #shorts
4 Videos
🧀 Rainbow Cheese Art 🌈 | Fun Emoji Drawing 😁✨ #shorts
How to draw a Cheese | Piece of Cheese Easy Draw Tutorial

Create Consistent Cartoon Characters Using AI | Dzine AI Tutorial

BEGINNERS GUIDE TO CARTOONING PEOPLE
Facts about food art and edible crafts
🧀 Many cheeses like cheddar and gouda slice cleanly and hold their shape well—perfect for building a cheesy character.
✍️ Edible food markers use food-grade dyes so you can safely draw expressive faces and tiny details on snacks.
🦴 Toothpicks are often made from birch and are surprisingly strong—use a few to make sturdy limbs and joints.
📸 Soft natural light and a simple background make food photos look professional even when taken with a phone.
👀 Humans spot faces instantly—adding two eyes and a mouth makes your cheese creation read as a character right away.
How do I turn cheese into a cartoon character?
What materials do I need to design and assemble a cheese cartoon?
What ages is this cheese cartoon activity suitable for?
What are the benefits, safety tips, and variations for the cheese cartoon project?
